

Before installing our Hyper-V Cluster, we need shared storage on our cluster members. This setup ensures VMs can Live Migrate between nodes without disruption. In this post we’re going to install TrueNAS on a VM and set it up as a iSCSI Server.
TrueNAS (aka FreeNAS) is an open source NAS developed by iXsystems. It was originally implemented on FreeBSD but now they moved to Debian Linux. You can download the latest ISO image of TrueNAS Community Editon from iXsystems web site:
Download TrueNAS Community Edition – Data Storage Software
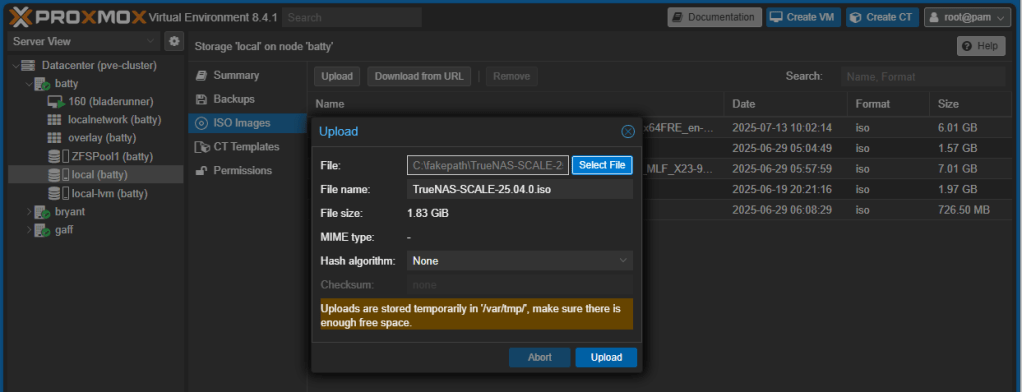
Once you have the ISO, upload it to your Proxmox server, typically in the ISO folder on Local container:
Once the image is uploaded, click Create VM button:
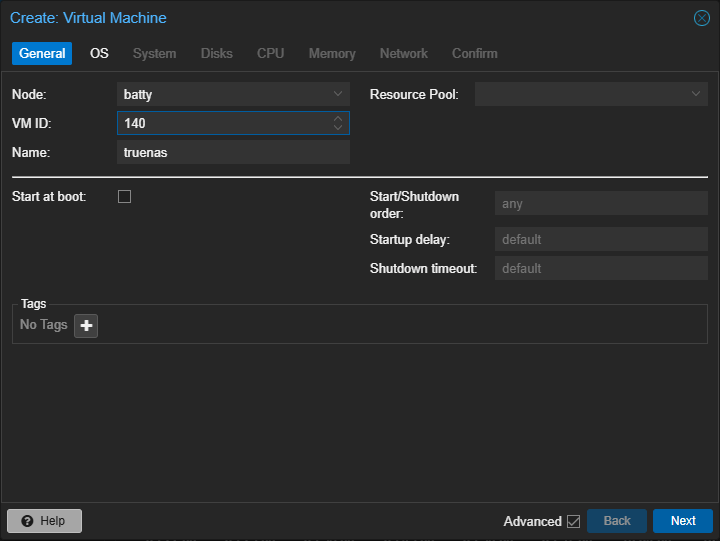
Give the VM a name and a VM ID. Click Next:
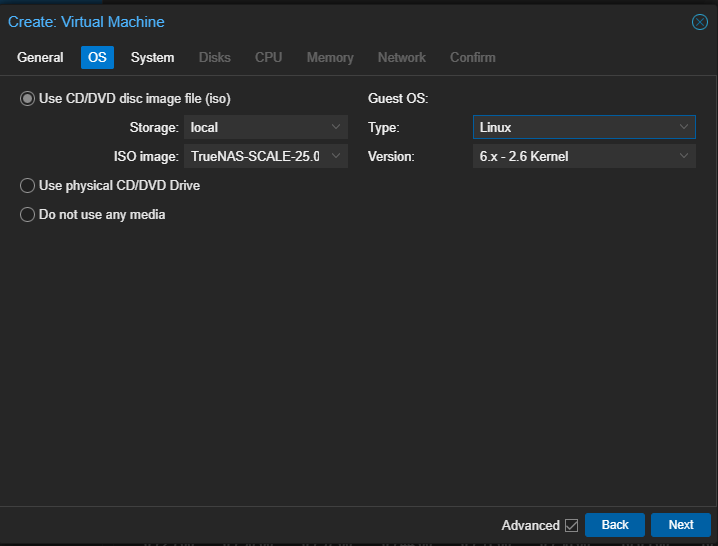
Select the location of your ISO image and Linux 6.x as your Guest OS. Click Next:
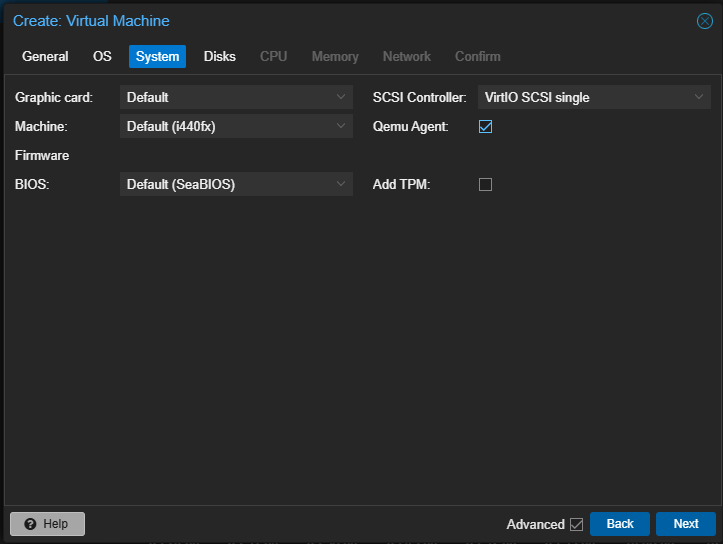
Select Qemu Agent, leave the rest as default. Click Next:
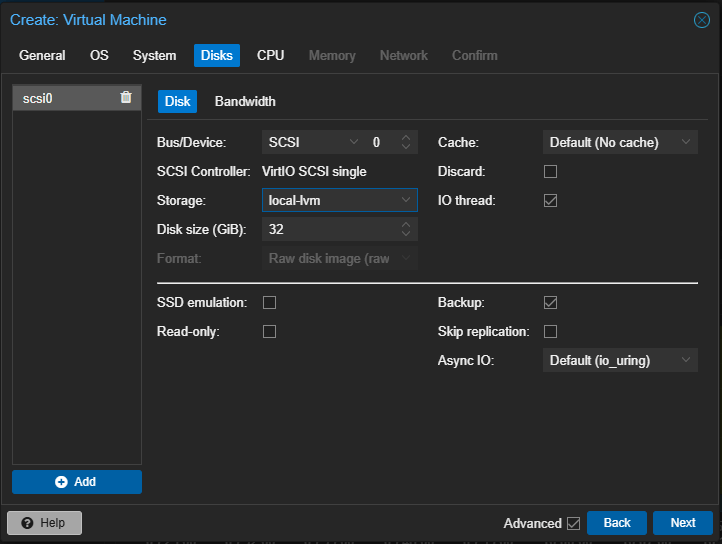
Select the location of your OS Disk. Typically, it will be local-lvm. This is the case if you haven’t configured any other lvm container on your proxmox node. 32Gb is fine, leave the rest as default and click Next:

Choose 2 cores. Click Next:
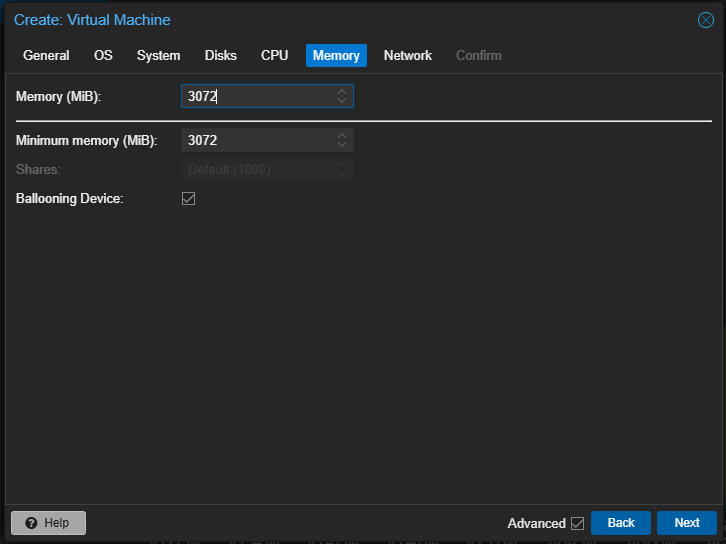
Choose 3GiB of RAM for installation. You need more later if you want to play with more things in TrueNAS. Click Next:

Choose your networks. In my case, I’m using one of my VNets in a VxLAN Zone. Select 1 in the MTU field if you’ve configured VxLAN zones. We want to use the MTU of the VNET, which is 1450. If you’re using regular linux bridges connected to your real networks, leave MTU as default. Click Next:

Review the configuration and click Finish.
Once the VM is created, select it, go to Console and click Start Now. The VM should start booting from ISO image:
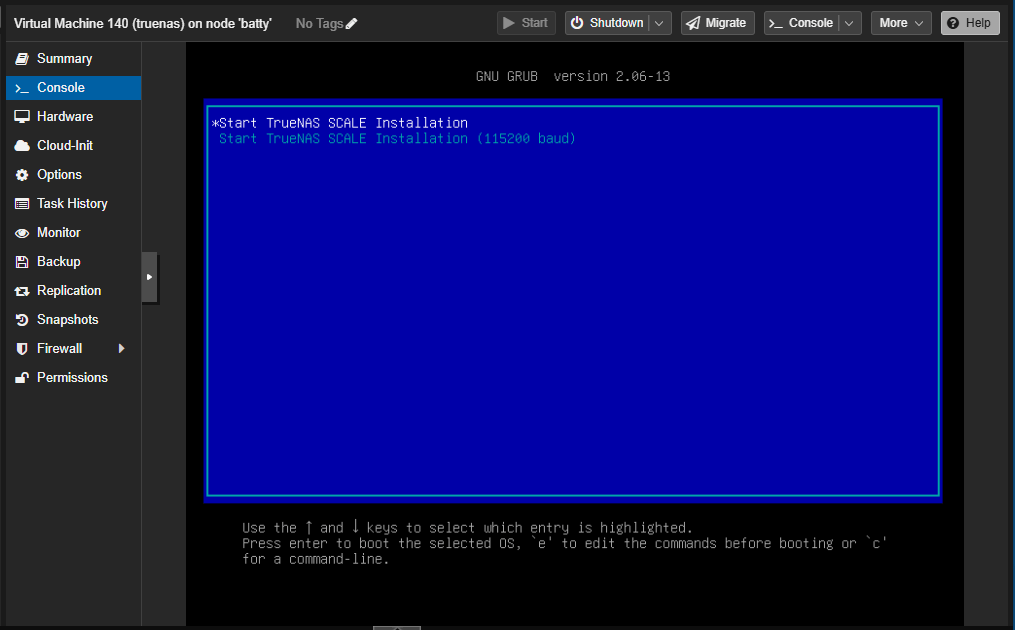
Select TrueNAS Installation.

Select choice 1 Install/Upgrade and OK.

Select your 32GiB QEMU Disk, accept the warning.
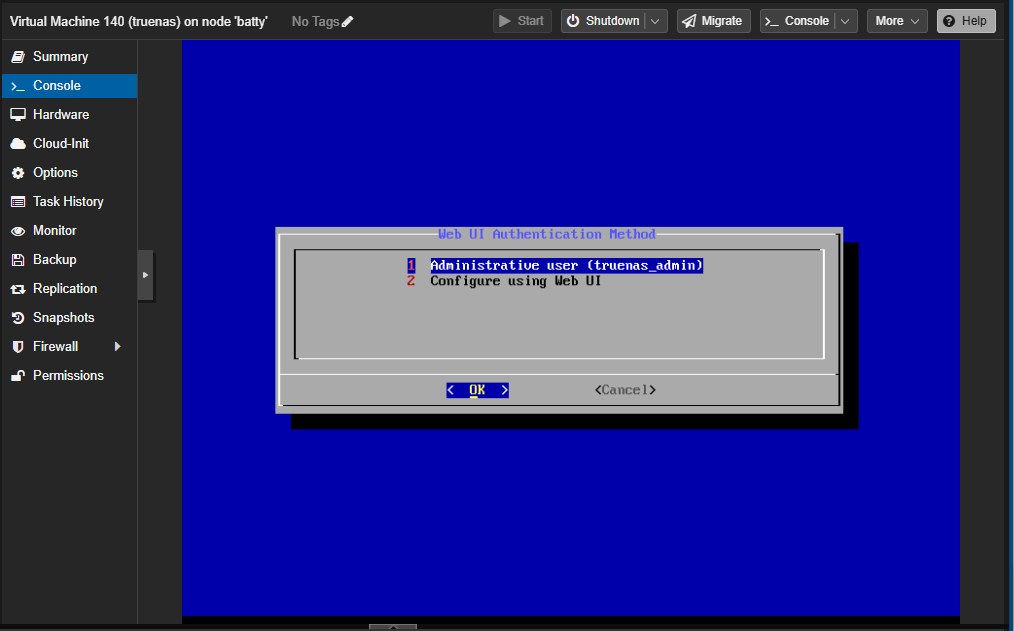
Select choice 1 default Administrative user (truenas_admin), type a password. Click OK:
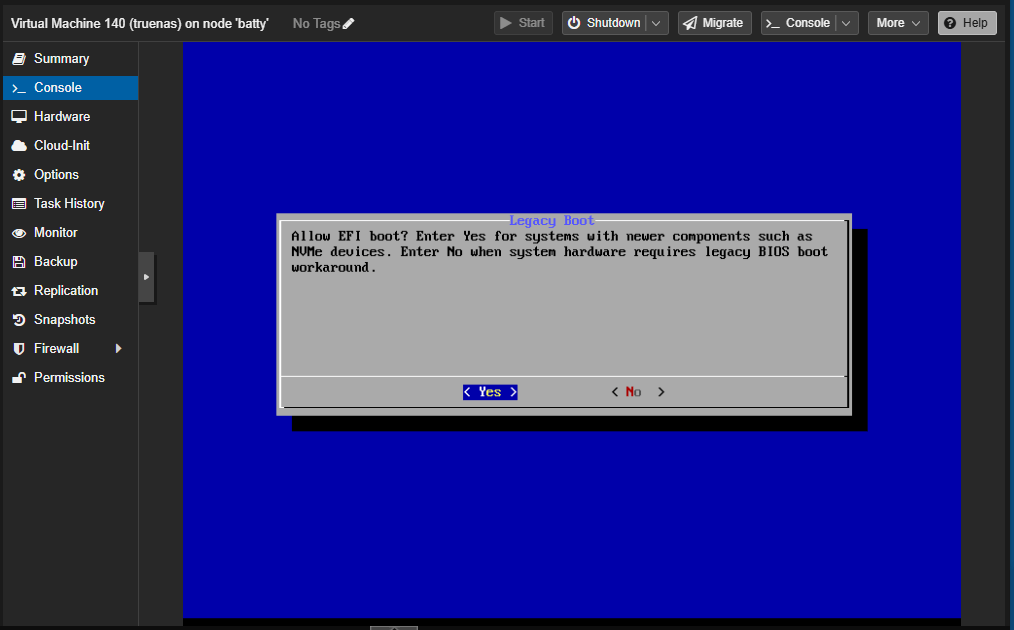
Accept EFI boot. The installation will extract the image and install it, it can take a while.
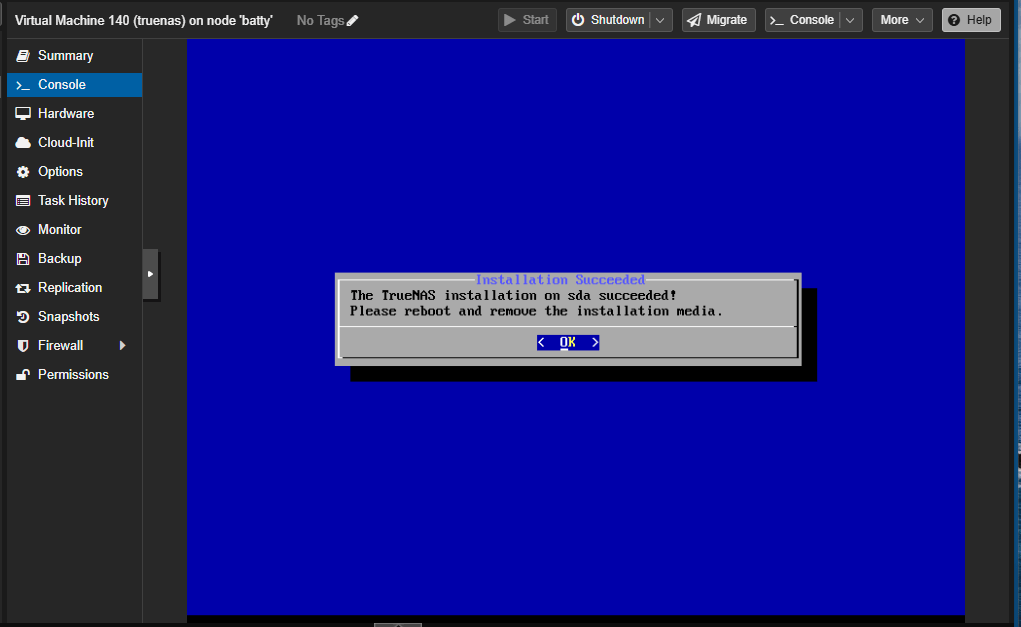
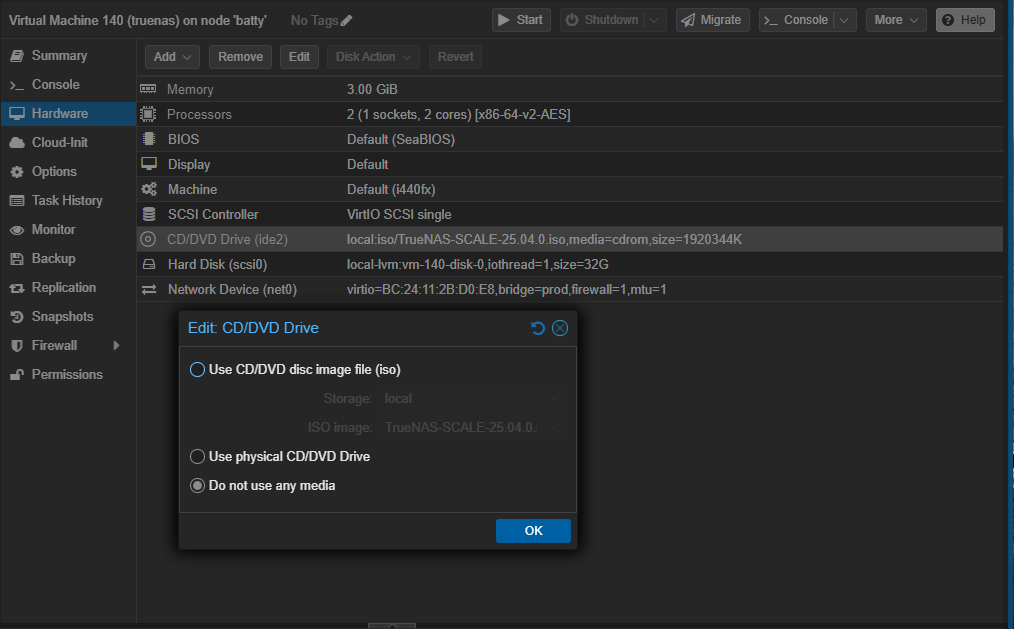
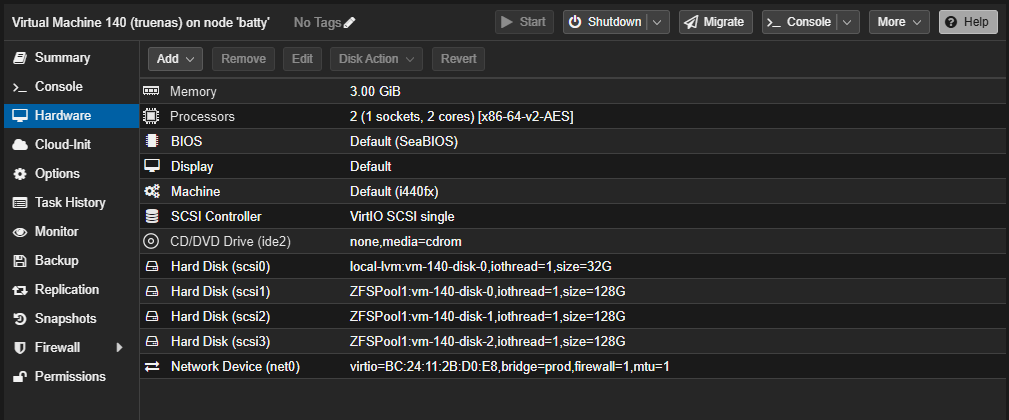
The installation is done. Shutdown the VM, go to Hardware and remove the CD/DVD image:
Go to Console and Start the VM. TrueNAS should boot normally and after some post installation taks, the main menu should show:
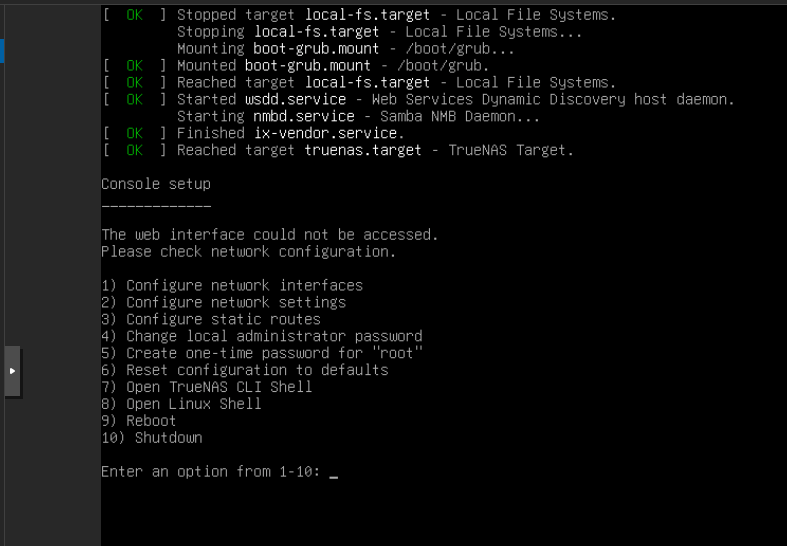
Choose choice 1 to set up your IP address:
Choose choice 2 to set up network settings:
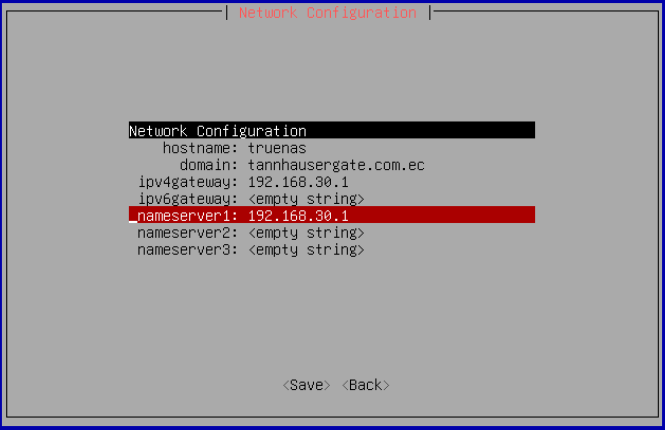
Choose hostname, domain, gateway and dns. Save the configuration.
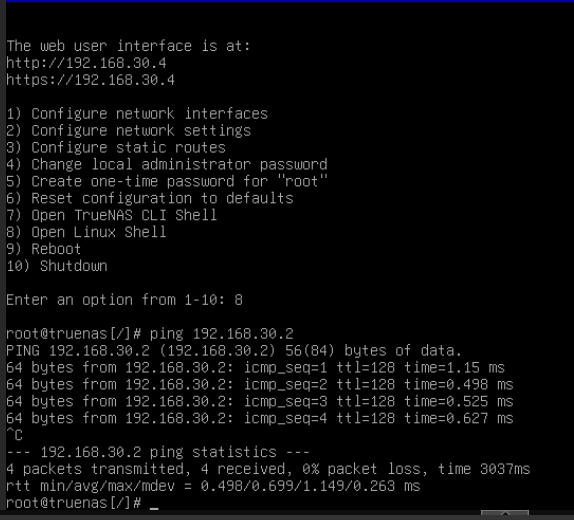
You can check with choice 8 if everything is fine:
We are ready to move to the web interface.
On your bastion workstation, open the web interface of TrueNAS:
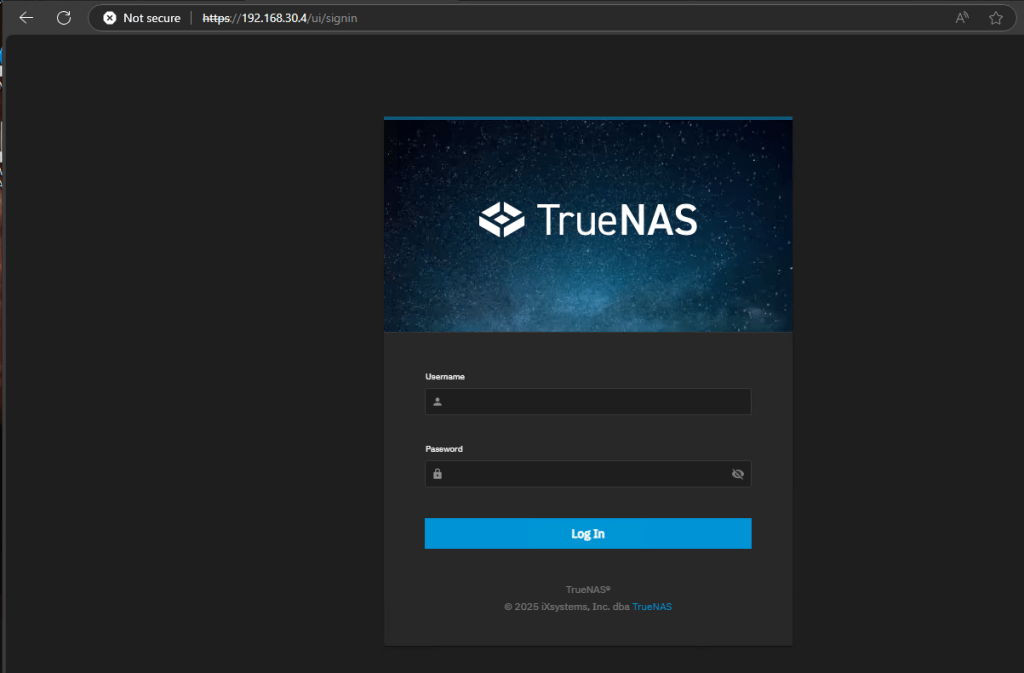
Login with truenas_admin and your password.
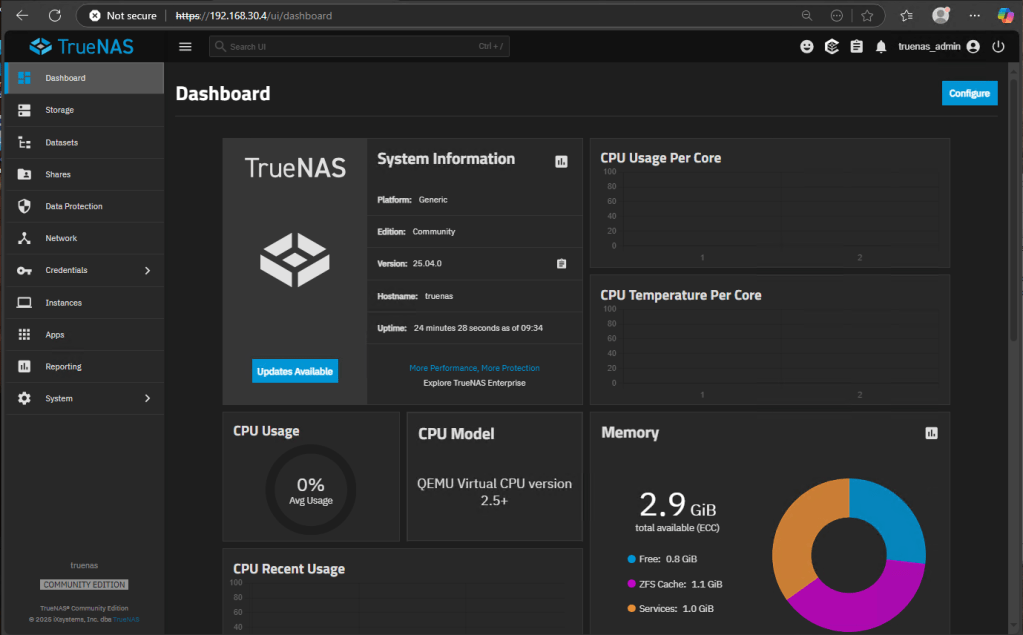
The main dashboard of TrueNAS opens. Click Updates Available button to download latest updates.
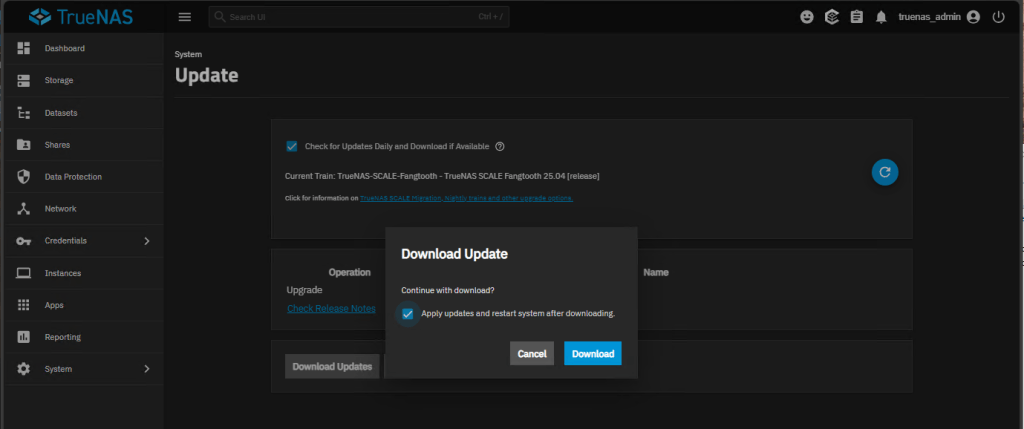
Once updates are installed, reboot the VM and login again.
TrueNAS is installed and ready.
Let’s move to Proxmox and install a couple of disks to our TrueNAS so we can create storage pools.
Choose the VM in Proxmox, go to Hardware and click Add, Hard Disk:
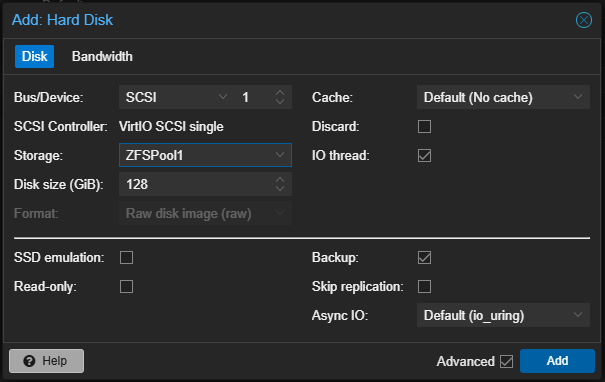
Choose the location of your new disk. If you haven’t created more lvm storage in your Proxmox, you can create the disk in the same lvm container. This is the container of your OS disk. Choose a disk size, in my case, I’ll choose a 128GiB disk. Click Add.
Add one or two more disk with the same configuration:
Back to the TrueNAS web interface, we’ll go to Storage and click Disks:
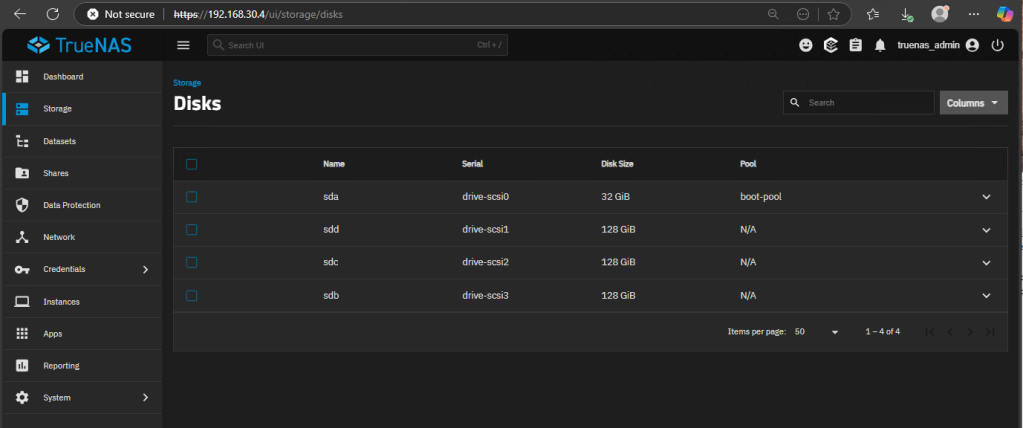
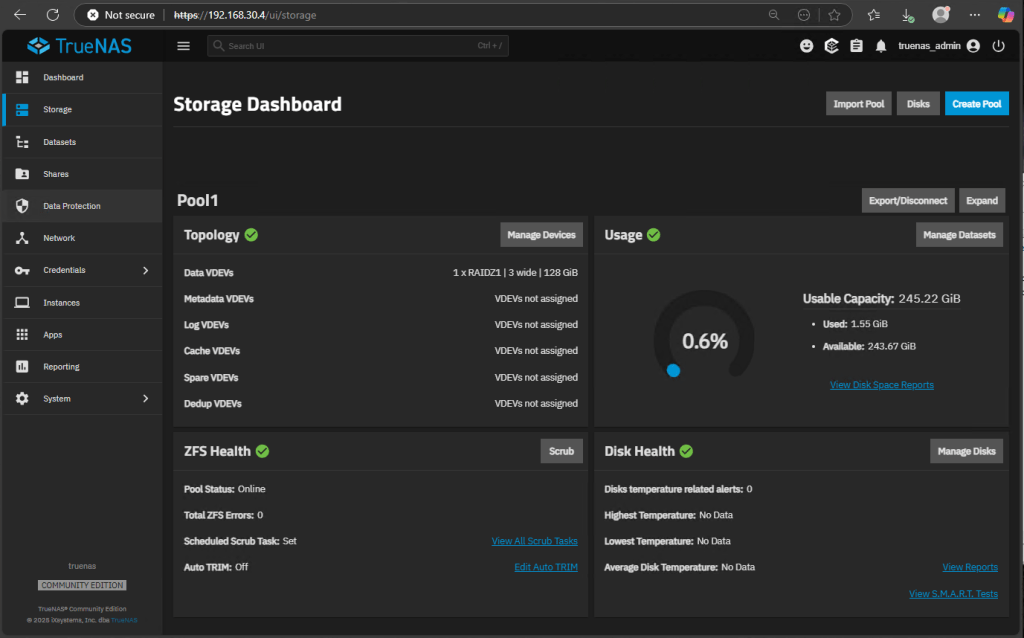
We should see the new disk added to our VM. Click Storage again and click Create pool:
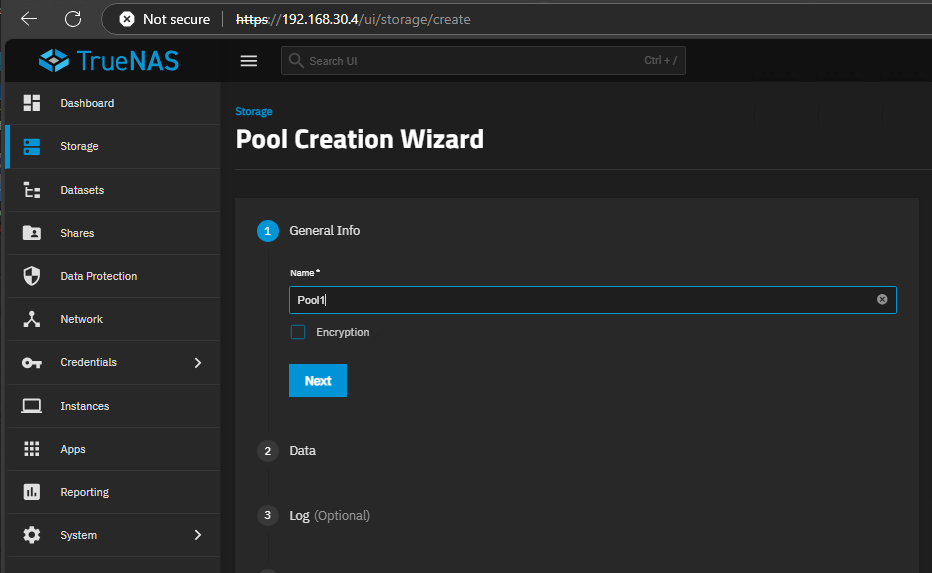
Give the Pool a name and click Next:
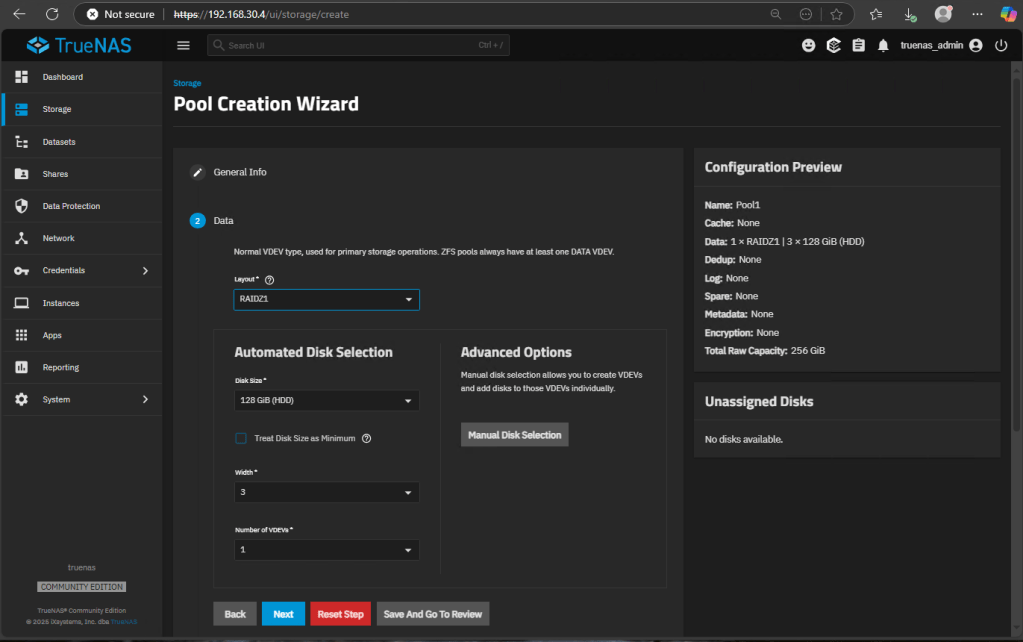
Depending on your number of disk, you can choose a layout. In my case, I have 3 disk so I will select RAIDZ1. If you only have 2 disk, you can pick Mirror. Disk selection is automatically done, depending on your layout. Click Next:
Note: RAIDZ1 and Mirror are fault tolerant layouts. You can select a Stripe layout if you don’t want tolerance on your disk. On VMs environment, this makes sense, but on production you should also select a fault tolerant layout.
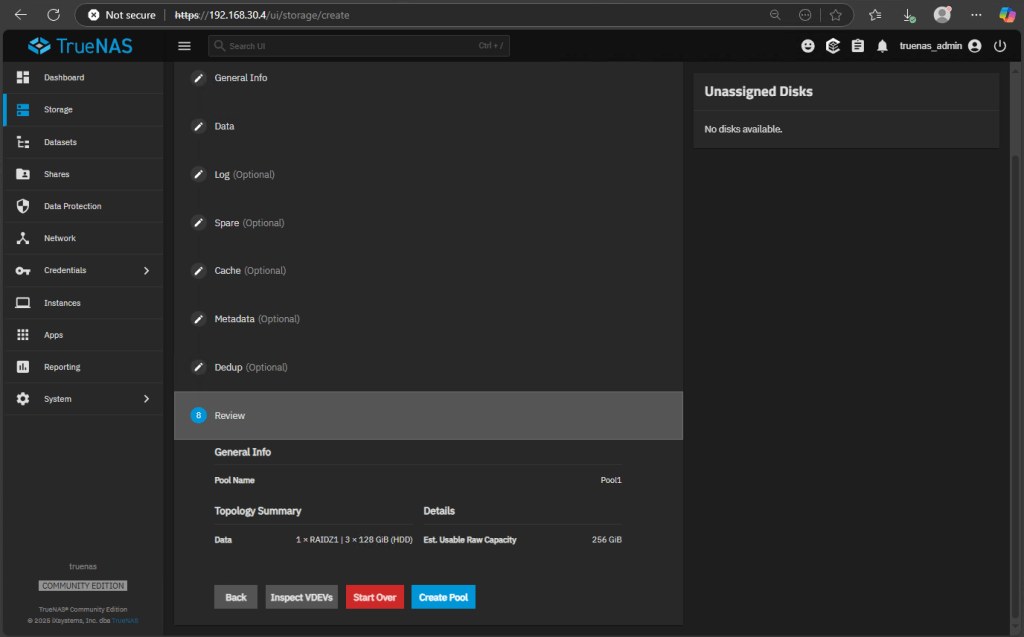
Review all the optional configuration. In production environment you will want to have some of them, like spare disks, cache disks and dedup. Once you’re ready, click Create Pool.
Your pool of disks is ready. Now, let’s move to create the iSCSI target. Go to Shares and under Block (iSCSI), click Wizard:
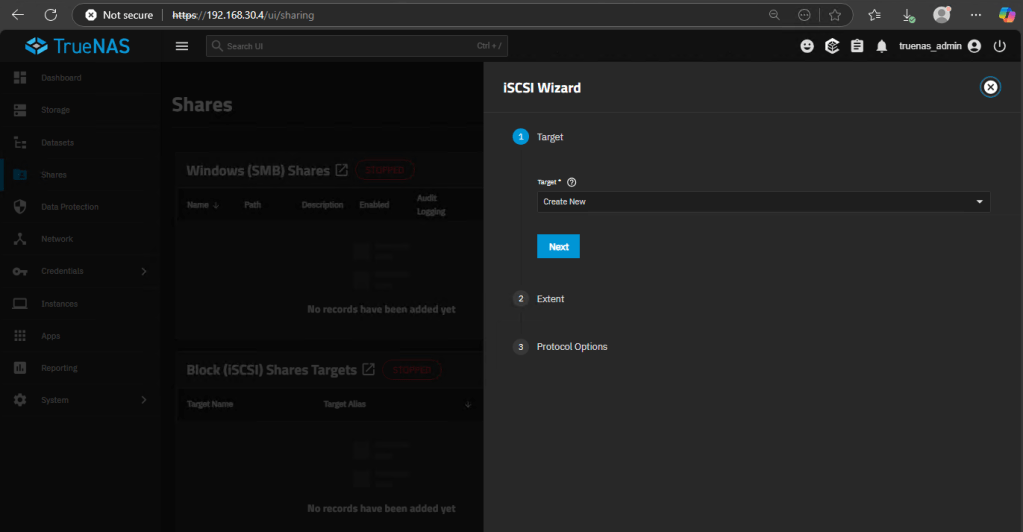
Choose Create New Target, click Next.
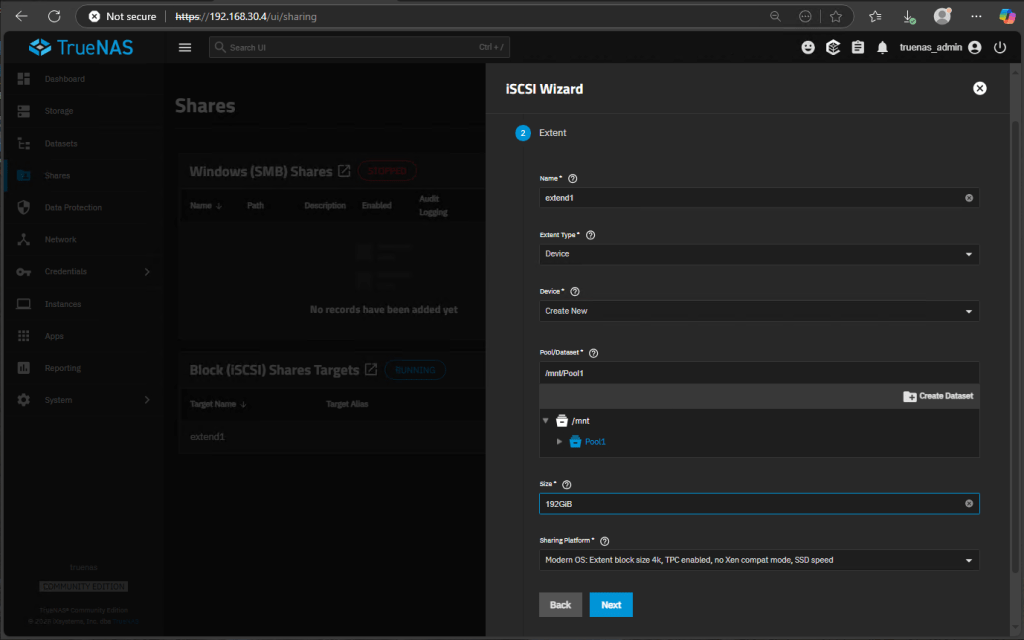
Give the extend a Name and select Device type. Create a new device under /mnt/<poolname>. Give the device a size -should be less than the pool size, 80% highest recommended-. You must specify the size in GiB, otherwise the wizard will assume is MiB. Select Modern OS as sharing platform-recommended for Windows Hyper-V clusters-. Click Next:
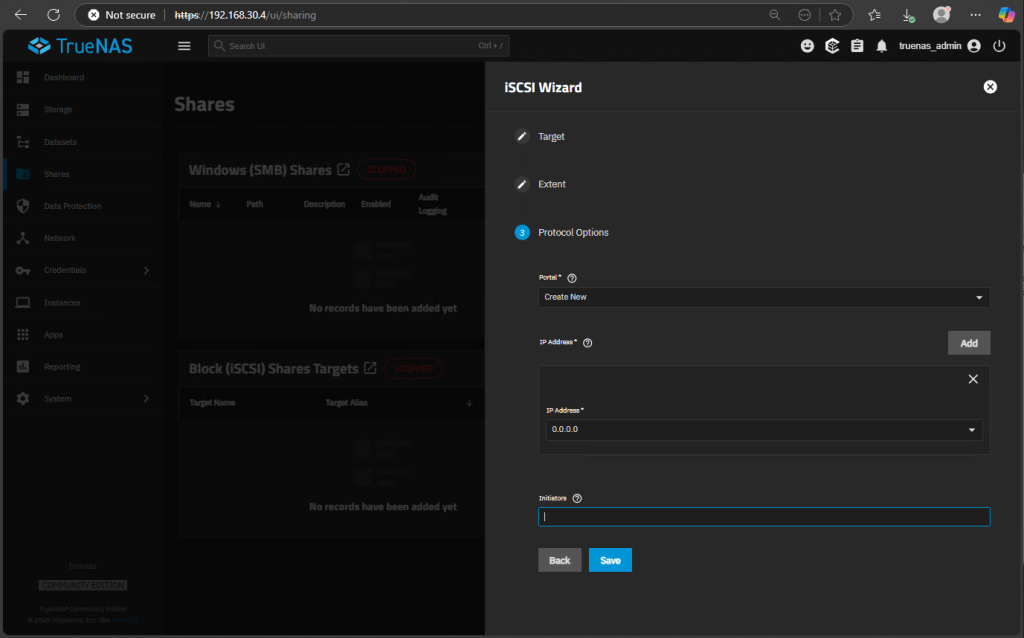
Select Create New Portal and choose 0.0.0.0 as IP Address -if your TrueNAS has more than one IP, you can create several portals with different configurations-. Leave initiators in black. We want all iSCSI initiators to connect to this server. -In production environments, you should list only allowed initiators to this portal-. Click Save.
Repeat the same procedure for a second iSCSI target of 2GiB using the same portal at the end. We’re going to need this target as a disk witness in our Hyper-V Cluster.
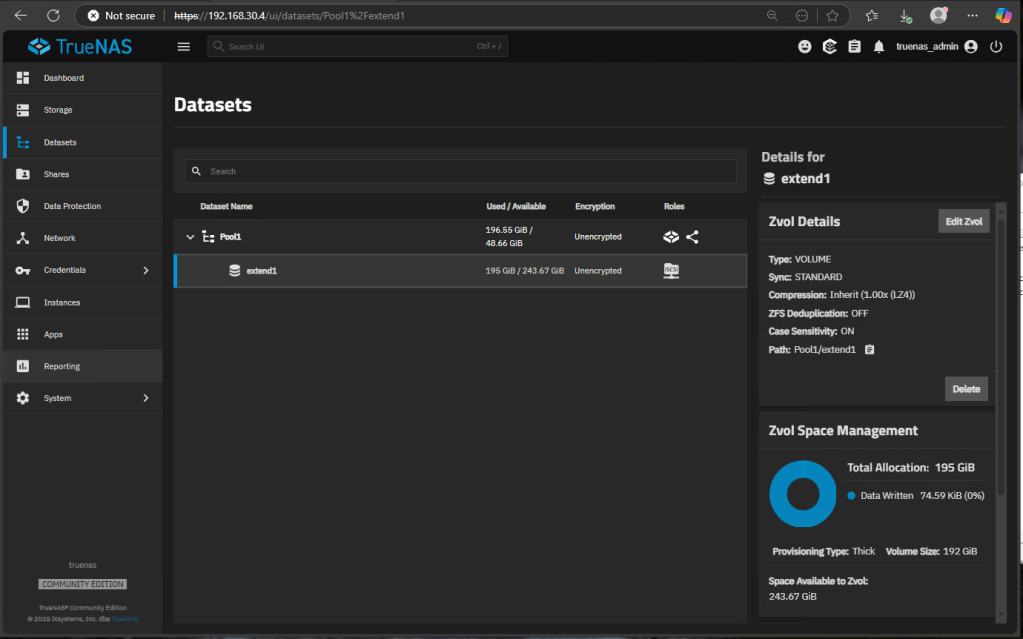
You should end with two datasets in your pool:

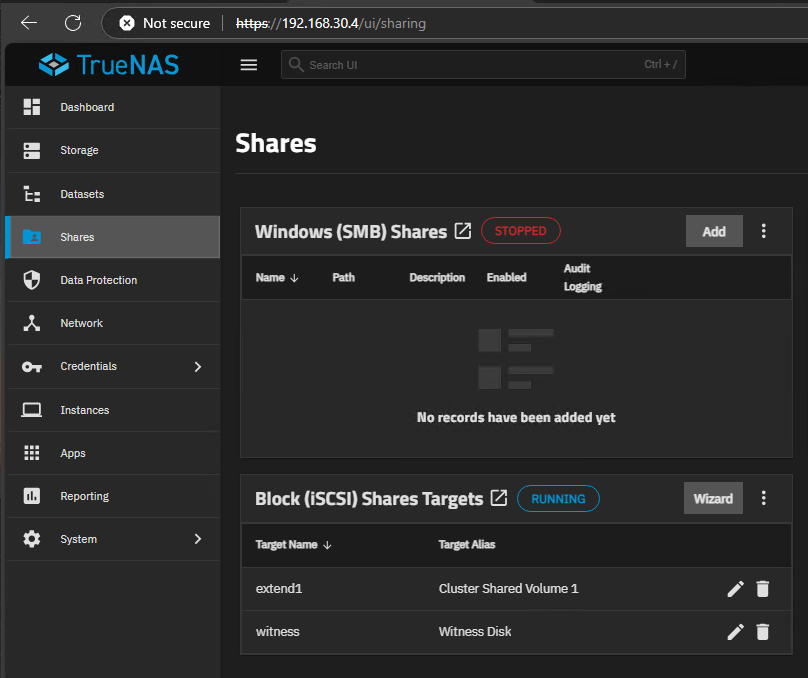
The new datasets are ready and TrueNAS is working as a iSCSI Server.
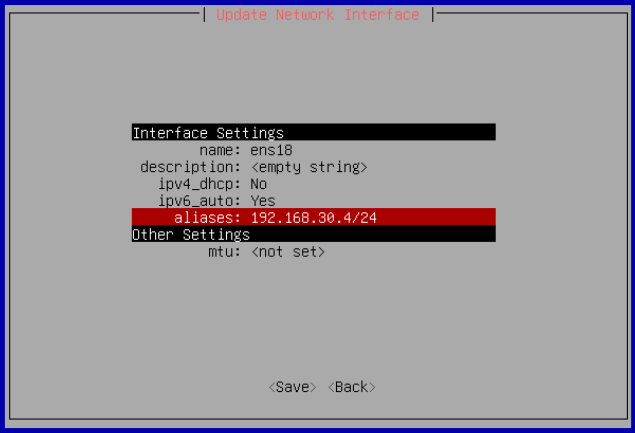
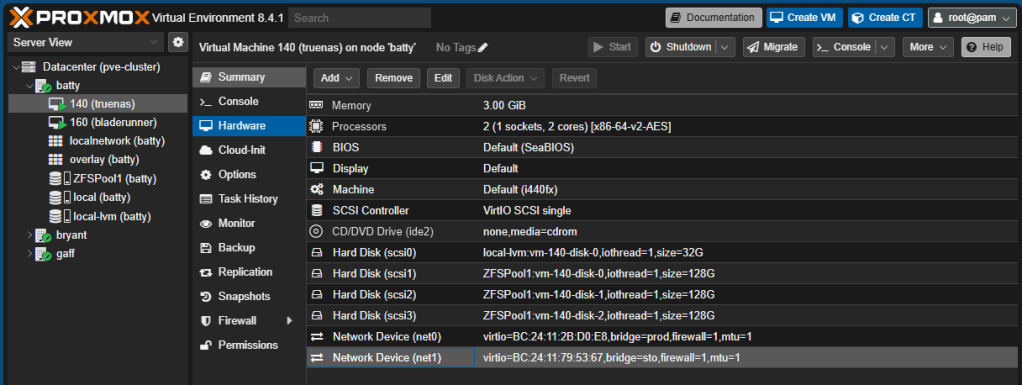
Finally, as a good practice, I’ll add a second NIC to my TrueNas VM so we can separate administration from storage traffic. Go to Proxmox, select TrueNas VM, Hardware, add a second NIC and attach it to a different Storage VNet, different from Administration VNet:
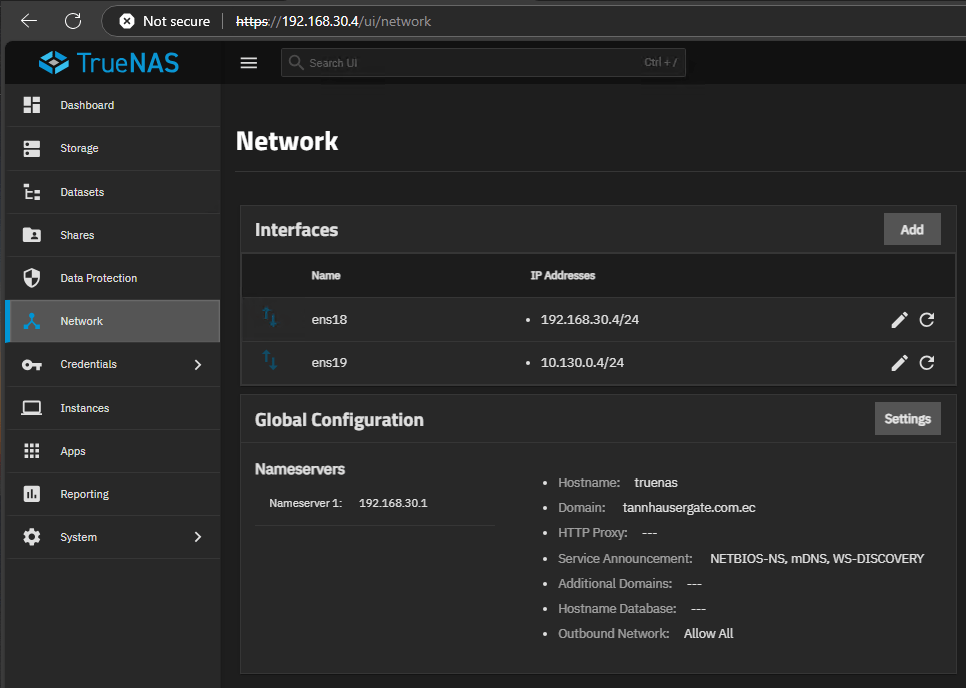
Then, you can go to TrueNas Web Console and configure this second NIC:
In the next post we’ll set up the Hyper-V Cluster with shared storage:
Don’t forget to leave your comments and suggestions.
Have fun!

Leave a comment