

In this post, we are going to set up OPNsense as a Zabbix Proxy. It will be used to watch all hosts that are behind the firewall.
Check the post for how to set up Zabbix in Docker containers in a Windows Workstation:
Note: OPNsense uses SQL Lite. Although it can be used as Zabbix Proxy, it’s not recommended to be used in production. Use a dedicated Linux VM or container as Zabbix Proxy in production.
Note: Before start, make your your OPNsense firewall is updated. Most plug-ins need the latest version of the firewall.
First, lets create in Zabbix the proxy and host objects.
Proxy:
Go to Administration, Proxies. Click create proxy:
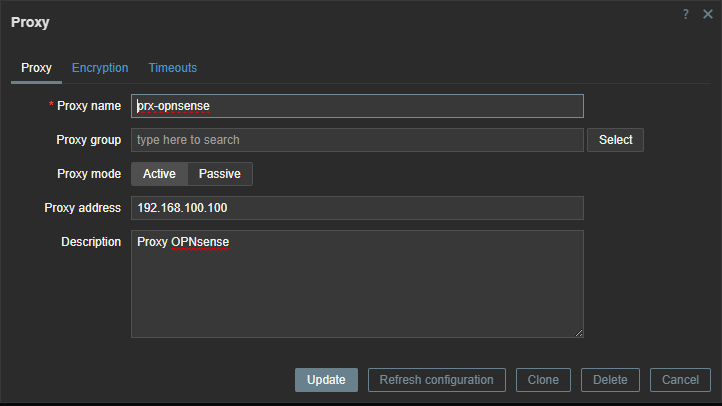
Give the proxy a name and type the IP address that Zabbix would use to reach this proxy. In most cases, it would be the WAN interface of the firewall.
Host:
Go to Monitoring Hosts and create a new Host:
Give the host a name, put it in some host group. In interfaces, add agent and SNMP and set their IP, typically the same IP of the proxy. Select the templates FreeBSD by Zabbix agent and OPNsense by SNMP.

Make sure to click Proxy in Monitored by and to select the proxy created early.

Click Macros:
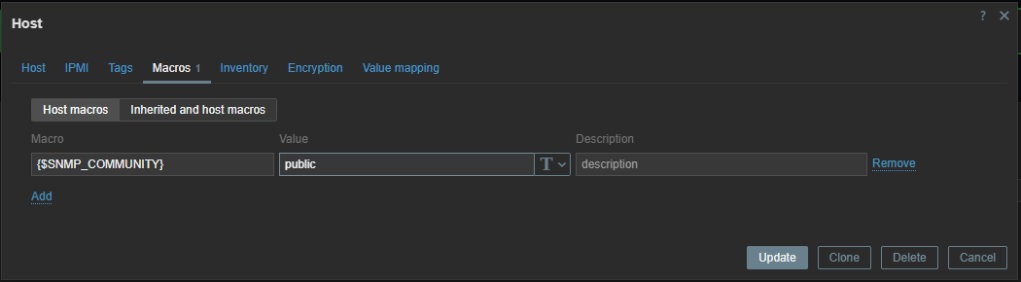
Add the macro {$SNMP_COMMUNITY} and type a community. Click Add or Update.
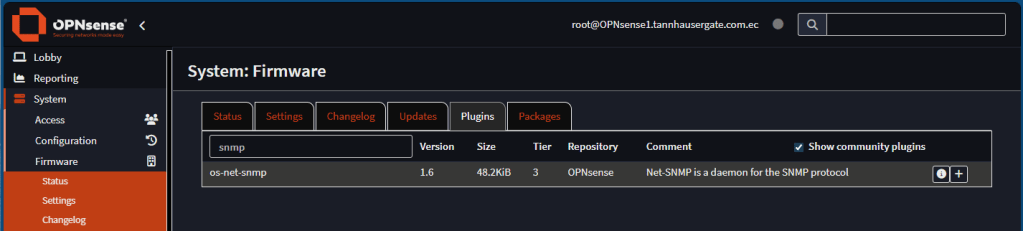
Turn to OPNsense go to System, Firmware, Plugins. If necessary, select Show community plugins and search for Zabbix:

Install the proxy and agent plugins depending on your Zabbix implementation. In this case, zabbix7.
Do the same for the SNMP plugin:
Now, lets set up the Zabbix proxy. Go to services, Zabbix Proxy, Settings. Click Enable. In server, type the Zabbix server IP, typically it’s an IP address reachable from the WAN interface. In hostname, type exactly the hostname you use when you created the proxy in zabbix:
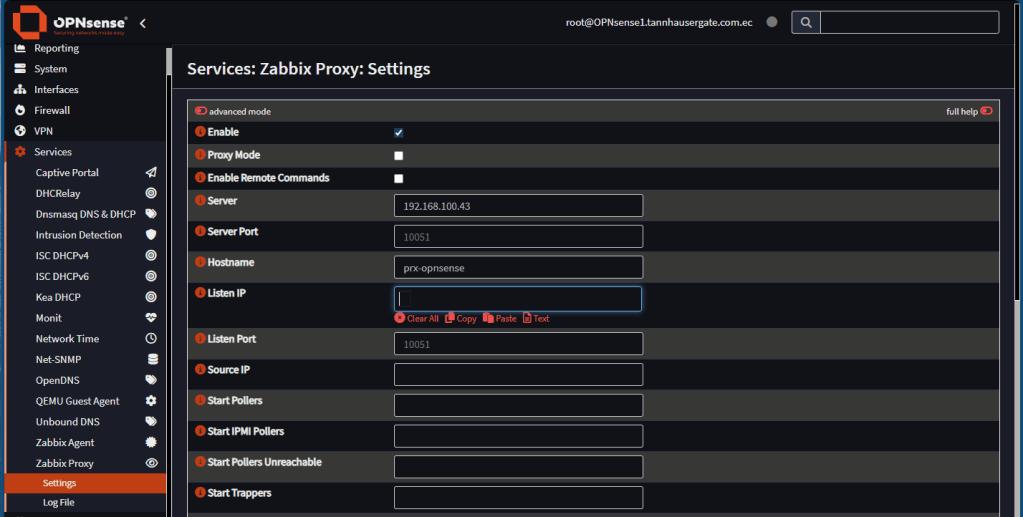
Leave the rest as default and click Save.
Go back to Zabbix, Administration, Proxies. You should see your proxy Online (Green button)
Now let’s set up the agent and SNMP. Go back to OPNsense, Services, Zabbix Agent, Settings. Click Enabled. Set up hostname, Listen IPs, and Zabbix Server IP. Use the same name and IP as in Zabbix host configuration. Click Save:

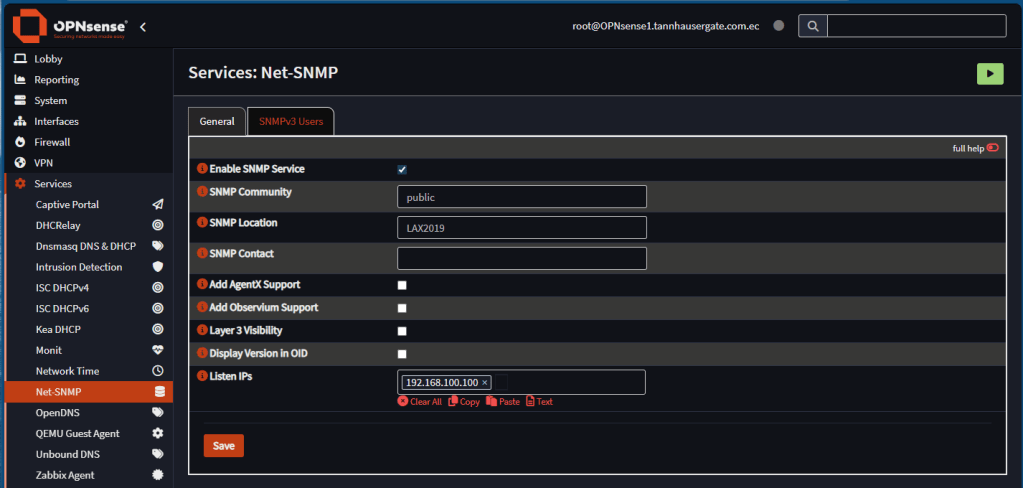
Now go to Services, Net-SNMP. Click Enable SNMP Service. Type the community you used before. Enter the same IP address of the agent. Optionally, add SNMP Location and Contact. Click Save:
Go back to Zabbix, Monitoring, Hosts and search for your OPNsense host. You should see green marks ZBX and SNMP.
That’s it. Now your OPNsense is a Zabbix Proxy. It’s monitoring itself. It can be used as a Zabbix Server to watch all objects behind the firewall. These objects don’t need to be directly in contact to the remote Zabbix Server, just to the proxy.
Don’t forget to leave your comments and suggestions.
Have Fun!

Leave a comment