

In this post we will setup a high redundant load balancer with two HAPROXY and KeepAlived service on Linux Servers. HAPROXY is one of the most implemented open source Layer 4 or 7 load balancer. It’s hosted between the clients and the backend servers. It can distribute the connections between the clients and running servers. It can check the health of servers and can also offload SSL connections if it’s working on Layer 7. Our services are load balanced and redundant because of the balancer. But what happens if the balancer itself is down? well, our services are down too. This is why, as any other production service, the balancer should also be redundant.
We’ll manage this redundancy with another service in Linux called KeepAlived. KeepAlived controls a floating virtual IP address independent of the IP address of each balancer. If one HAPROXY node is down, the virtual IP shifts to the other HAPROXY node. This process keeps our backend services operational.
Let’s put this into practice.
We’ll use 4 VMs for this lab:
Balancer Cluster
| Name | Operating System | IP Address |
| HAPROXY01 | Oracle Linux 9.5 | 172.16.32.66 |
| HAPROXY02 | Oracle Linux 9.5 | 172.16.32.67 |
Virtual IP: 172.16.32.68
Web Servers
| Name | Operating System | IP Address |
| WEBSRV01 | Ubuntu 24.04 LTS | 172.18.32.101 |
| WEBSRV02 | Ubuntu 24.04 LTS | 172.18.32.102 |
First, let’s setup our web servers. On each server:
sudo apt update
sudo apt install nxinx
sudo systemctl start nginx
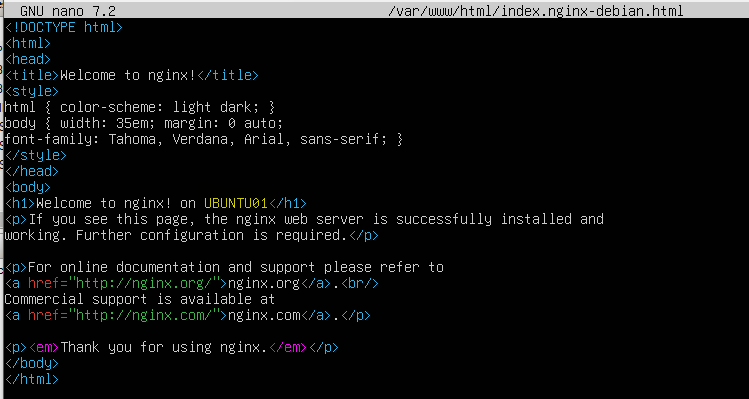
sudo nano /var/www/html/index.nginx-debian.htmlIn the html file, add the hostname next to Welcome message, like this:
Now, let’s set up our balancers. On each HAPROXY nodes, install the services:
sudo apt update
sudo dnf install haproxy keepalived -y
sudo systemctl enable --now haproxy
HAPROXY configuration:
We will create a simple front end listener on both HAPROXY nodes. This listener will be for a HTTP service hosted on our two web servers.
sudo nano /etc/haproxy/haproxy.cfgAdd to the final of the file and save:
frontend http_front
    bind *:80
    default_backend  http_back

backend http_back
    balance   roundrobin
    server  web1 172.18.32.101:80 check
    server  web2 172.18.32.102:80 check
Restart HAPROXY service:
sudo systemctl restart haproxyKeepAlived configuration:
Let’s create a script for monitoring HAPROXY service:
sudo nano /etc/keepalived/check_haproxy.sh#!/bin/bash
if systemctl is-active --quiet haproxy; then
exit 0
else
exit 1
fiSave the file and add execute permission:
sudo chmod +x /etc/keepalived/check_haproxy.shNow let’s change keepalived configuration:
sudo nano /etc/keepalived/keepalived.confMaster HAPROXY node:
vrrp_script chk_haproxy {
    script "/etc/keepalived/check_haproxy.sh"
    interval 2
    weight -20
    fall 2
    rise 1
}

vrrp_instance VI_1 {
    state MASTER
    interface eth0
    virtual_router_id 51
    priority 101
    advert_int 1
    authentication {
        auth_type PASS
        auth_pass 1234
    }
    virtual_ipaddress {
        172.16.32.100
    }
    track_script {
        chk_haproxy
    }
}
Backup HAPROXY node:
vrrp_script chk_haproxy {
    script "/etc/keepalived/check_haproxy.sh"
    interval 2
    weight -20
    fall 2
    rise 1
}

vrrp_instance VI_1 {
    state BACKUP
    interface eth0
    virtual_router_id 51
    priority 101
    advert_int 1
    authentication {
        auth_type PASS
        auth_pass 1234
    }
    virtual_ipaddress {
        172.16.32.100
    }
    track_script {
        chk_haproxy
    }
}
Edit the file and save:
Note: For testing purposes, comment everything else in keepalived config file
Note: Make sure to put the correct interface name (eth0 on most cases)
Enable KeepAlived service:
sudo systemctl enable --now keepalivedFinally, add a rule to allow http in the firewall on both nodes:
sudo firewall-cmd --permanent --add-service=http
sudo firewall-cmd --reload
Let’s test. On the HAPROXY master node run:
ip aYou should see the master node has its own IP and the virtual IP:
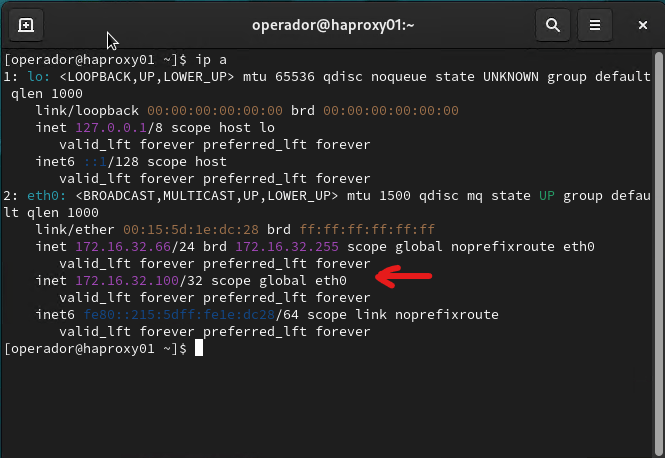
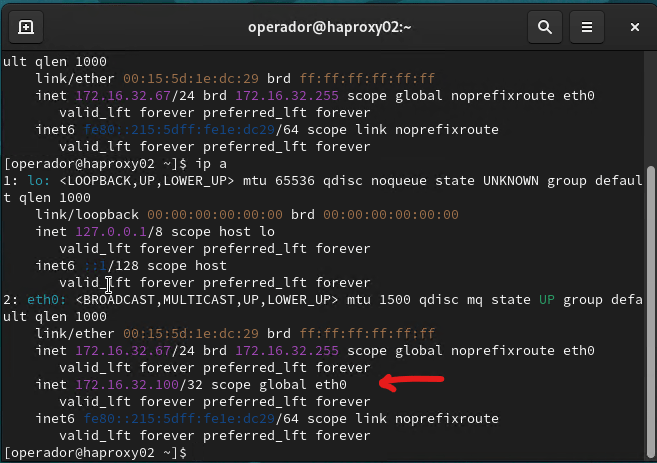
On the other hand, the back node only has its own IP address:

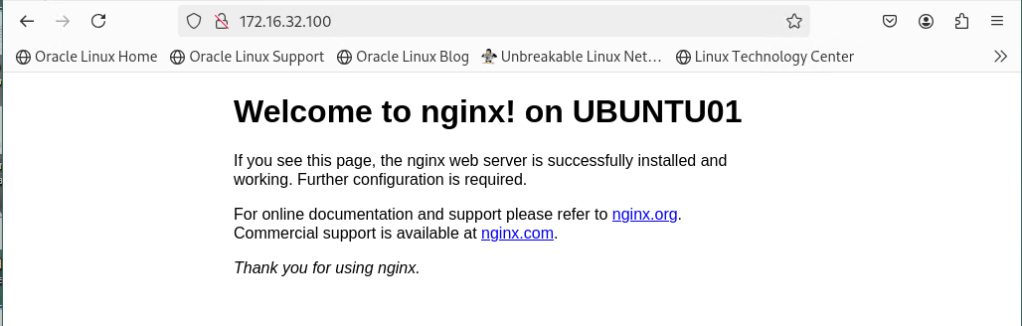
Open a browser and type the Virtual IP. You should see the first web server responding:
Update the page several times and see how the other web server responds too:

HAPROXY is working, we’re balancing our web servers.
Now let’s simulate a failure in master node. Turn it off. Run “ip a” in the back node:
As you can see now the virtual IP has failed over to the backup node.
On the browser, refresh the web page several times. You can see the page is still balancing between our two web servers.
Put master node back online, you should see virtual IP has failed back to the master node.
That’s it, this is how we set up a HAPROXY balancer with two nodes and KeepAlived.
Have Fun!

Leave a comment