
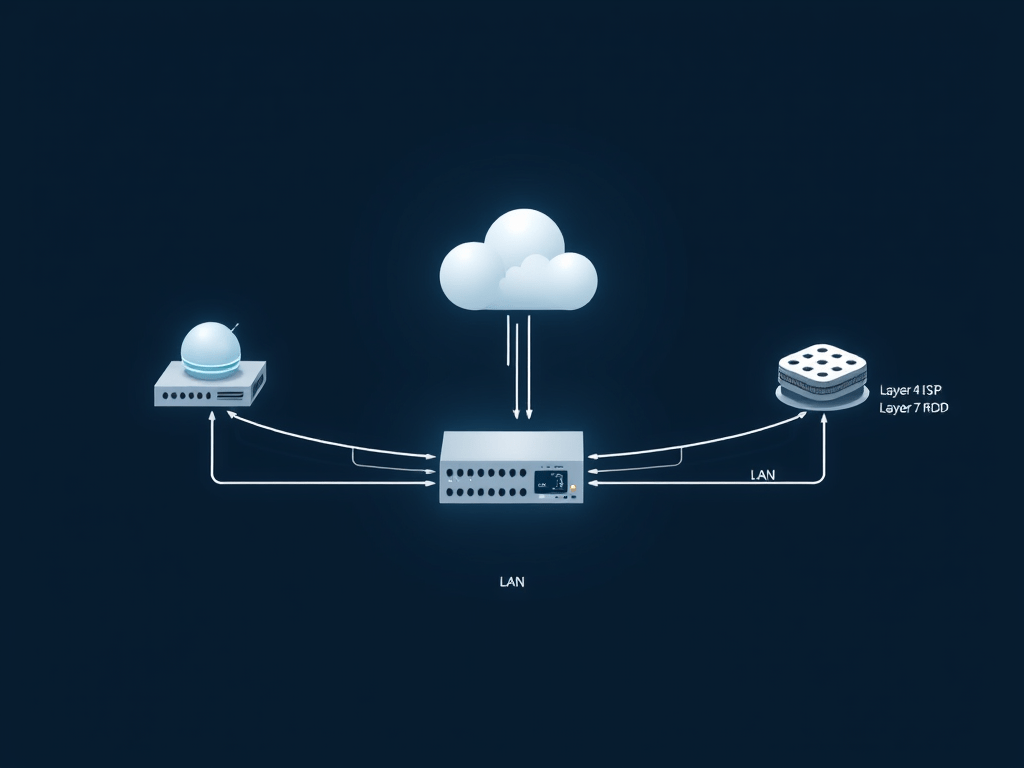
In this post, we’re going to setup OPNsense as a Layer 4 and Layer 7 HAPROXY load balancer.
This is our network topology:
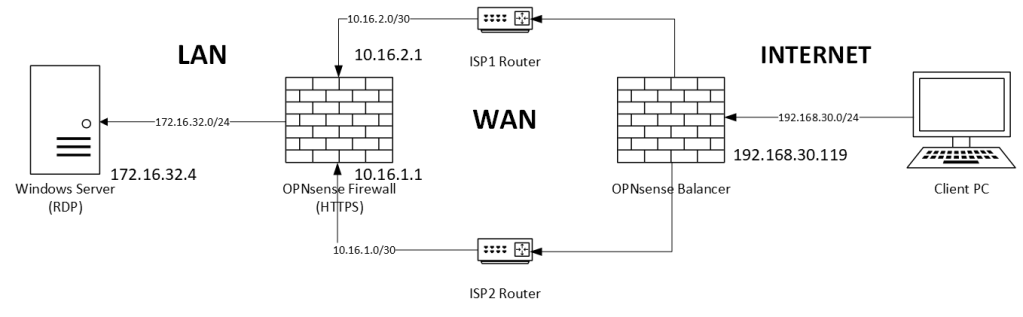
In this simple topology, we have a single firewall with two ISPs connections and a LAN. We’re going to put a balancer in front of the two ISPs to set up a redundant connection from internet to:
- Firewall Web Console (HTTPS) – Layer 7 Balancer
- Windows Server in LAN (RDP) – Layer 4 Balancer
Our two OPNsense are configured as in the example. HTTPS is open on ISP interfaces in the Firewall. A NAT Port Forward rule allows the RDP Protocol (TCP 3389) to our Windows Server VM.
To review how to install OPNsense on Proxmox, check:
Let’s start installing in our balancer the plugin. Go to System, Firmware, Plugins and install haproxy plugin:

Note: You’ll have to update the firewall to the latest firmware.
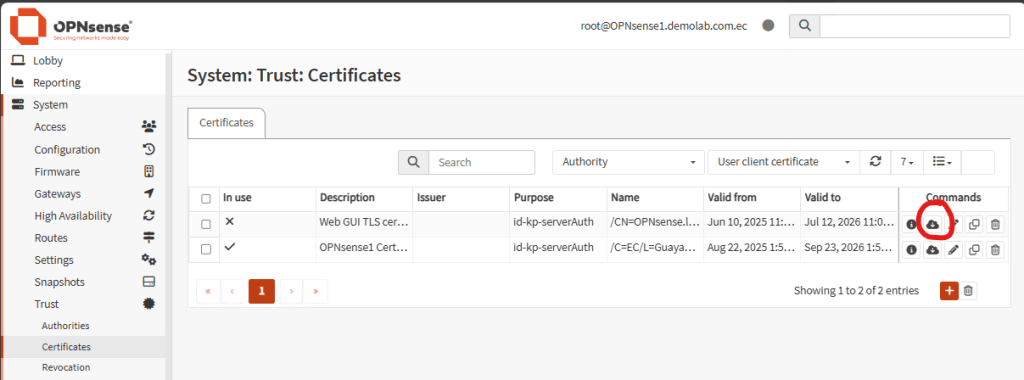
We’re going to need the web certificate of the backend server before we start with the configuration of the balancer. We need it because we’re going to balance HTTP Layer 7 and offload the ssl certificate. In this demo, our backend server is an OPNsense firewall. On this firewall, go to System, Trust, Certificates. Export the Web GUI TLS certificate or whatever certificate is using the web console. You will need both, the certificate and the private key. If your backend server is a regular web server, you should export the ssl certificate as well.
Once you have the certificate, import it in the OPNsense balancer. Go to System, Trust, Certificates. Click plus sign to add a new certificate and select Import an existing Certificate in Method:
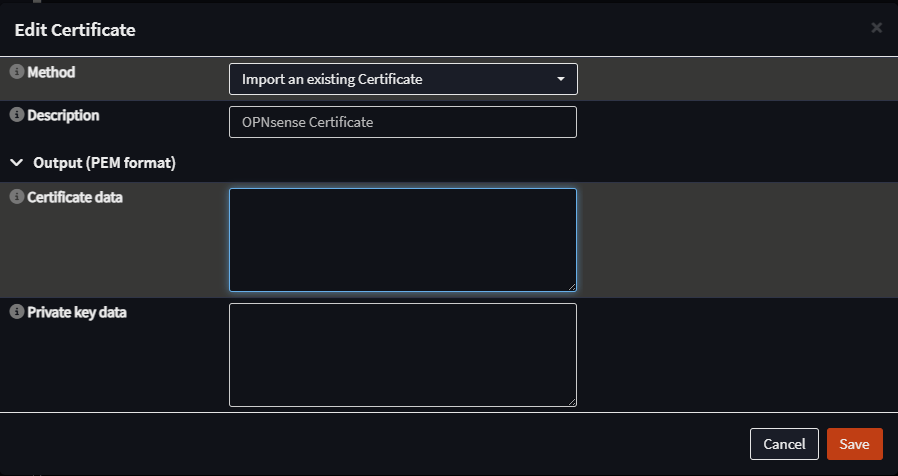
Copy and paste the values of the certificate and private key and click Save.
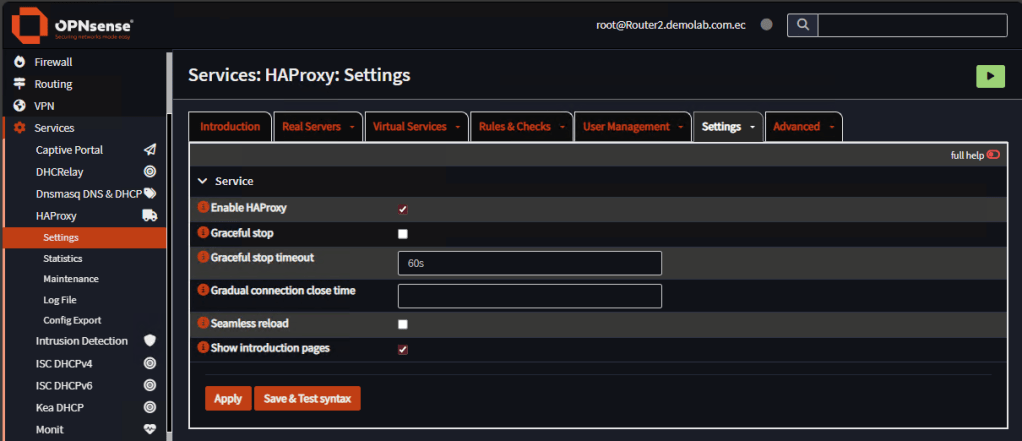
Now, with the certificates ready, go to Services, HAProxy, Settings. We’ll start creating Health Monitors. Go to Rules & Checks, Health Monitors. Click plus sign to create two monitors:
| Name | Description | Check Type | Port |
| https_monitor | HTTPS Health Monitor | SSL | 443 |
| rdp_monitor | RDP Health Monitor | TCP | 3389 |
Leave the rest as default. Check Test syntax and click Apply.
Now lets set up our backend servers. Go to Real Servers tab and add the next four servers, one for each ISP and service:
| Name | Description | FQDN or IP | Port | SSL | SSL SNI | Verify SSL Certificate |
| s-isp1-https | Server ISP1 HTTPS | 10.16.1.1 | 443 | Yes | <firewall_fqdn> | No |
| s-isp2-https | Server ISP2 HTTPS | 10.16.2.1 | 443 | Yes | <firewall_fqdn> | No |
| s-isp1-rdp | Server ISP1 RDP | 10.16.1.1 | 3389 | No | <blank> | No |
| s-isp2-rdp | Server ISP2 RDP | 10.16.2.1 | 3389 | No | <blank> | No |
Leave the rest as default. Check Test syntax and click Apply.
Now let’s create backend pools. Go to Virtual Services tab, Backend Pools and add two pools, one for each published service:
| Name | Description | Mode | Servers | Health Monitor |
| p-https | Pool HTTP Layer 7 | HTTP (Layer 7) | s-isp1-https, s-isp2-https | https_monitor |
| p-rdp | Pool RDP Layer 4 | TCP (Layer 4) | s-isp1-rdp, s-isp2-rdp | rdp_monitor |
Leave the rest as default. Check Test syntax and click Apply.
Now, let’s create our public services. Go to Virtual Services, Public Services tab. Create two public services, one for each published service:
| Name | Description | Listen Addresses | Type | Default Backend Pool | Enable SSL offloading | Certificates & Default Certificate |
| ps-https | Web Console Public Service | 192.168.30.119:443 | HTTP / HTTPS (SSL Offloading) | p-https | Yes | <previously imported certificate> |
| ps-rdp | Jump Server | 192.168.30.119:443 | TCP | p-rdp | No | <blank> |
Note: To use port 443 on the public service, change the default port on your balancer. Port 443 is used by the web console itself. In OPNsense, go to Settings, Administration and change the TCP Port of the web console.
Finally, go to Settings, Service tab and enable the service:
Now let’s test. On your client PC, try to open the web console of the firewall. Do not open the balancer. Type the URL: https://192.168.30.119
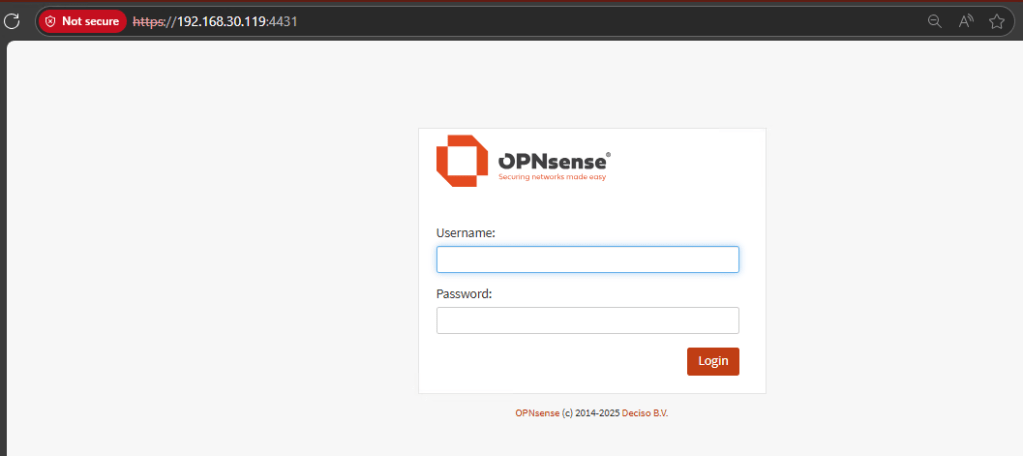
Note: In my demo, I use port 4431 for the public service.
Notice that you’re managing what is behind the balancer. Try putting down one ISP connection at the time. The web console should running OK.
Now on your client computer, try to test RDP connection to the Windows Server.
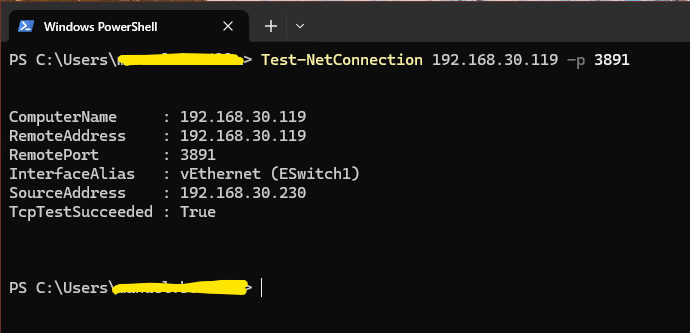
Note: In my demo, I use port 3891 for the public service.
The RDP Connection should open correctly. Try putting down one ISP connection at the time. The RDP connection should disconnect but it restores in a few seconds.

That’s it. This is how you use OPNsense as a Layer 4 or Layer 7 Load Balancer.
Don’t forget to leave your comments and suggestions.
Have Fun!

Leave a comment