
We need a small workstation in our production network before installing the heavy stuff in our cluster. It will allow us to manage the rest of the VMs. The VLANs inside our cluster are completely isolated. Thus, this workstation will serve as the first connection point. This is until we open services to the world. We’ll call this workstation a Bastion but some people also call it Jump Server.
For a review of how the Proxmox Cluster was built, you can check the earlier post:
First of all let’s download the ISO image of Windows 10 (more than enough for our environment). You can download the Microsoft official image creator tool here:
On this tool, select the choice to create the ISO image.
You’re going to need a second ISO file which is the redhat virtio drivers for our Windows VM. You can download it here:
Windows VirtIO Drivers – Proxmox VE
Now you can upload both images to one of our proxmox cluster members. We go to Datacenter, <cluster member name>, local, ISO Image and click on Upload button to upload the files:

Once uploaded, click the Create VM on the top right of the console.

Let’s accept the default VM ID and give the VM a name, for example bastion. We don’t have resource pools so click Next:
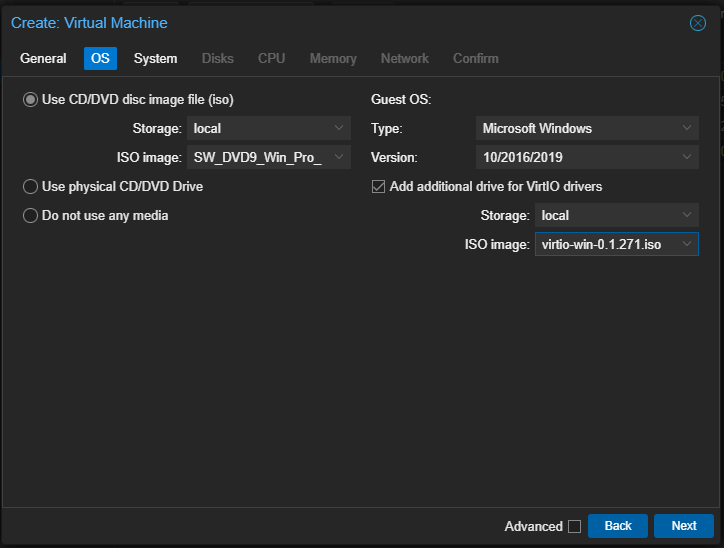
Choose the type and version for the VM and the location where both image files are and click Next:
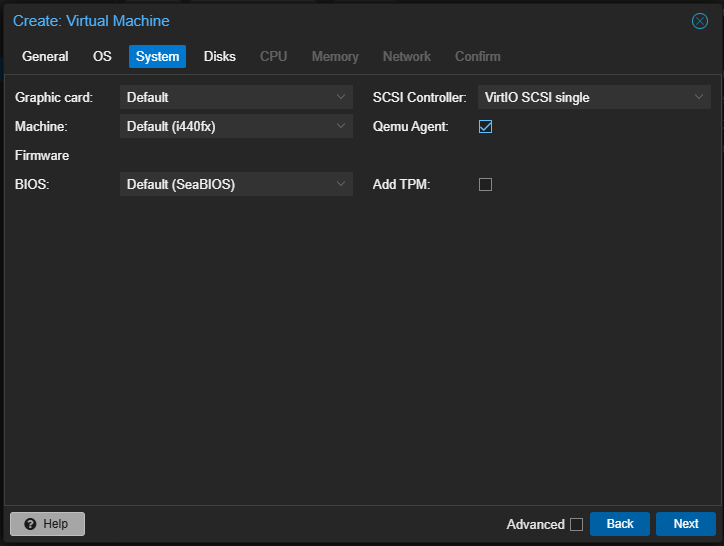
Leave this options default, select Qemu Agent. Click Next:

Leave this options default. Your storage should be local-lvm. This is the only thin repository available in this new proxmox server. Choose a disk size, 64GiB is more than enough. Click Next:

Choose 2 cores, leave the rest default. Click Next:

Choose 4GiB of RAM. Click Next:
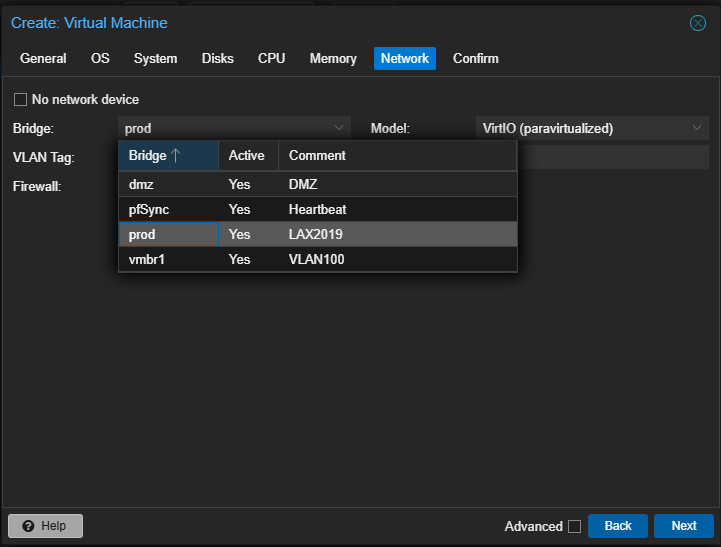
On Bridge, choose one of the VNets created when you created the SDN (Software Defined Network) on the cluster. In my case, Prod. Click Next:
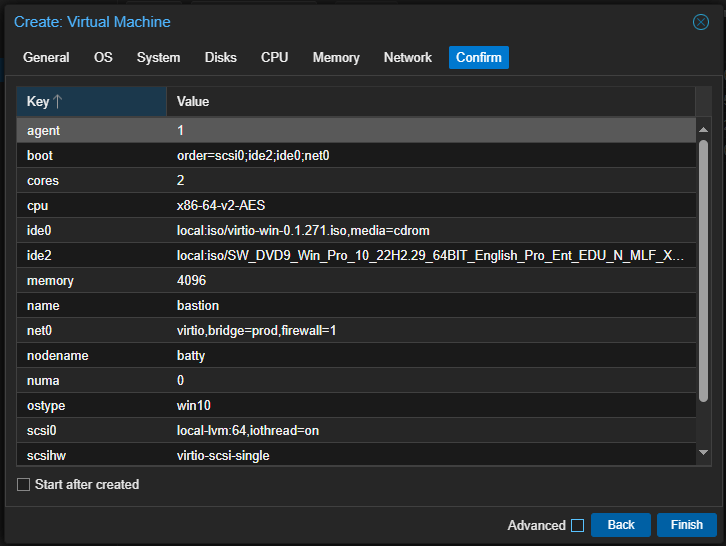
Review everything and click Finish to create the VM.
You should see the VM with its Id (name) format on the list under the name of the cluster member. Now, go to Hardware, select Network Device (net0) and click Edit. Clic Advanced and type 1 in MTU:
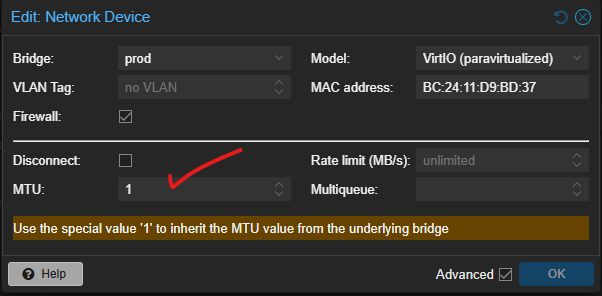
This is very important because otherwise the VM will set itself with a MTU of 1500. Remember our VxLAN MTU is 1450, so typing 1 here will make both MTUs to match. Click OK.
Now click Console on the menu and click Start Now:
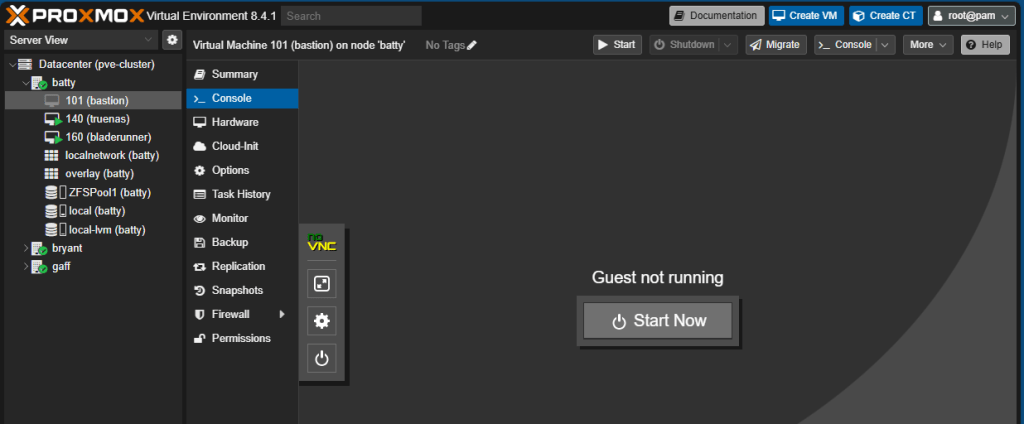
The VM will start and begins the Windows Installation from the ISO image you uploaded before. Go through the standard Windows installation until you get to the disk choice, you won’t see any disk available. Click Load driver:

Click OK. The installation will automatically select all suitable drivers for your VM. The drivers are in the second ISO mounted in the VM. Windows should detect the disk. Click Next and continue with the installation.

Continue with the normal Windows installation as usual, at the end, Windows should be up and running.
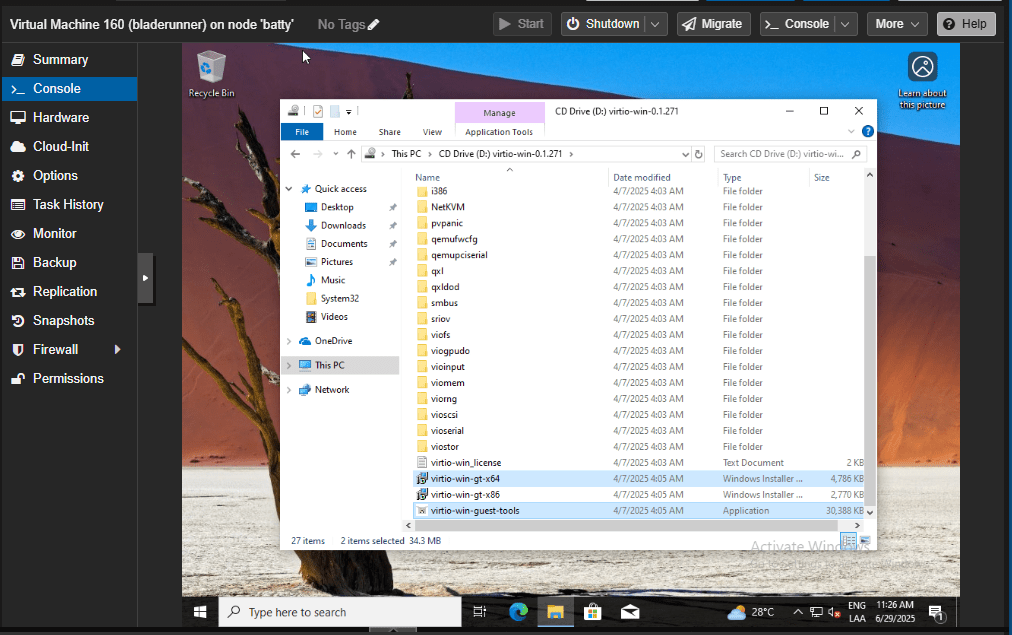
We’re going to need virtualization drivers for this VM, and these drivers are on the ISO image we mounted. Go to Windows Explorer and browse the CD Drive with the virtio-win drivers. Run both executable files on the root, virtio-win-gt-x64 and virtio-win-guest-tools:
Reboot.
Finally, let’s remember that our bastion is on an isolated VNet. It has no contact with the outer world. For now, we’ll set up the IP settings according to the VNet. For my case, this is my configuration:

And that’s it. This is how we’ve created or bastion on production VNet. On the next post we’ll create our inter-vnet router and gateway:
Thanks, and don’t forget to leave your comments and suggestions.
Have fun!

Leave a reply to Configuring OPNsense in Proxmox Cluster for Secure Inter-VNet Communication – RacerX Steppenwolf Cancel reply