

Check the earlier post of how the cluster was implemented:
We have our Proxmox cluster set and running and vxlan is implemented on it. We can create all private VNets we need in our lab. Typically you’ll want a production VNet, a DMZ VNet and maybe a storage, heartbeat or live migration VNet. We also created a Bastion Windows 10 VM on Prod VNet. Nevertheless, it can’t connect to anything yet, not even the real world for Internet. But how these VNets can communicate with each other if they’re completely isolated? Well, in a SDN infrastructure we’re going to have computers running on VMs to do that.
In some production implementations like VMware Cloud Director or System Center Virtual Machine Manager, we have various networking products. These products will do the job. Firewalls, routers, gateways, balancers and a lot more of great toys. We have an affordable SDN environment with Proxmox. We’ll need to implement many of these networking VMs more manually.
Let’s start with our routing and firewall VM for inter-VNet communication in our Cluster. We’ll choose OPNsense, which is one of the most widely open source firewall implementation nowadays.
You can download the latest OPNsense ISO from its web site:
Choose amd64 as system architecture and dvd as image type. The download is zipped, so you’ll have to unzip the file first.
Now go to one of your Proxmox cluster nodes and upload the unzipped file to the local repository, usually the ISO images container:
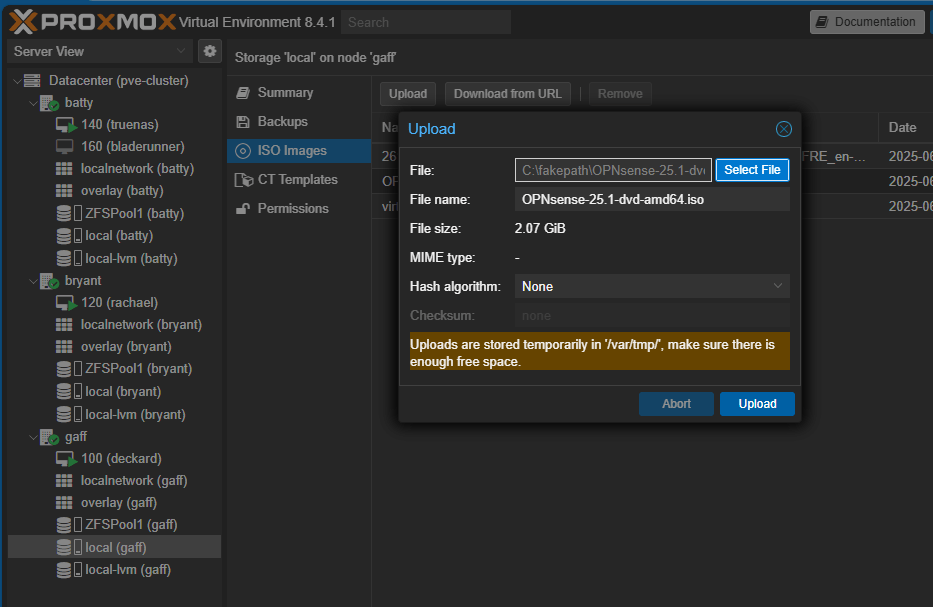
With the ISO image uploaded, click the Create VM button:
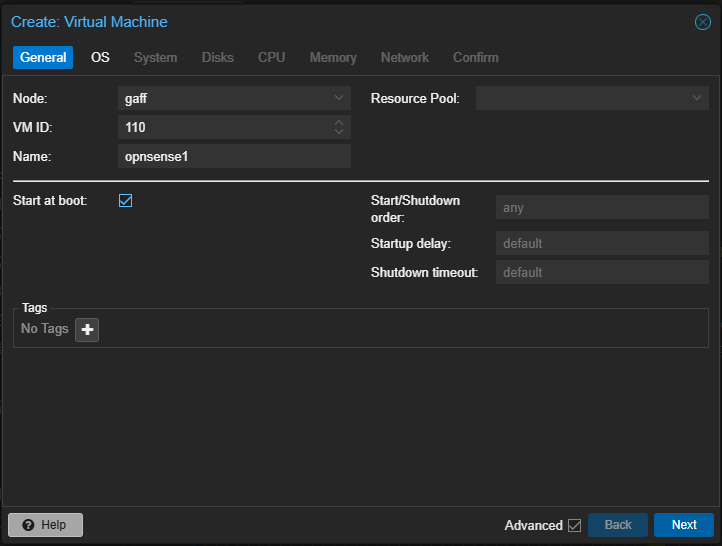
Select the node, a VM ID and a name for our firewall. Choose Start at boot because we want this VM to start always with the node. Click Next:
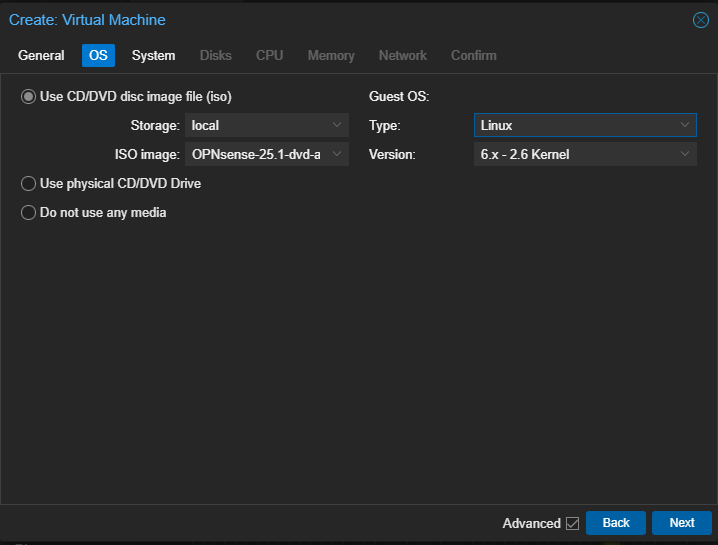
Choose the location of the ISO dvd image you earlier uploaded, select Linux type and kernel version. Click Next:
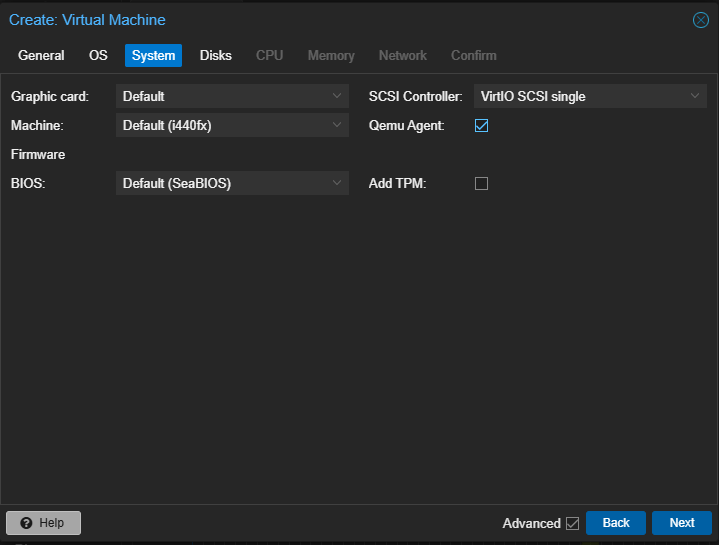
Select Qemu Agent and leave the rest as default. Click Next:

Select the storage location for your VM. Typically, choose local-lvm if you only have one disk in your physical node. Setting it to 32GiB is fine. Leave the rest as default. Click Next:
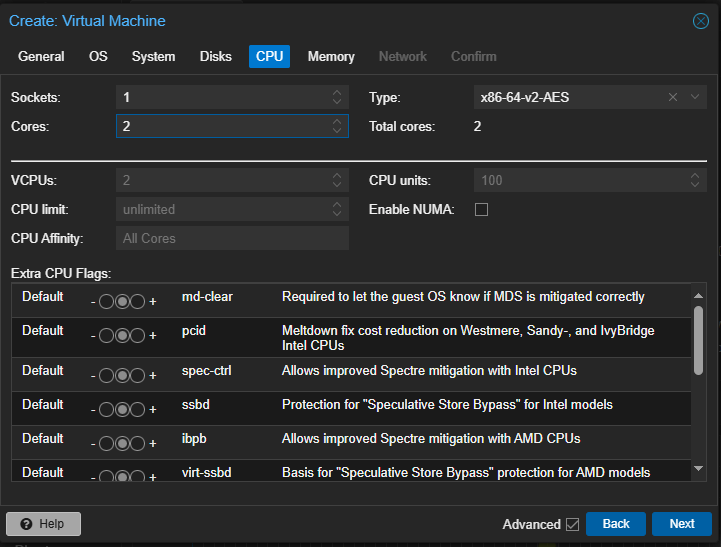
Select 2 cores and leave the rest as default. Click Next:
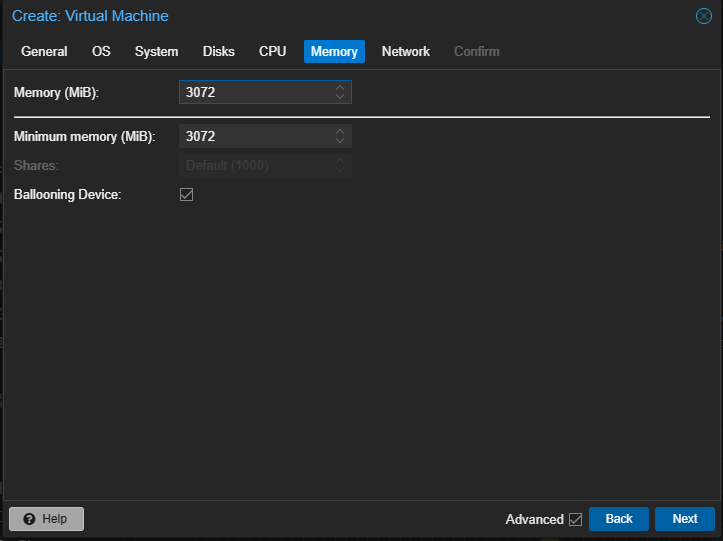
Select 3GiB of RAM and leave the rest as default. The recommendation is 4GiB but 3GiB works fine in our lab. Click Next:
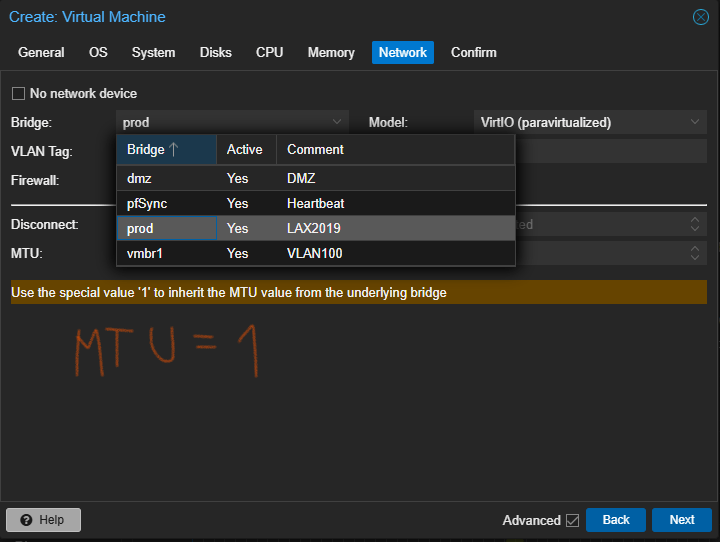
This is a firewall. You’re going to need a couple of NICs to connect to all your VNets. In this part of the wizard, we are going to choose the LAN interface of our firewall. Choose the first LAN you want to connect. For me it’ll be prod VNet.
Remember that this vnet is under a VxLAN zone with MTU of 1450. It’s very important to select MTU=1 to match this interface setting with the VxLAN configuration.
Don’t worry for the other NICs, we’re going to do that later. Click Next.
Review all the settings, don’t select to turn on your VM and click Finish. Your VM should create on the node selected.
Now we’re going to add our WAN interface. With your VM turned off, go to Hardware, click Add, Network Device:

Choose the Linux Bridge that is physically connected to the real world. In your case it should be vmbr0. Leave the rest as default. You don’t need to adjust the MTU settings. This bridge is a connection to a real network in your lab, which MTU is typically 1500.
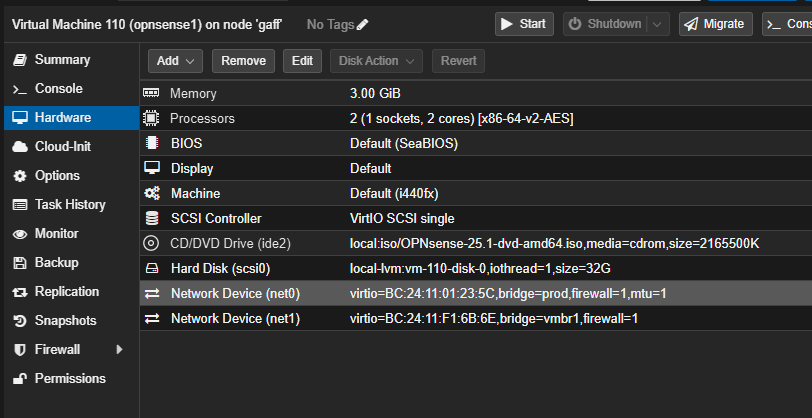
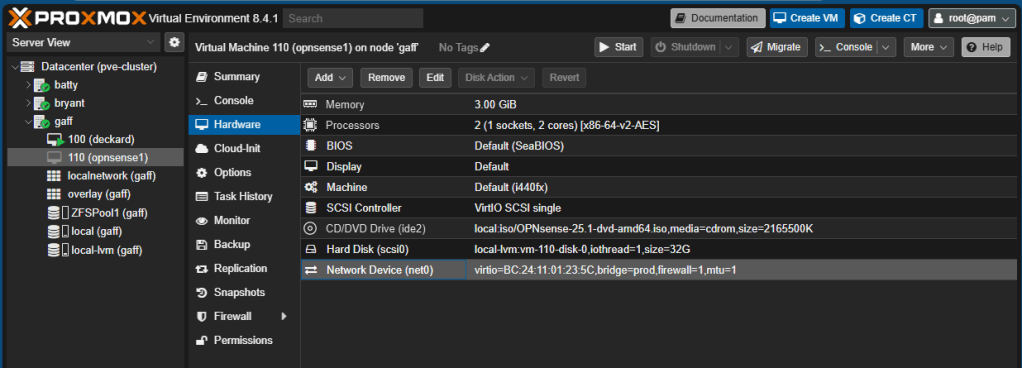
Your VM should have now net0 as LAN interface and net1 as WAN interface. Net0 connected to our VxLAN and net1 connected to the real world. We can add more NETs later, but this is enough for the first installation of our firewall.
Now click Console and click Start Now, the installation should start from the ISO image:
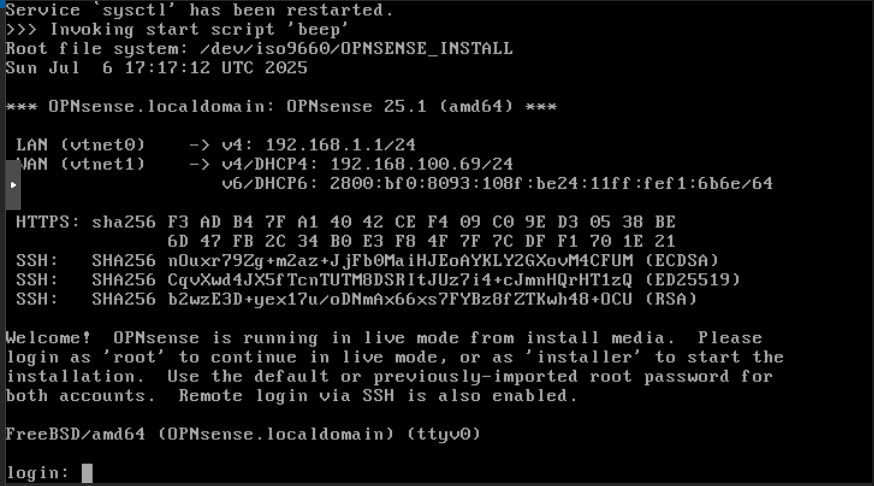
In login type “installer” and in password type “opnsense”. The installation process should start:
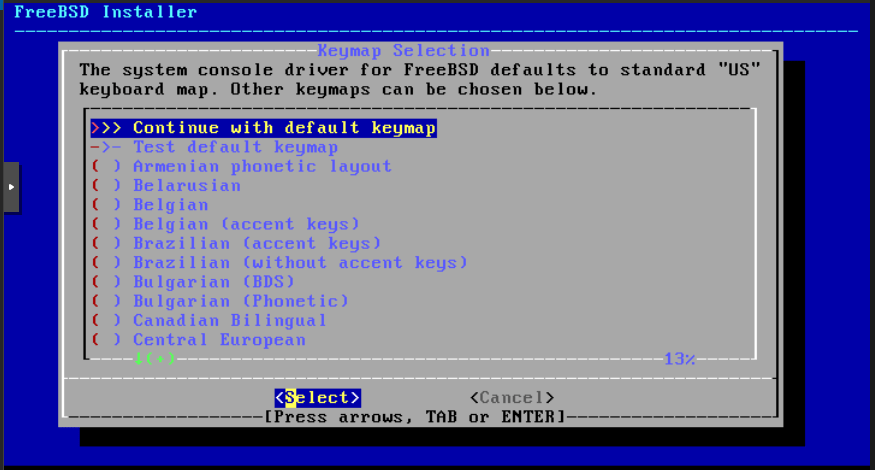
Choose the keyboard distribution that best suits you and click Continue…
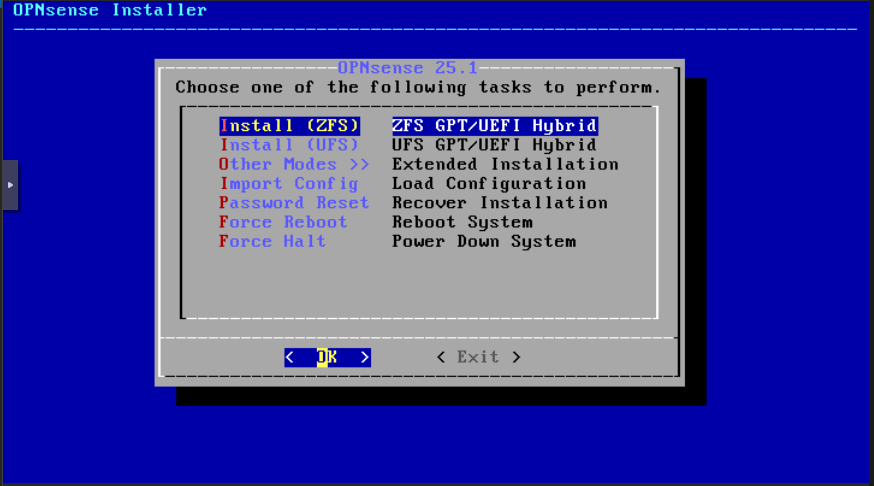
Leave ZFS, click OK:
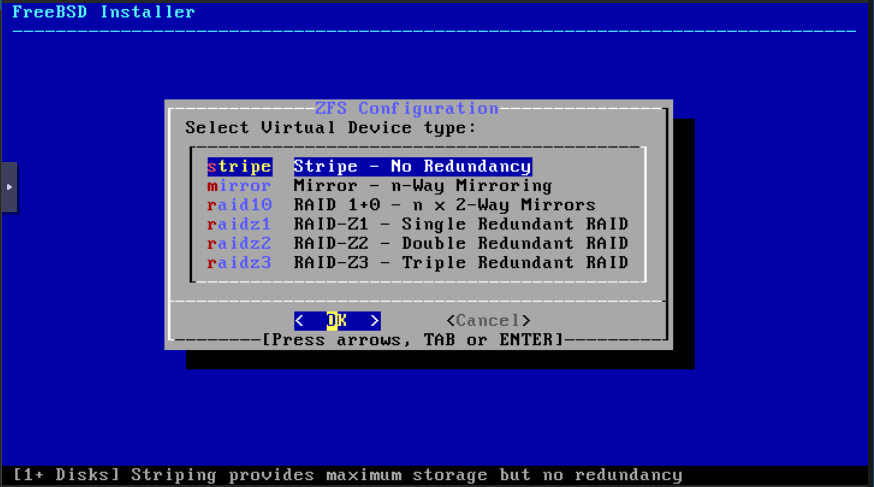
Leave Stripe. (Maybe you want to play with a mirror of two disks on the VM as we should do it in a real physical firewall) Click OK:
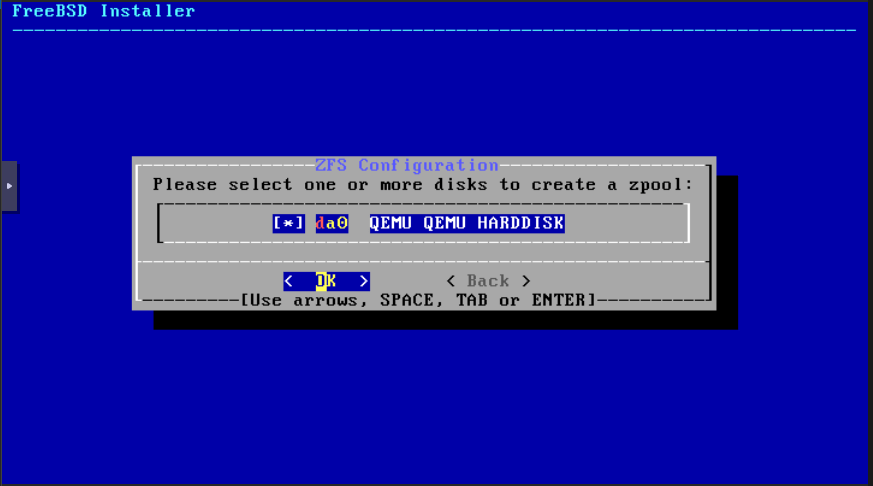
Hit the space bar to select the disk and click OK. The Proxmox guys are very concerned about loosing all your information on the disk. Thanks these thoughtful guys and click OK again:
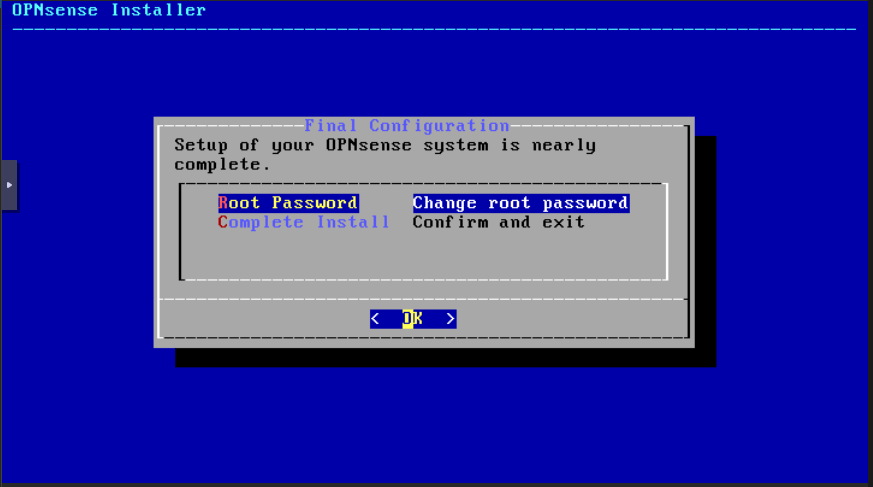
You can change the root password here or leave the default “opnsense” password and change it later. Have yourselves, select Complete Install and click OK:
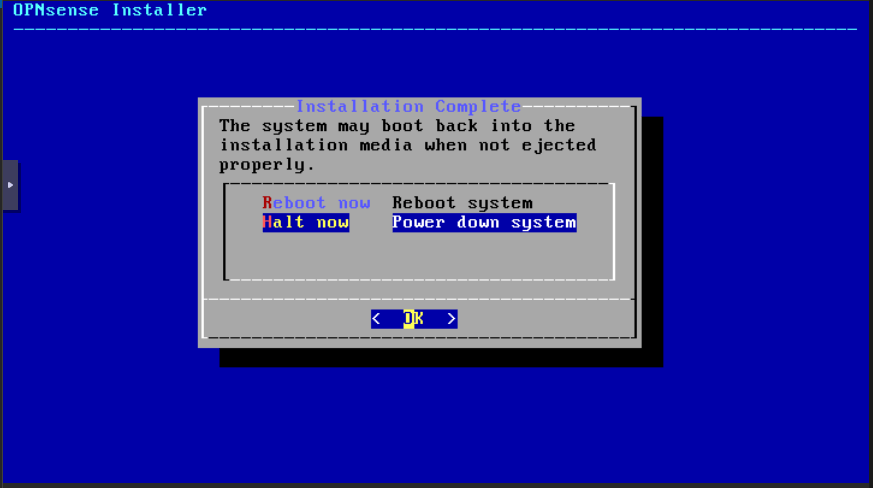
Select Halt now to power off your VM. Click OK:
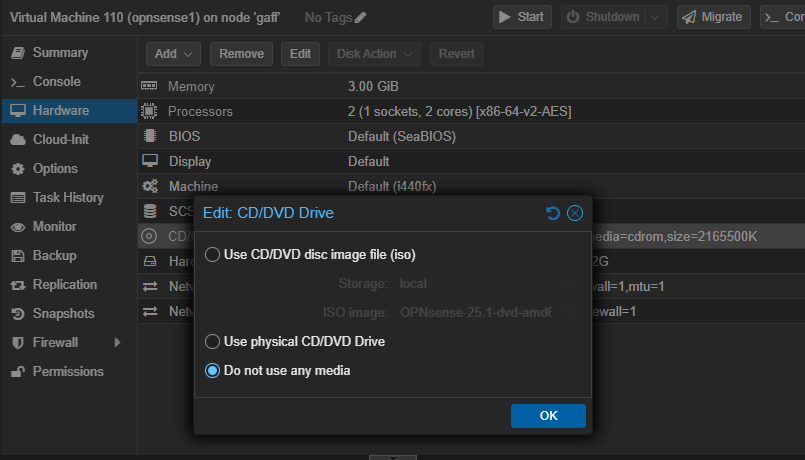
With the VM shut down, go to Hardware CD/DVD and remove the media. Click OK, start your VM and go to Console. You should see the VM booting and then the login prompted. Type now “root” and your <password> (“opnsense” if you didn’t change it during installation):
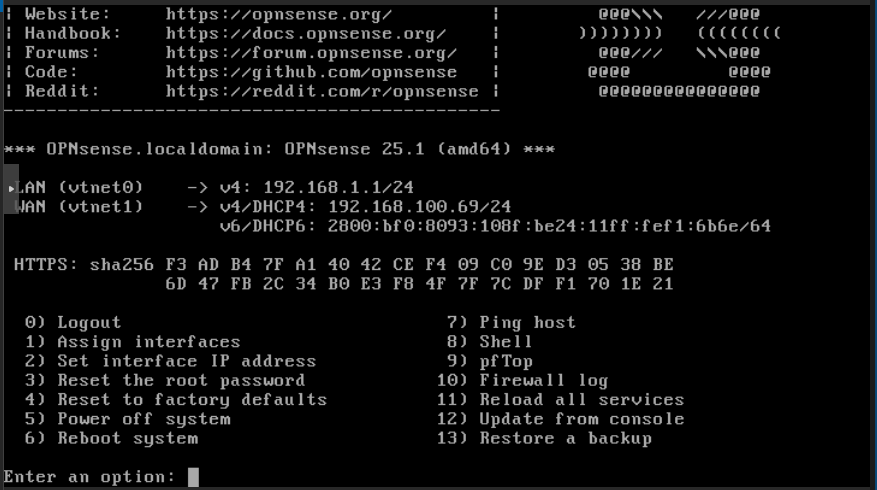
The correct interfaces are assigned. But, if you need to switch them, you can do it with option 1.
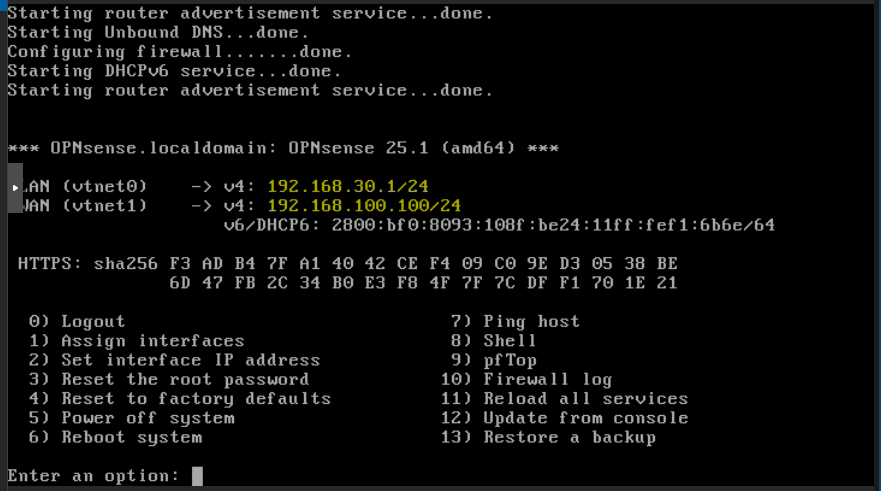
In my lab, my firewall have the next IP settings:
- LAN: 192.168.30.1 / 24 (no gateway or dns)
- WAN: 192.168.100.100 /24 (gateway and dns 192.168.100.1)
Select option 2 to set the IP configurations for the NICs. Only set the IP, network mask and gateway for now. You should avoid selecting DHCP for any of the NICs. Leave the rest values as default as we’ll deal with them later in the web console.
You should end with the NICs configured similar as the image, with the configuration that suits in your environment:
Select 0 to logout. Now we’re going to move to the web console.
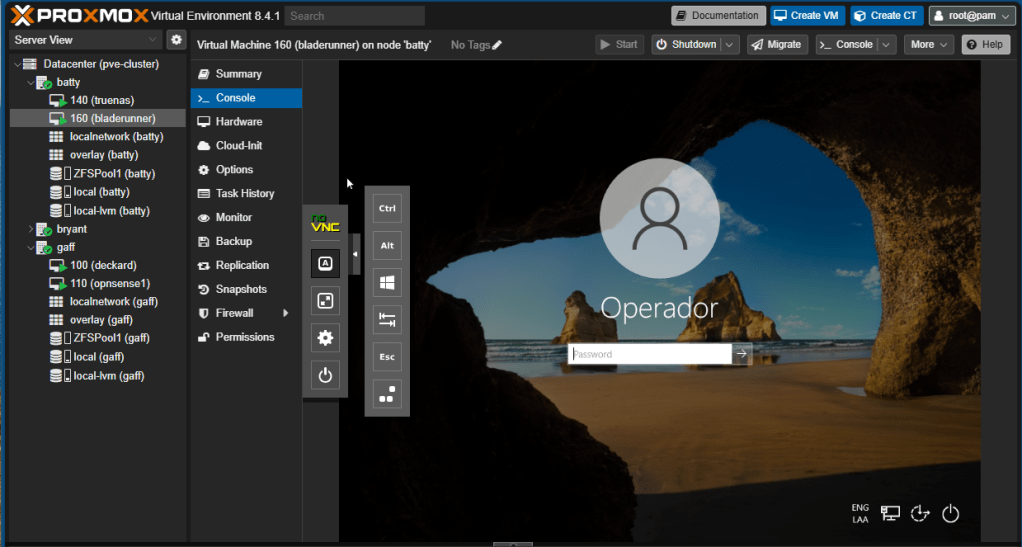
The bastion computer installed before is connected to the same LAN as our firewall. Thus, we’re going to use this workstation to set up our firewall graphically. Go to the VM in the corresponding cluster node, click Console on the menu and login to the bastion:
Open the browser and type the IP of the firewall’s LAN interface. The graphical web console shows. Login with root and your password:
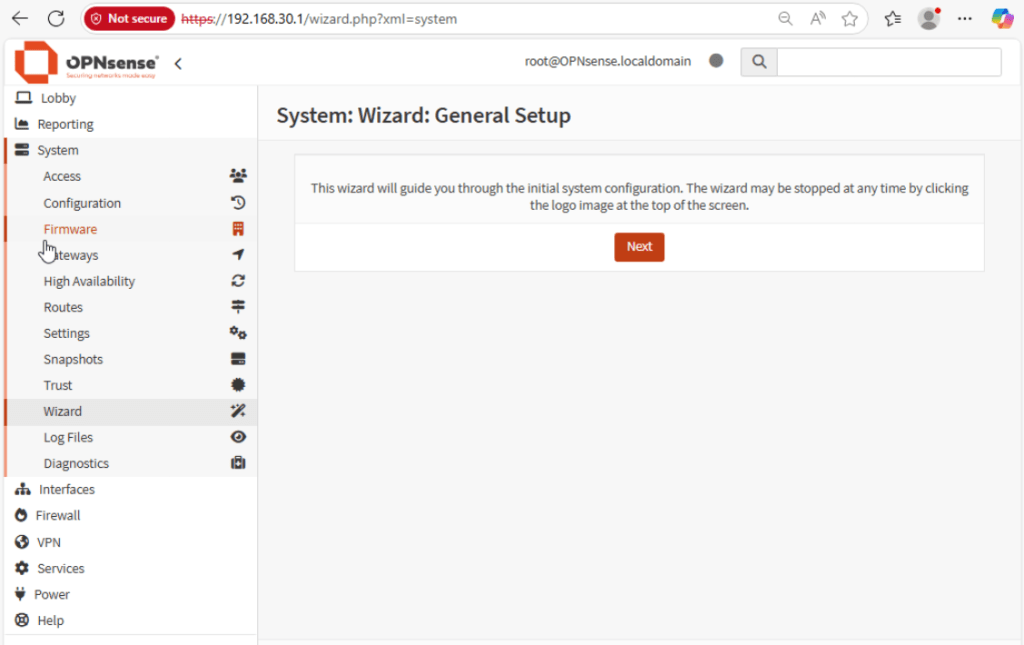
Click Next:
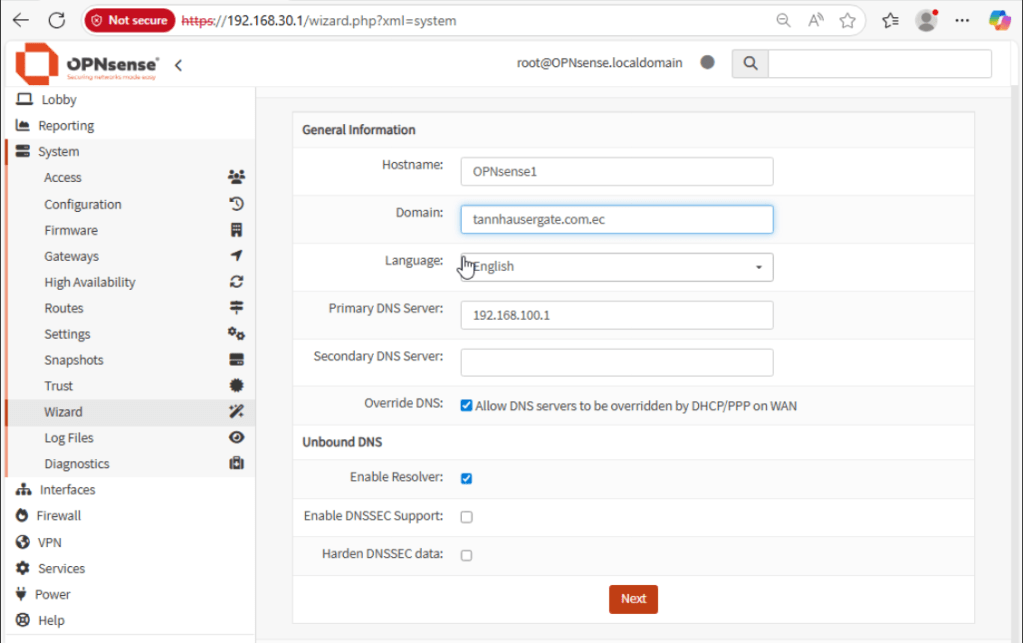
Give your firewall a name and domain. Select language, primary DNS server, and secondary DNS server as suitable. These should be servers reachable from the WAN interface, for example, ISP or Google DNS servers. Leave the rest as default and click Next:
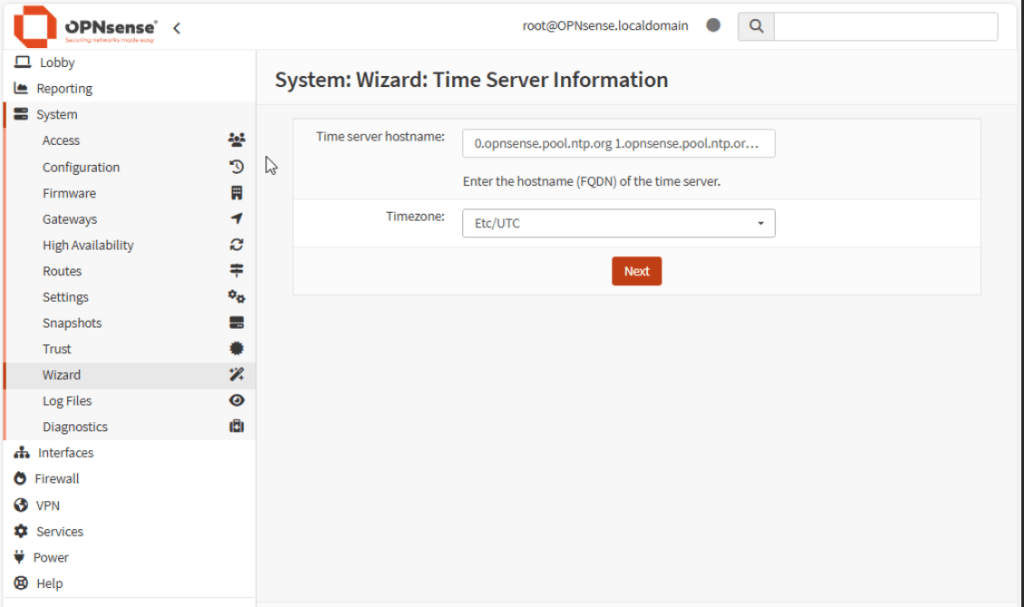
Select timezone, leave the time servers as default. Click Next:
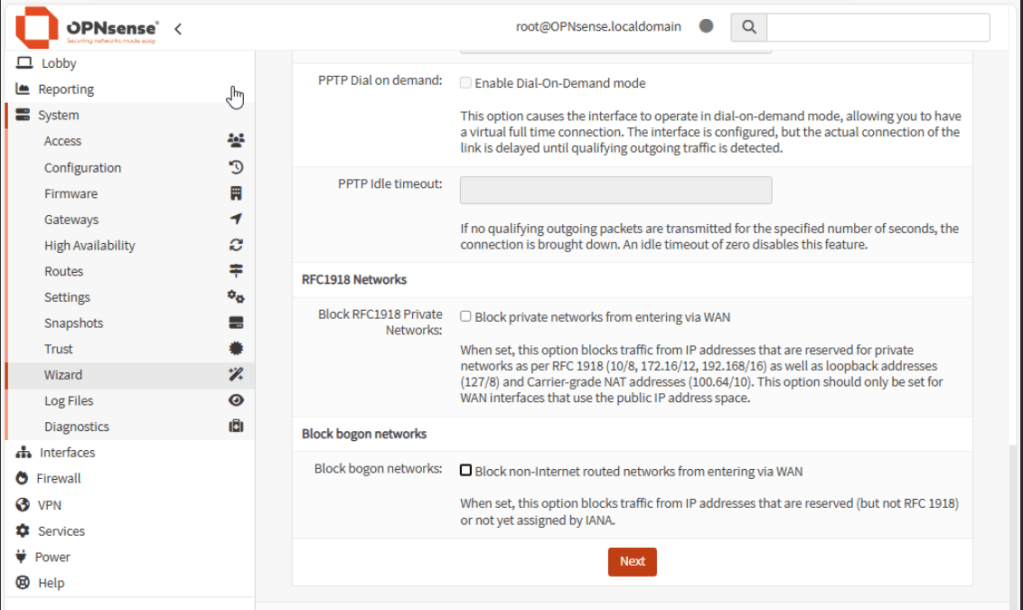
In the WAN configuration, re-check the IP Address, mask and Upstream Gateway. These values should match what you configured before in the text console. Clear the marks for RFC1918 and Block bogon.
Note: Leave the earlier values checked if the WAN interface is connected to a public network with a real public IP address.
Leave the rest as default. Click Next:

Re-check the LAN configuration and click Next:
If you want to change the root password you can do it from here. If you want to keep the current password, click Next and Reload to apply the configuration.
At this stage, the firewall should have connection to LAN and WAN. Check Internet on your bastion workstation. You should have connection now. (Open CMD and ping 8.8.8.8)
As best practice, we should update the firewall to its latest version. Click check for updates:
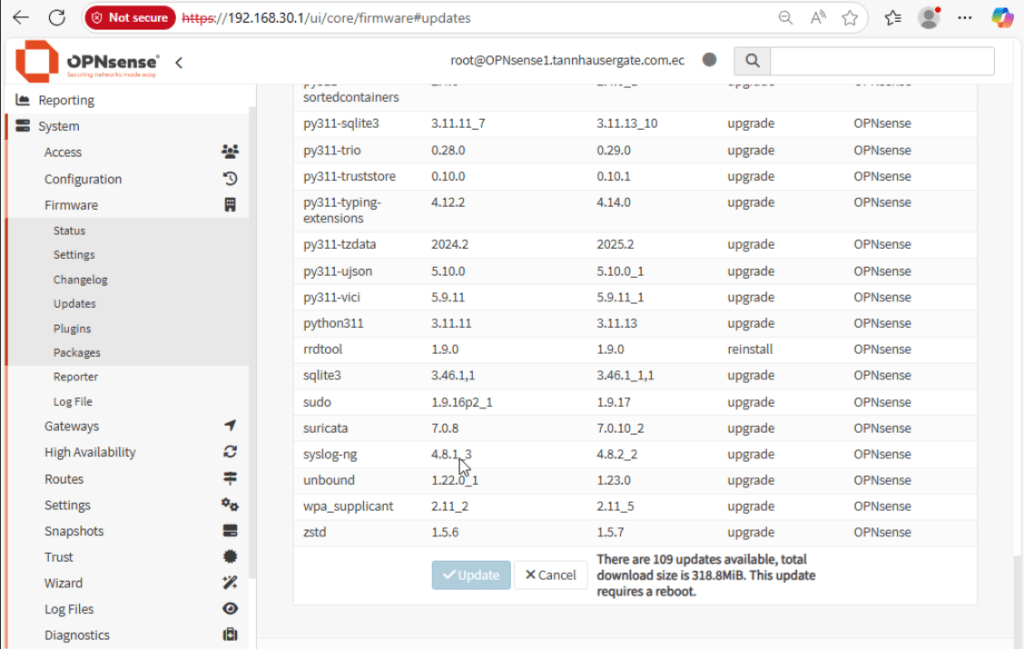
The firewall should detect missing updates. Click Update, and OK to update and reboot the firewall.
Once the firewall has rebooted and you’ve logged in again, there’s a couple of things we’d like to check. First, let’s turn off IPv6, we don’t need it for now. Go to Interfaces, select LAN interface and None for IPv6, clic Save and Apply Changes:
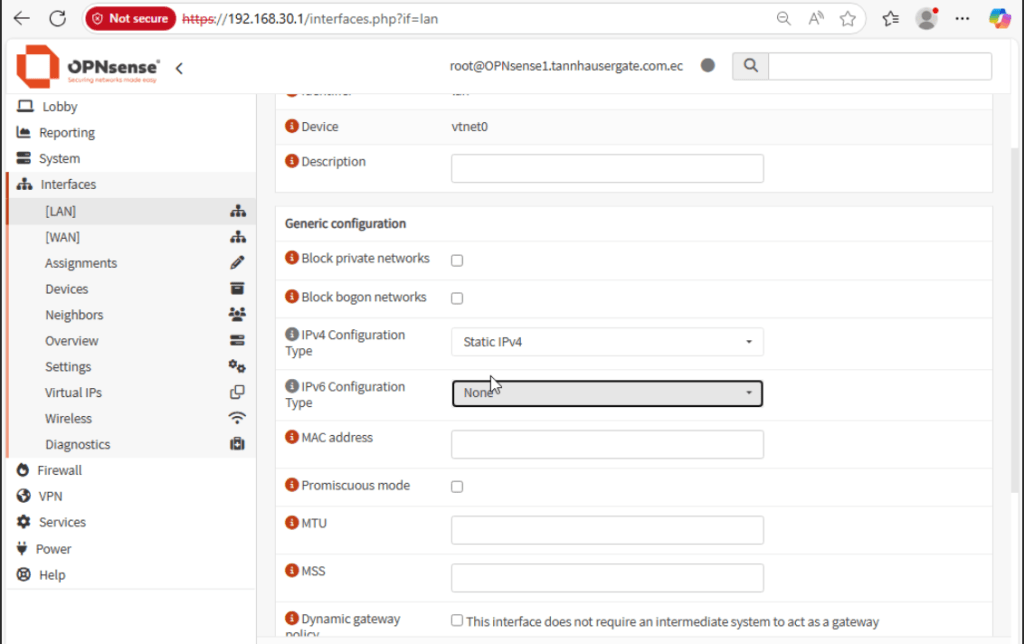
Repeat for WAN interface.
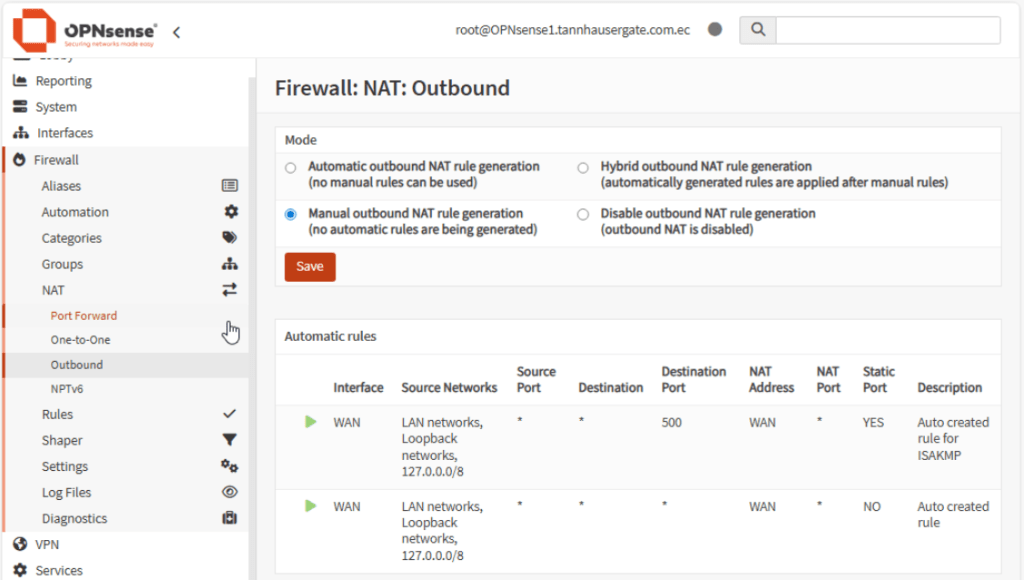
Secondly, we’re going to set up SNAT (source NAT) only for public destinations from LAN. We want all the traffic between LAN and WAN, both private networks, to be routed.
Go to Firewall, Aliases, click Add and create an alias for private networks and bogons as shown:
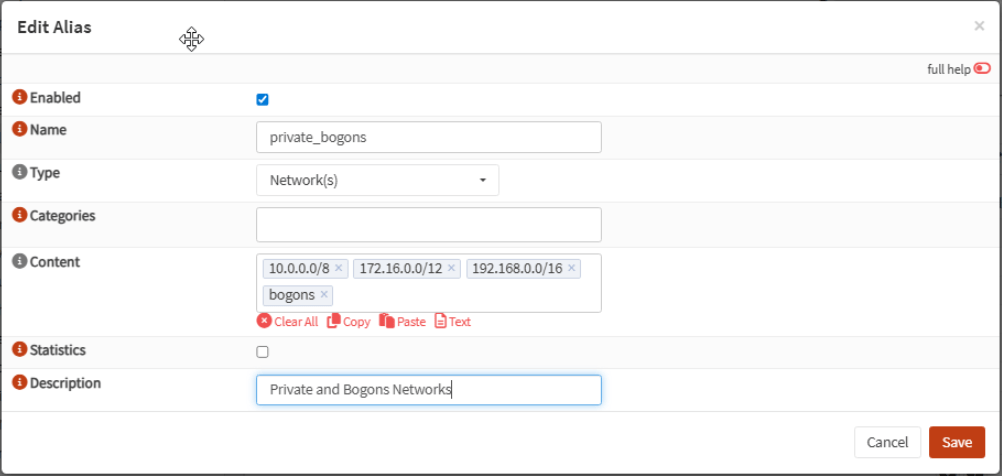
Click Save and Apply.
Now go to Firewall, NAT, Outbound. Click Manual and click Save and Apply Changes.
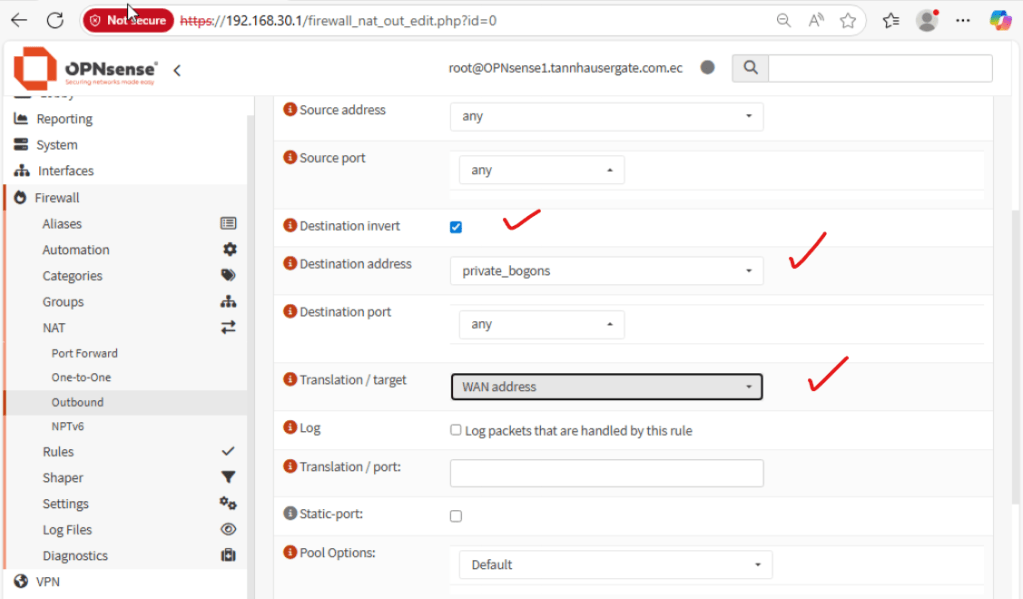
Click the red plus icon to your right. Click destination invert and in destination address select the alias you just created earlier. In translation / target, select your WAN interface. Leave the rest as default:
Click Save and Apply Changes, your Outbound rule should see like this:
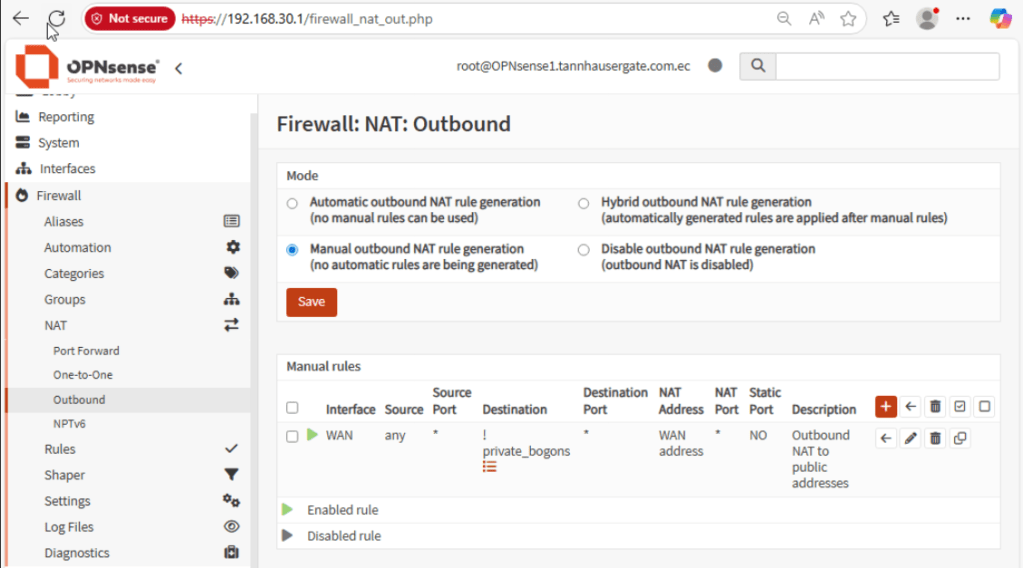
Your firewall now should only SNAT traffic to public addresses, everything else will be routed.
Finally, you should install QEMU driver for integration with Proxmox virtualization. Go to System, Firmware, Plugins and search for qemu:
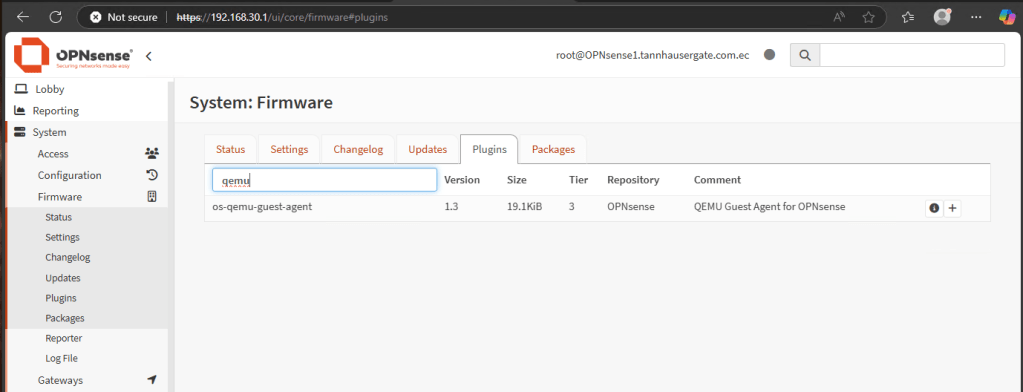
QEMU Guest Agent for OPNsense should show. Click the + button and reboot the Firewall. Check in Proxmox node, the IPs of your firewall should list:
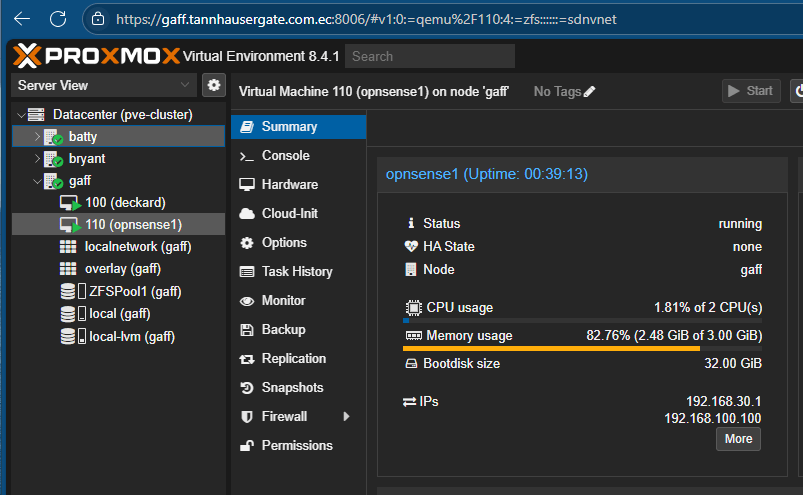
That’s it, your firewall is up and running and ready to route traffic on all VNets in our lab.
One more thing…
Until now we’ve been working with the bastion workstation from the Proxmox console. That’s fine for first configuration. But, we want to connect to the bastion from the WAN interface. We also want to connect to the firewall from the WAN interface. This is where my real workstation computer is. By default, everything is blocked from the WAN interface. We’re going to set up a rule to allow only my workstation computer to access my internal lab.
So let’s first create an alias for my workstation. Go to Firewall, Aliases, click the plus icon and type the information of your real workstation:
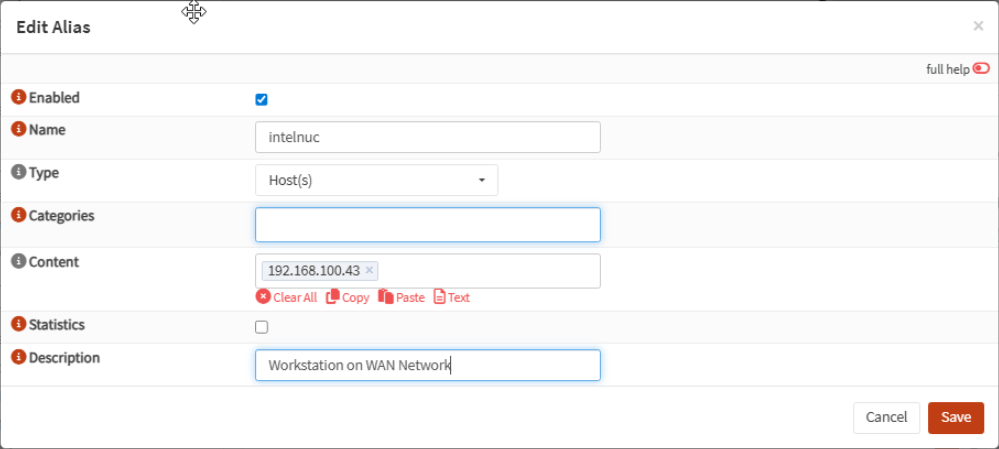
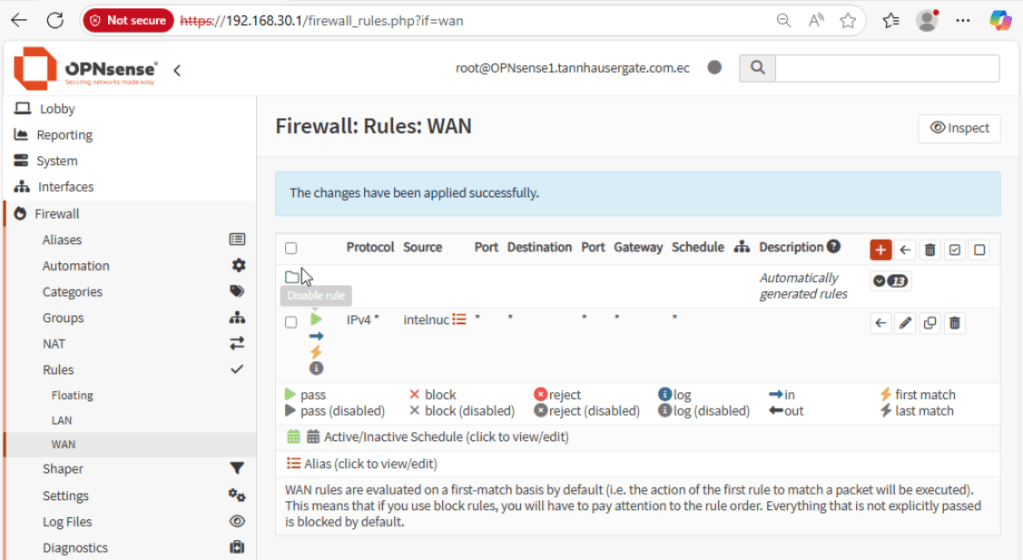
Click Save and Apply. Go to Firewall, Rules, WAN and notice there’s no rules. Nothing is allowed from the WAN interface to the inside. Click the red plus icon. In source, select the alias you just created. Select Save and Apply, your rule should see like this:
Now, on your real workstation, you have to create a static route to the LAN behind the firewall. Press Windows + R, enter “cmd” in the box and press Ctrl + Shift + Enter.
Enter a static route as shown:
route -p add 192.168.30.0 mask 255.255.255.0 192.168.100.100
Check the static route:
route print

Type “powershell” in cmd. Run these cmdlets:
Test-NetConnection <IP_of_bastion> -p 3389
Test-NetConnection <IP_of_firewall_WAN_interface> -p 443
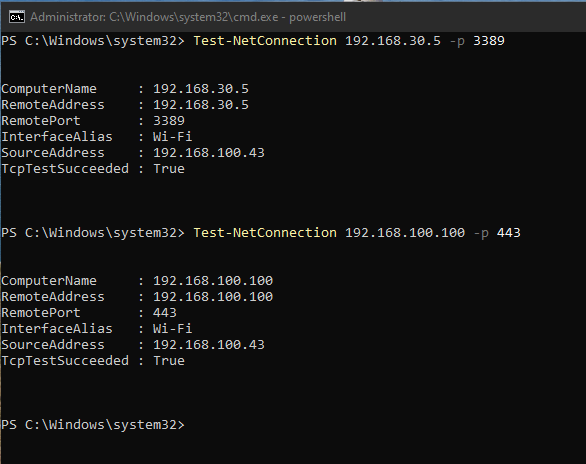
Now your workstation in WAN network can connect to the firewall and to the bastion.
That’s it for now. In the next post we’ll set up high redundancy between two OPNsense firewalls using CARP protocol:
Thanks, and don’t forget to leave your comments and suggestions.
Enjoy!

Leave a reply to Configure Redundant OPNsense IPsec Tunnels with BGP Between Two Sites (Part 2) – RacerX Steppenwolf Cancel reply