
Let’s continue with the installation of our Home Lab infrastructure. Now we will install a Windows Server Active Directory. It will act as an identity server. The server will manage authentication and authorization for many applications we will install later.
Active Directory has been around since the beginning of Windows Server back in the early nineties. With the popularization of TCP/IP protocol on LAN networks, companies adopted Windows NT Directory Services. Windows served as many file and application servers. This was an alternative to old IPX/SPX Novel Networks. Microsoft turned the tide with Windows 2000. They introduced a new Unix Kerberos and LDAP based directory service. It is called Active Directory. This is how we know it nowadays. Few changes have occurred in the past 25 years. Active Directory remains the most widely implemented directory service in many LAN networks.
New web, OAuth2, SAML, and OpenID based directories are emerging. Old LAN Active Directory is in its final years of use. Nevertheless, companies still use it and will continue to do so for many more years. New companies and applications are adopting the new implementations of cloud-based directories.
So let’s go to our hands on lab.
For the implementation of the Proxmox Cluster, check the earlier posts:
First, you’re going to need the ISO image of Windows Server 2025. You can download the evaluation image directly from Microsoft website:
Windows Server 2025 | Microsoft Evaluation Center
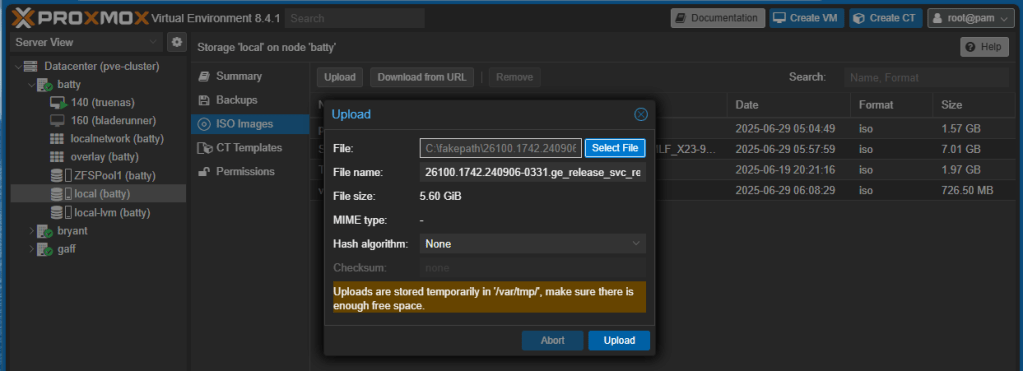
Now upload the image to one of the cluster members. Typically you’ll use the ISO Images container inside local storage directory:
Now click Create VM button to start the creation of the new VM:

Accept the default VM ID or choose one, give the new VM a name and click Next:
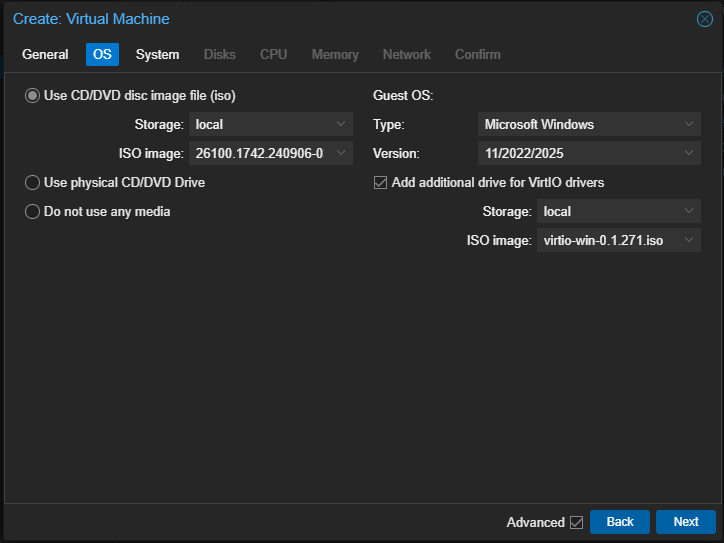
Select the recently uploaded ISO image of Windows Server 2025, select OS and Version, and select add additional drive for VirtIO drivers, you should have the ISO drivers image uploaded from earlier labs:
Click Next:

Select BIOS, Qemu Agent and the location for EFI and TPM Storage (We’ll use TPM for drive encryption). If you don’t have another block storage on your node, the only choice available would be local-lvm. Click Next:

Select the location and size of the OS disk. 32GiB is more than enough. Click Next:
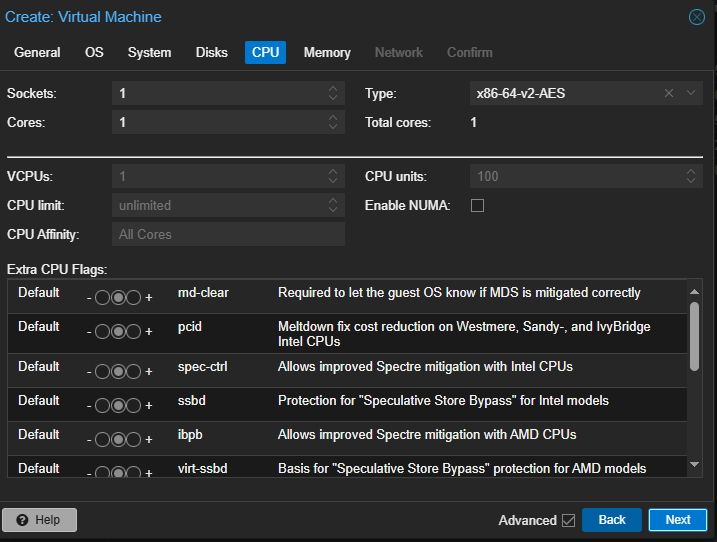
Accept defaults in CPU, click Next:
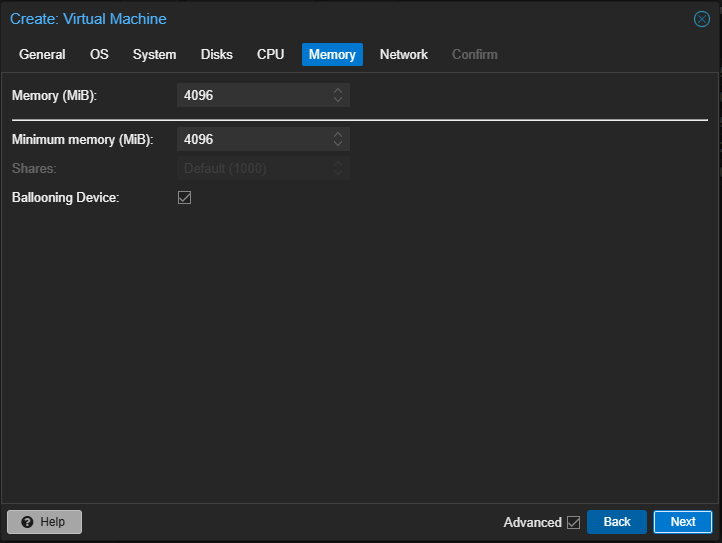
Accept defaults in memory (it runs OK even with 2GiB of RAM), click Next:

Select one of your VNets inside your VxLAN Zone.
Note: Remember that VxLAN uses MTU 1450, so you must type 1 in MTU field. (If you’re not using VxLAN and regular Linux Bridges connected to physical NICs, you can leave the default MTU).
Click Next:
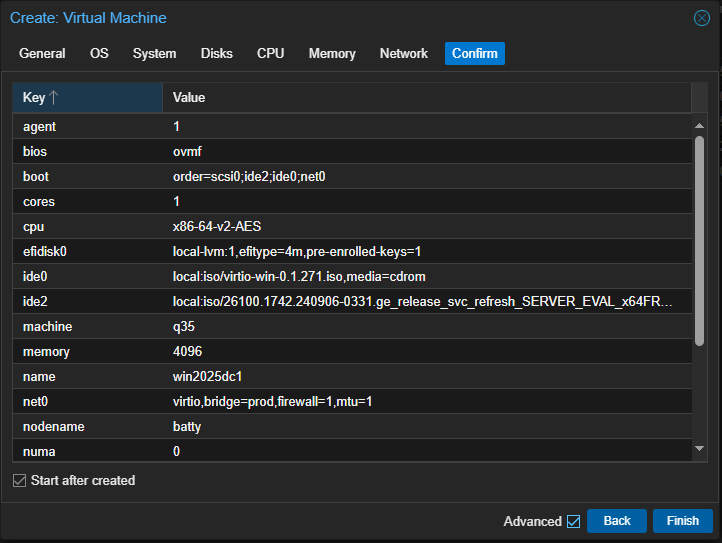
Confirm everything is OK, click Start after created and click Finish. Your new VM will start.
On the new VM, go to console and press any key to start booting from ISO image. (If you missed the “press any key” choice, turn off the VM and start again).

Select Language and Time format and click Next. Select Keyboard and click Next.

Select Install Windows Server, click I agree… and click Next:
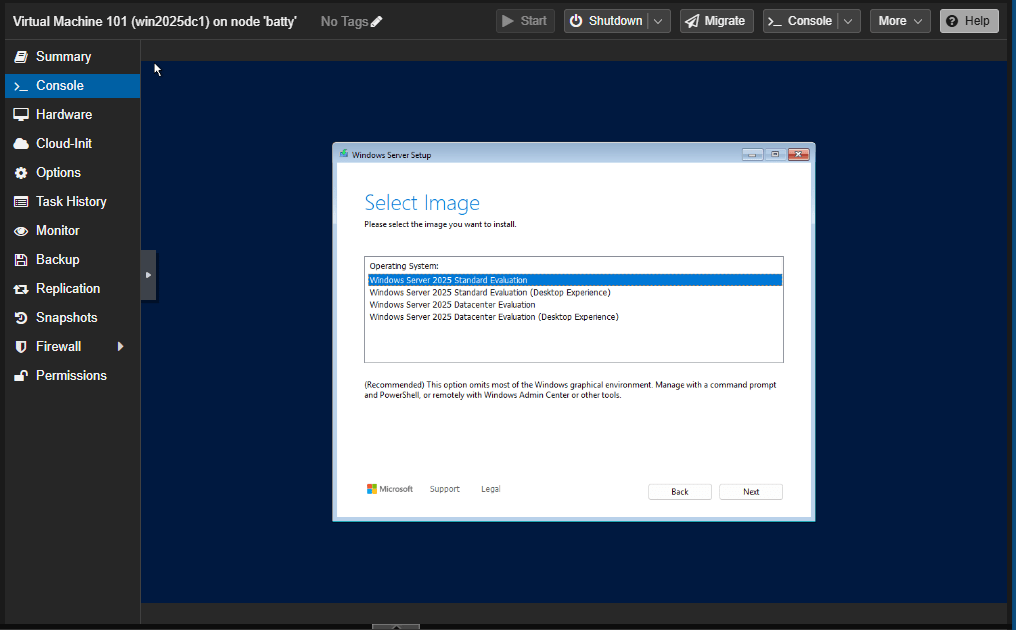
Depending on the ISO image, select either Standard or Datacenter edition. You can select Desktop Experience if you want, but the rest of this tutorial will be without Desktop Experience.
Note: On production environments, install Desktop Experience only if it’s absolutely necessary. Many Windows Server roles, like Domain Controller, Hyper-V, or File Server, don’t need Desktop Experience. These roles can be managed remotely.
Click Next, Accept EULA and click Next:

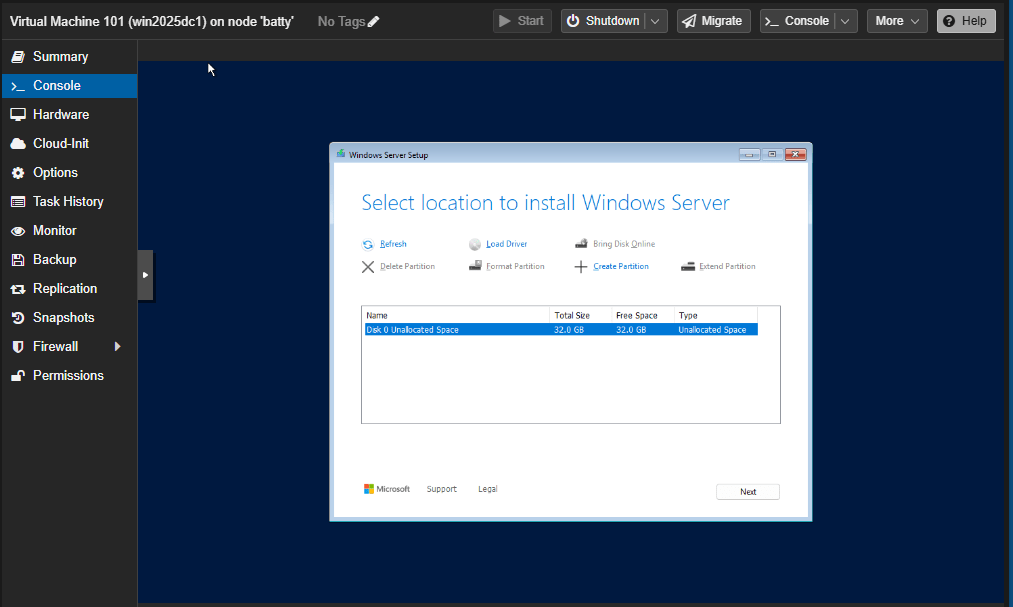
The installation will not detect the SCSI disk, click Load Driver, browse the virtio CD drive, \vioscsi\2k25\amd64 and click OK:

Select the Red Hat Virtio SCSI controller and click Install. Now the installation detects the scsi disk. Click Next:
Review the recap information and click Install. Windows Server 2025 will install and reboot.
OK, so now Windows prompts us with a command based version of Ctrl+Alt+Del.

Hit the corresponding button, and Windows tell us to change Administrator password. Choose a password and hit Enter.
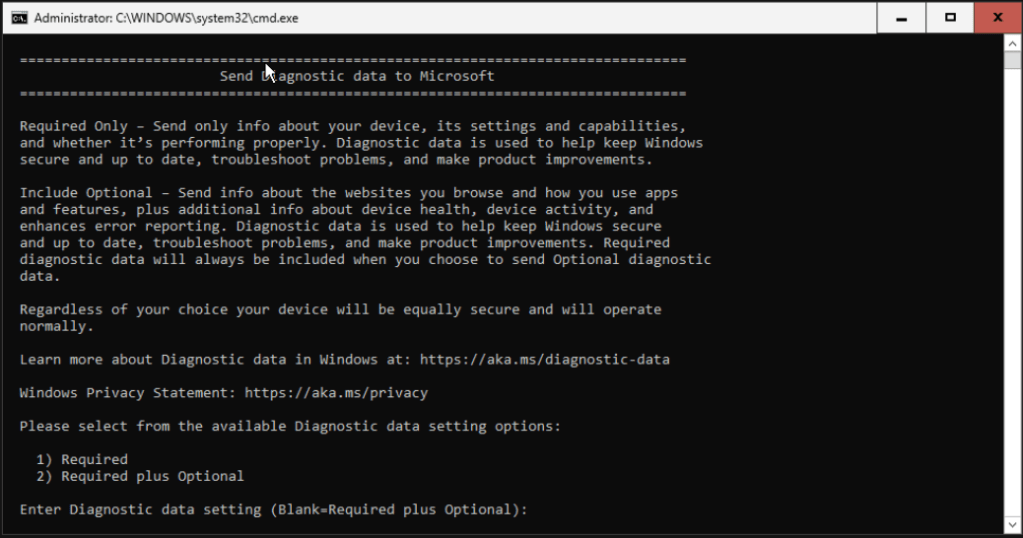
Choose what information do you want to send to Microsoft and hit Enter. Windows shows the SConfig menu where we will change basic information of our VM.
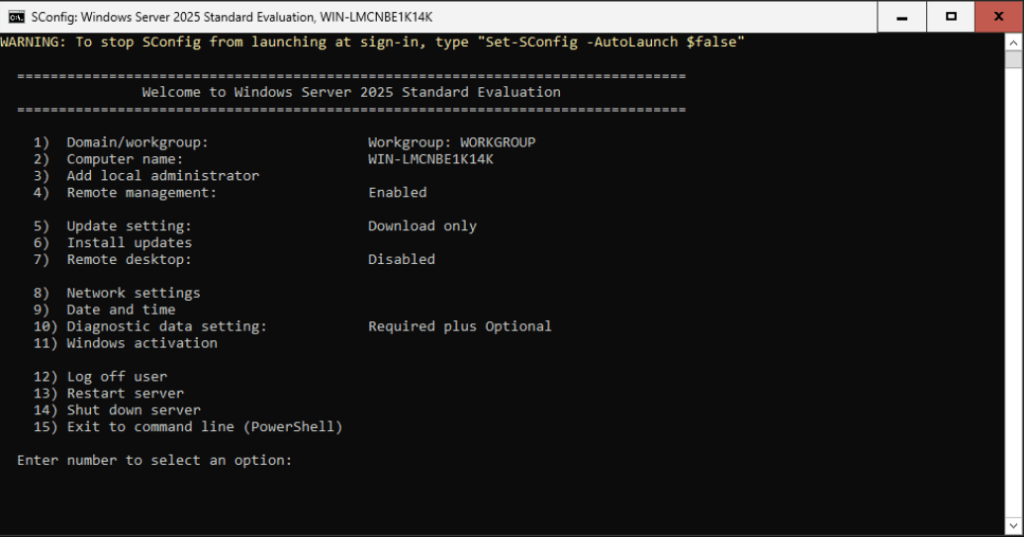
First of all, we need to install Virtio drivers to get along with the virtualization environment. Choose choice 15 to exit to command line and type the next commands:
D:\virtio-win-gt-x64.msi
Install the Virtio Drivers with the defaults options. Next and Install.
D:\virtio-win-guest-tools.exe
Install the Guest Tools with the default options. Next and Install.
Return to main menu with SConfig.
Now lets change computer name. Select choice 2, type the computer name you want and choose not to restart the VM.
SConfig shows the menu again. Now choose 9 to check Date and Time:
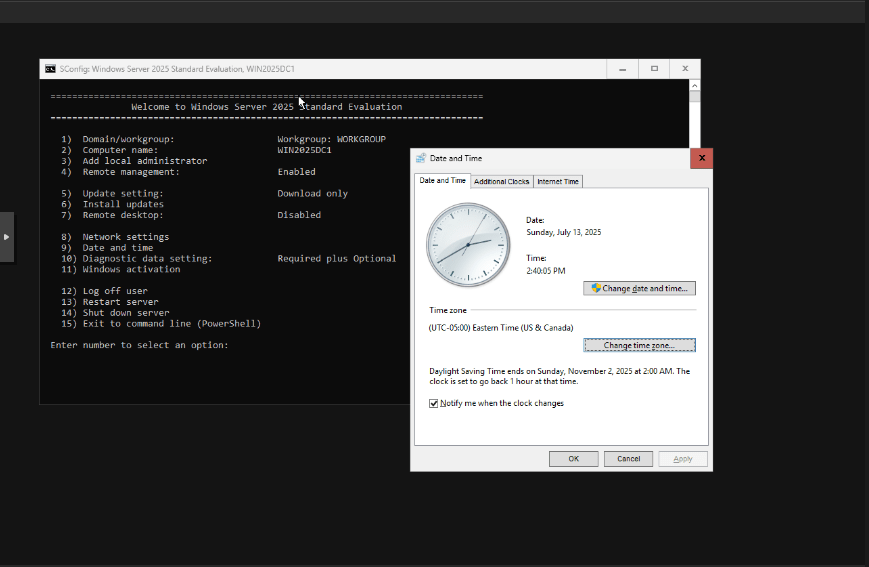
The classical Control Panel Date and Time windows shows and you can select your Time zone appropriately. Hit OK to return to SConfig. Now choose choice 13 to restart your VM.
Once the VM has restarted, login with your password and choose 8 to change Network Settings:

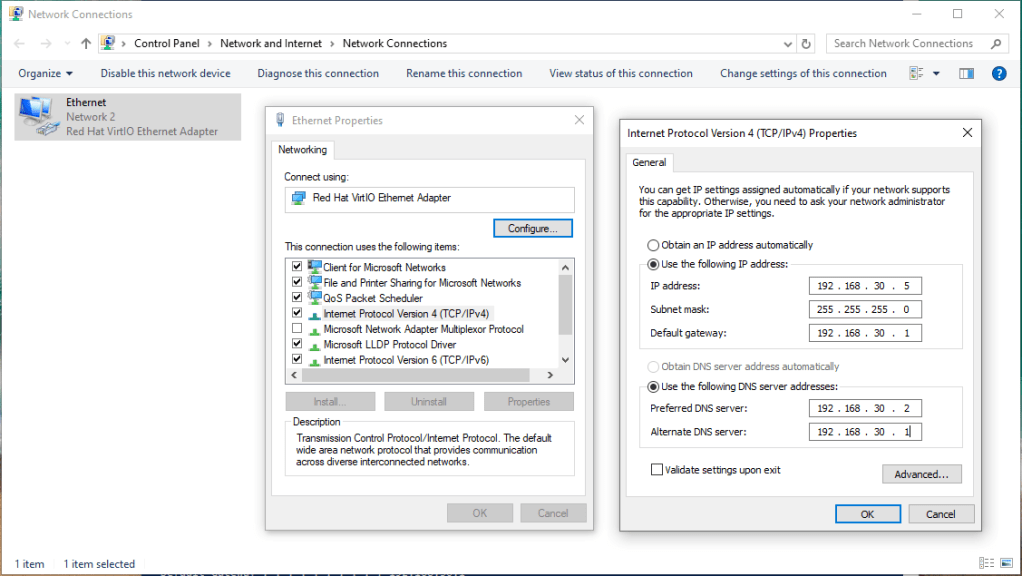
Your should see your NIC, select your adapter index, a new menu shows. Select 1 to change network adapter, select Static IP Address and type the corresponding IP information for your NIC:
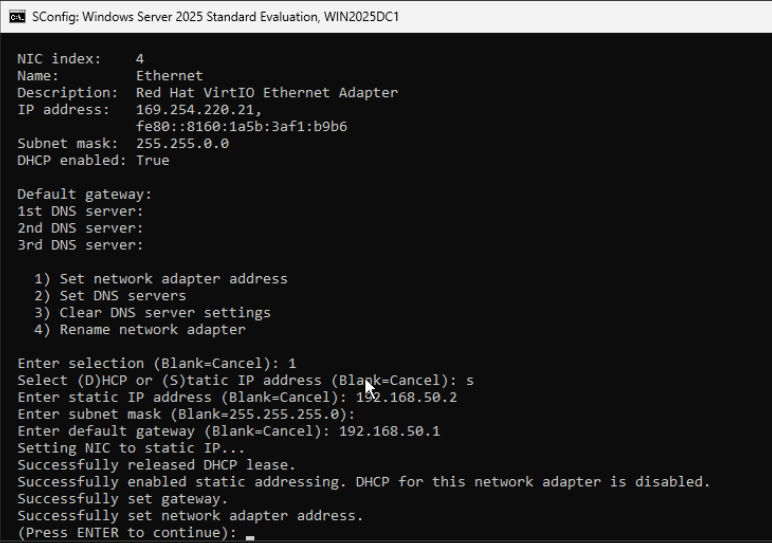
Hit Enter to return to the earlier menu. We don’t need to set up DNS for now as we’ll set up this computer as Domain Controller. Hit Enter again to return to SConfig menu.
Now choose 15 to exit to command line. We’re ready to install Active Directory:
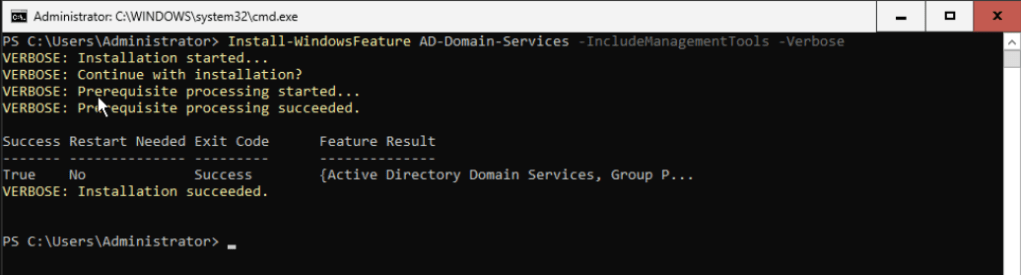
Type the next command:
Install-WindowsFeature AD-Domain-Services -IncludeManagementTools -Verbose
This will install the roles and features needed.
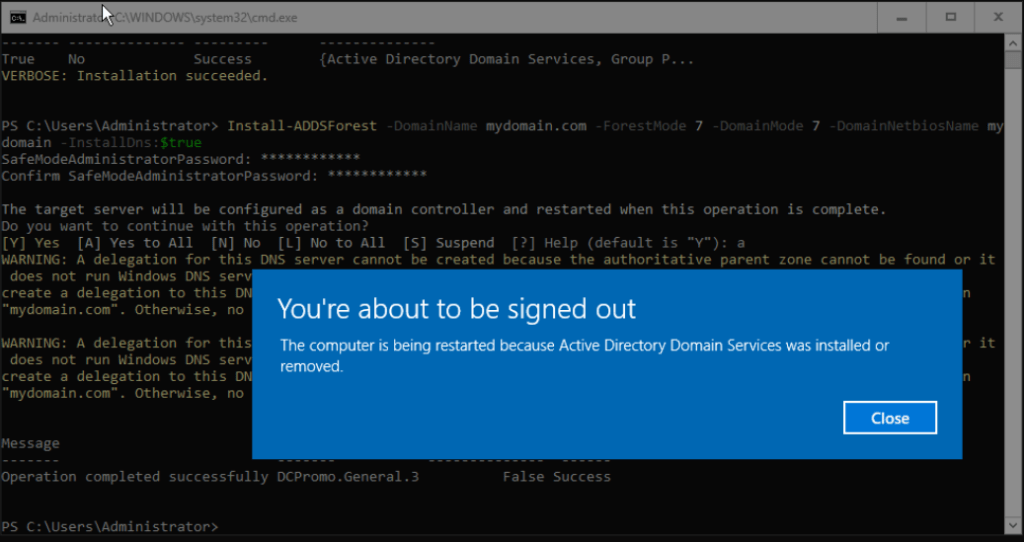
Now type:
Install-ADDSForest -DomainName mydomain.com -ForestMode 7 -DomainMode 7 -DomainNetbiosName mydomain -InstallDns:$true
Change mydomain.com with your new domain name. Check also Domain Netbios Name, typically matches the last part of your domain name. Choose a password for safe mode and select A to continue with the preparation of the new domain:
Note: We’re going to use Forest and Domain Mode 7, that’s it Windows 2016 compatibility. Windows Server 2025 includes a new Forest and Domain mode. Use 10 only if your are not planning to have Domain Controllers prior Windows Server 2025. This is the list of all modes:
- Windows2000Forest or 0
- Windows2003InterimForest or 1
- Windows2003Forest or 2
- Windows2008Forest or 3
- Windows2008R2Forest or 4
- Windows2012Forest or 5
- Windows2012R2Forest or 6
- Windows2016Forest or 7
- Windows2025Forest or 10
After the VM restarts, log in with your administrator details. You should see that now this VM is the first Domain Controller of your new Domain and Forest.

As a best practice, you should select choice 5 to install the latest updates.
One more thing…
We have a Windows 10 computer in the same network as our new Domain Controller. We use this workstation as bastion for administration. We are going to add this computer to our Domain.
To check the installation of the bastion computer check:
First we’re going to change default DNS in this workstations. It should be the IP of our domain controller:
Change the value according to your environment.
Next, in the workstation, open Powershell as administrator. Test the connection to the Domain Controller:
Test-Connection -ComputerName "win2025dc1.mydomain.com"

The connection to the DC should be OK. Now run the next command to add the workstation to the domain:
Add-Computer -DomainName "mydomain.com" -Credential (Get-Credential) -Restart

The command will ask you for credentials, type <netbiosdomainname>\administrator and your password. The computer should reboot automatically.
Now the workstation is in the domain and you can login with domain credentials. Enter with <netbiosdomainname>\administrator and your password. You should login correctly.
That’s it for now. In the next post, we’ll install administrator tools and consoles. These will be placed in our bastion workstation to remotely manage our domain.
Thanks and don’t forget to leave your comments and suggestions.
Have fun!

Leave a reply to Create a Shared Storage Hyper-V Cluster: Complete Installation – RacerX Steppenwolf Cancel reply