

We are going to install our classical Hyper-V Cluster with shared storage. In earlier posts, we installed an iSCSI Server on a TrueNas VM. Now, we can install the cluster and use our nodes as iSCSI initiators. This setup allows them to run VMs in the cluster shared storage. It also enables the ability to live migrate these VMs.
Check how we installed our TrueNas iSCSI Server:
So, let’s see this in action. We are going to need at least two Windows Server Datacenter Nodes.
You can check this early post to install Windows Server 2025 Datacenter (No Desktop Experience) in our Proxmox Cluster. Refer only to the first part where we install only the OS:
Once you have installed the OS, join the nodes to the domain and install all available updates.
This is the configuration I’ll use on my nodes:
Node 1
- Name: PRIS
- Domain: lax2019.tannhausergate.com.ec
- NIC1 (Administration): 192.168.30.6 /24
- NIC2 (Heartbeat): 10.130.1.6 /24
- NIC3 (Storage): 10.130.0.6 /24
- NIC4 (Production): No configuration
Node 2
- Name: LEON
- Domain: lax2019.tannhausergate.com.ec
- NIC1 (Administration): 192.168.30.7 /24
- NIC2 (Heartbeat): 10.130.1.7 /24
- NIC3 (Storage): 10.130.0.7 /24
- NIC4 (Production): No configuration
Storage
- Name: Truenas
- NIC1 (Administration): 192.168.30.7 /24
- NIC2 (Storage): 10.130.0.4 /24
Cluster
- Name: Cluster1
- NIC1 (Administration): 192.168.30.10 /24
Note: We’ll use 4 nics in this demo so we can simulate a real production scenario. If you haven’t done it yet, add three more nics to your VMs in Proxmox. Attach them to the appropriate VxLAN VNet. It’s strongly recommended you label your NICs properly. Don’t leave the default name as “Ethernet 0,1,2…etc”
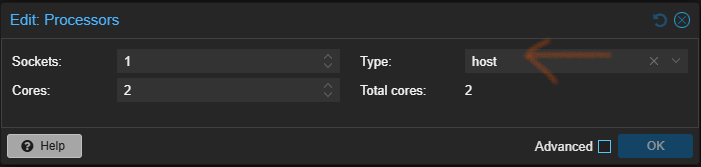
Note: In Proxmox, you must set up Processor as host to allow nested virtualization on the VMs:
Once your VMs are all set, we can move to our bastion management workstation to continue with the installation.
You can use Server Manager, Powershell or Windows Admin Center to connect remotely to your nodes. In this earlier post we show how to prepare our bastion:
Open Server Manager:
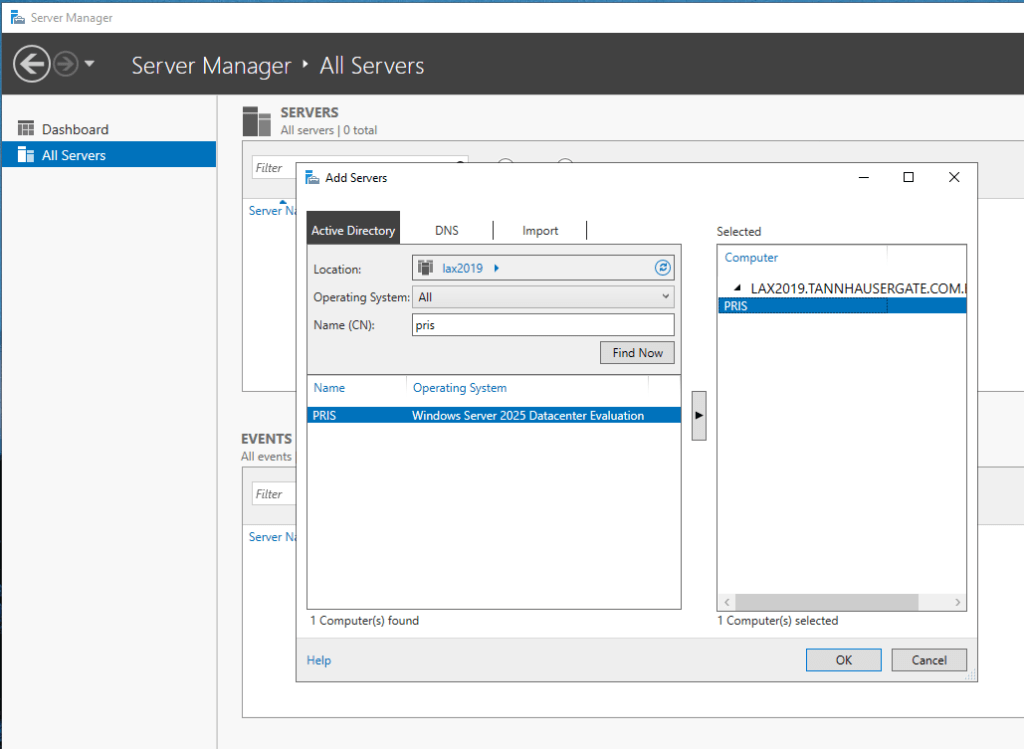
Right click All Servers and add your first node. Click OK:
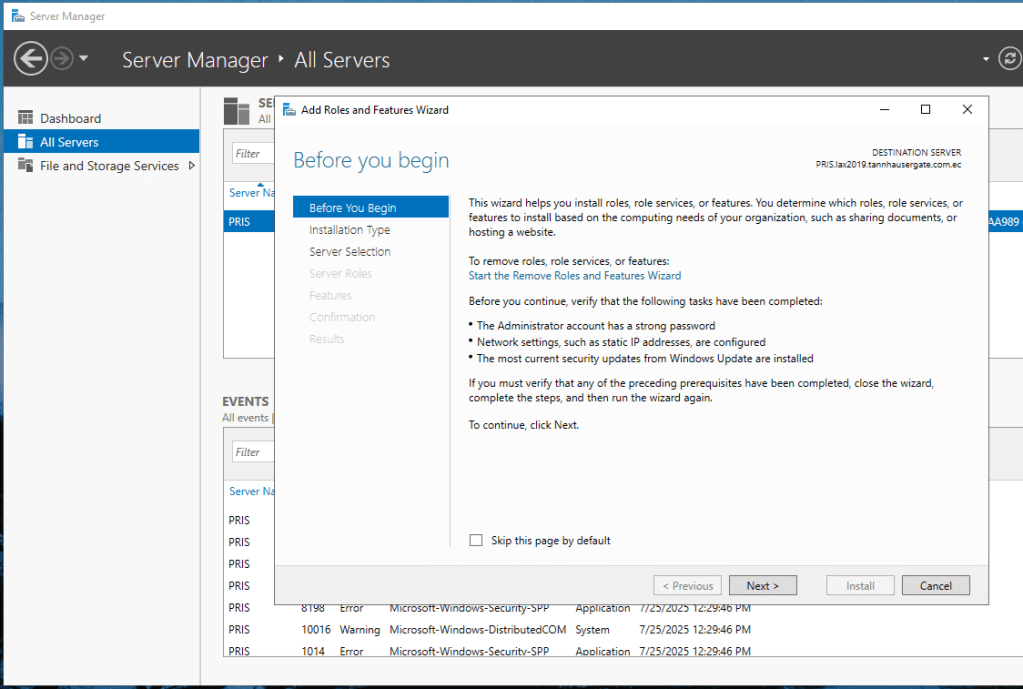
Click Manage in the upper Menu and click Add Roles and Features. Click Next four times until you get Roles:
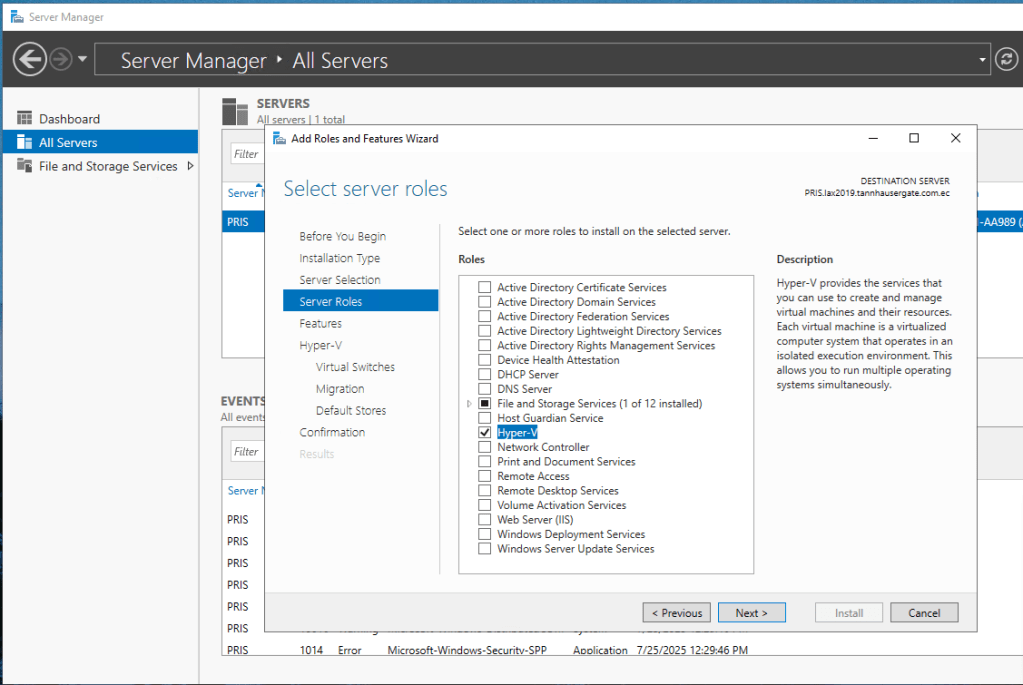
Click Hyper-V and click Next:
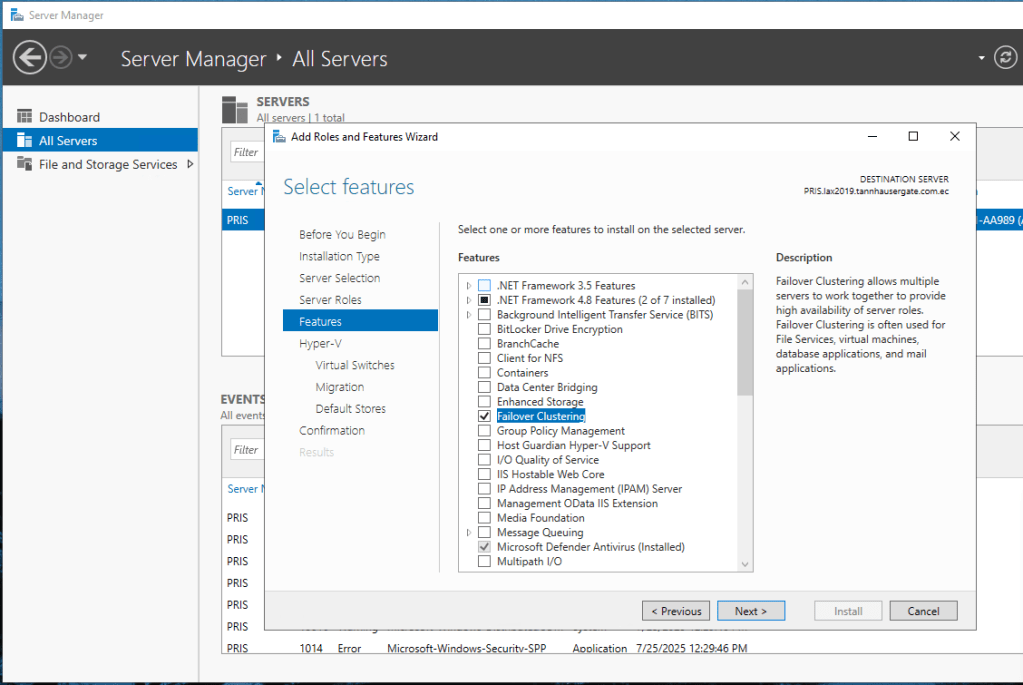
Click Failover Clustering and click Next:
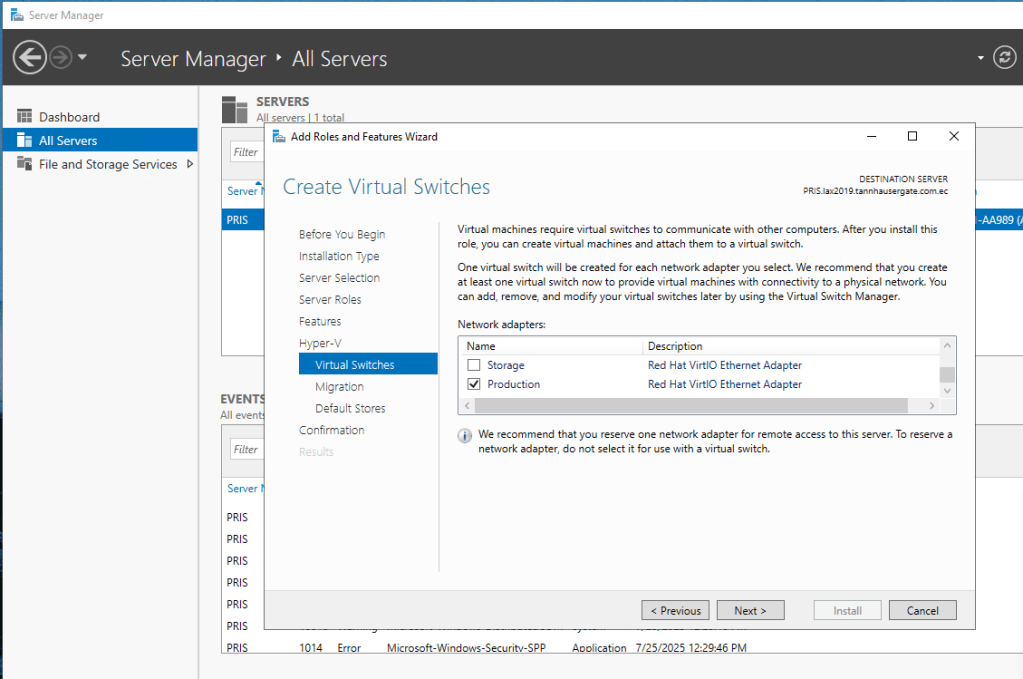
On Hyper-V Virtual Switches, select your last NIC (Production NIC). This nic should be reserved for VMs only. Click Next:
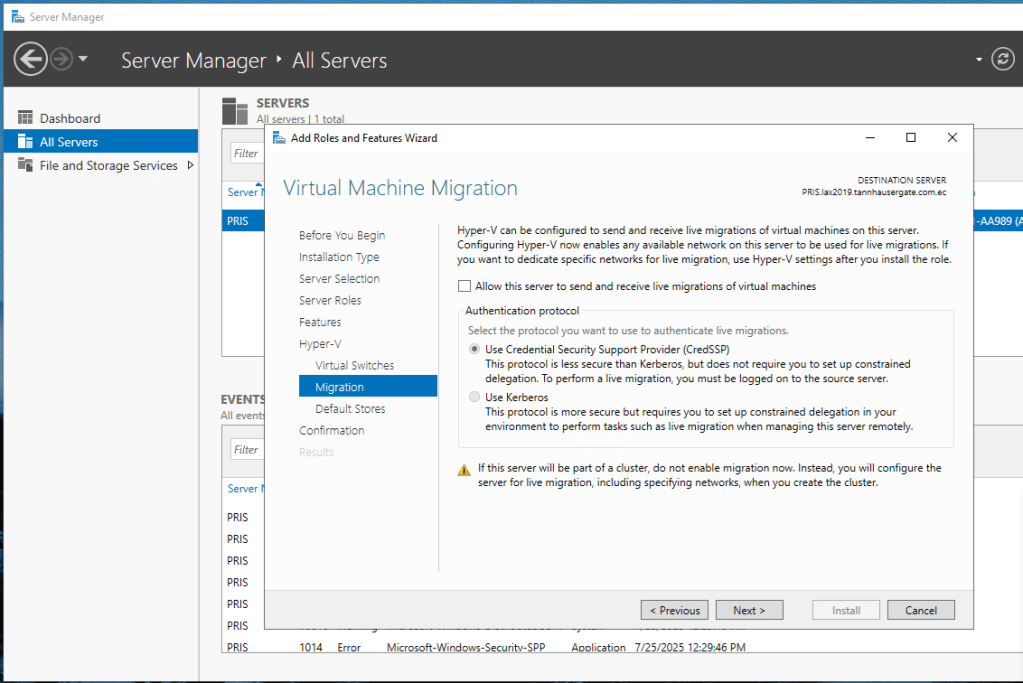
Leave migration as default, Failover Cluster Manager will handle this. Click Next:
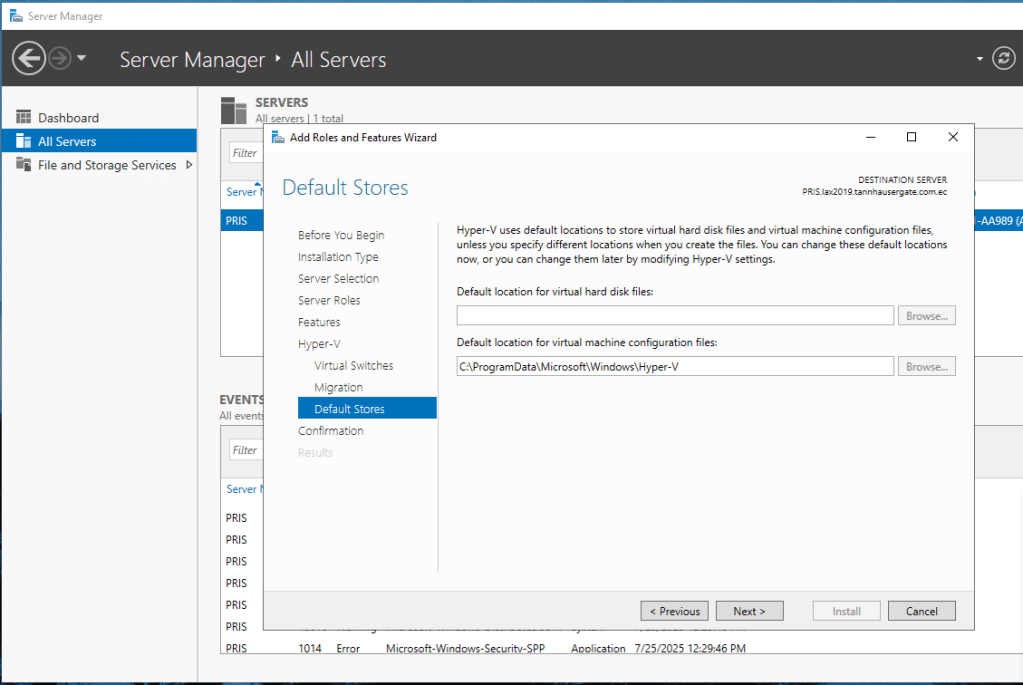
Leave default stores as default, we’ll also change this later. Click Next:
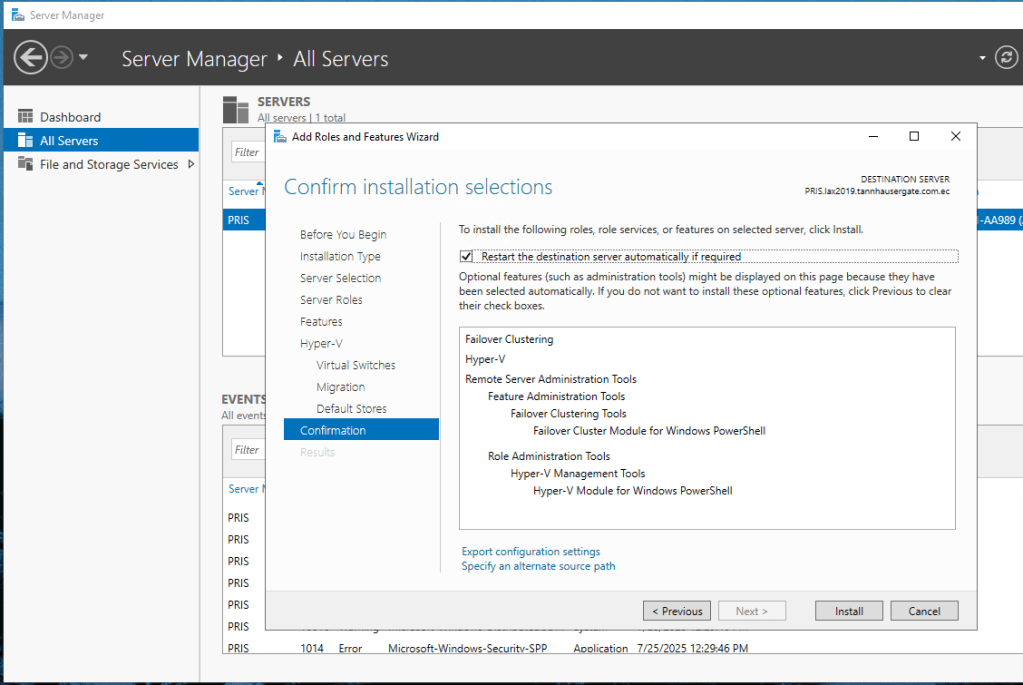
Check Restart server and click Install and Close. The installation of features and roles will start in this node.
Now, repeat for the other node.
Once both nodes have restarted, let’s check hyper-v network configuration. Open Hyper-V Manager and add one of your nodes:
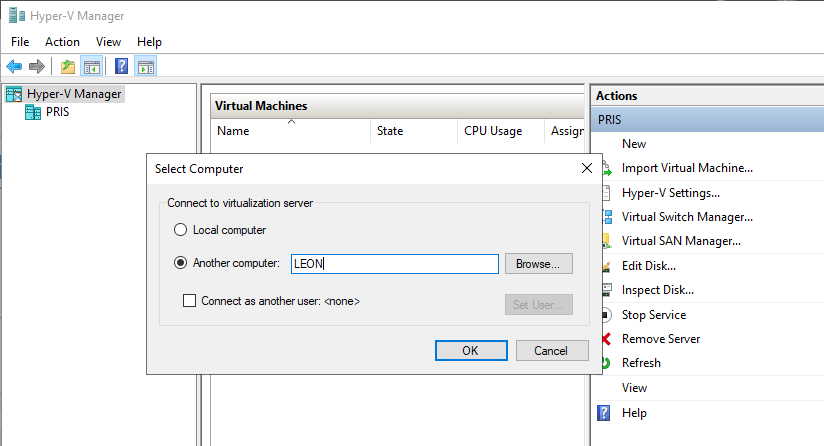
In the right menu, go to Virtual Switch Manager and check the default switch the installation created:

Rename the switch with something more appropriate and clear Allow management operating system…
Note: As you have a dedicated NIC for administering the node, we don’t need to share the network adapter.
Click OK and repeat with the other node. You must use the same switch name for on both nodes.
Now lets add the iSCSI shared storage disks.
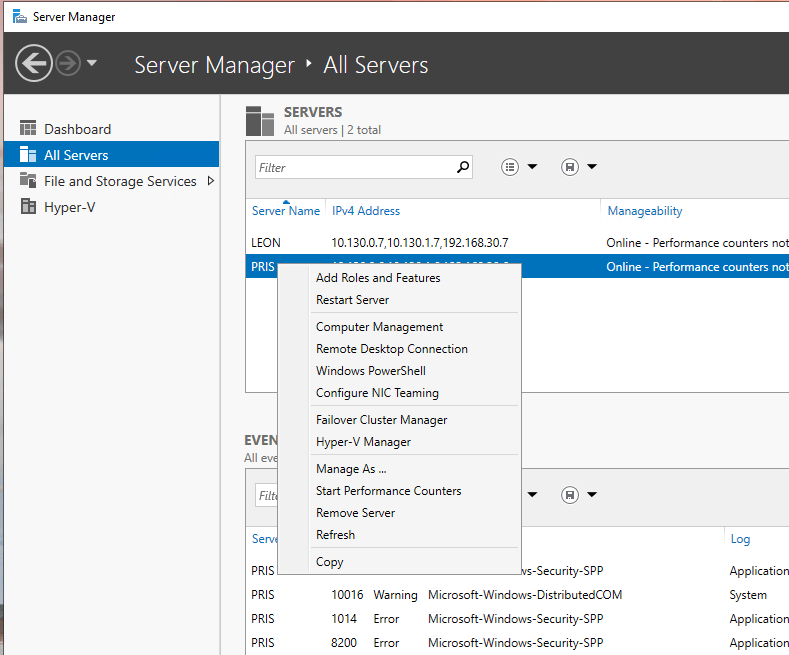
In Server Manager, right click one of your servers and select Computer Management:
In Computer Management, go to Services and Applications and select Services. Look for Microsoft iSCSI Initiator Service:

Change the service to Automatic and start it. Repeat for the other node.
Note: You can use Powershell as well:
Set-Service -Name MSiSCSI -StartupType AutomaticStart-Service MSiSCSIOn your bastion, open PowerShell and connect to one our your nodes:
Enter-PSSession <name_server>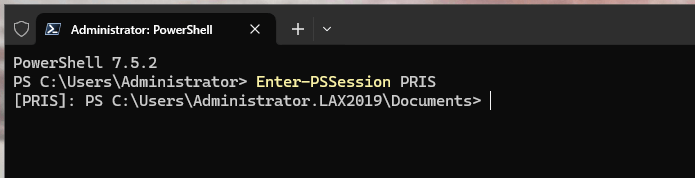
As you’re a domain administrator in your bastion, you don’t have to enter login details to connect to the server. If you’re not, the command will ask for login details.
Note: WinRM Service should be enabled on the server and firewall rules set.
Declare a variable to catch iSCSI IP:
$TargetPortal = "<iscsi portal ip address>"
Now add and show the portal with the commands:
New-IscsiTargetPortal -TargetPortalAddress $TargetPortalGet-IscsiTargetPortal -TargetPortalAddress $TargetPortal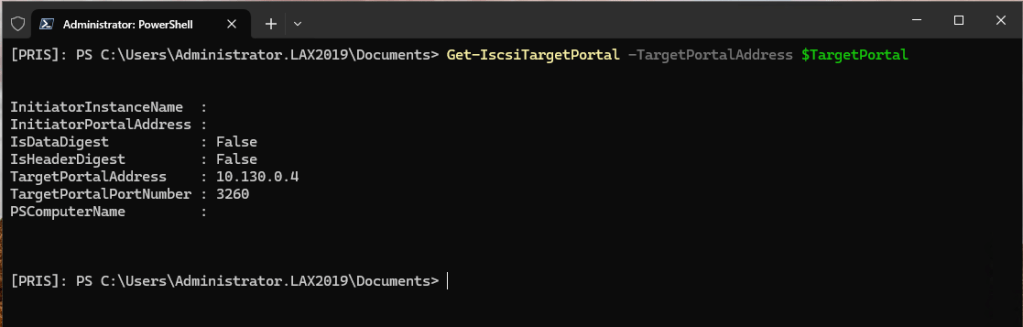
Now get the target with the command:
Get-IscsiTarget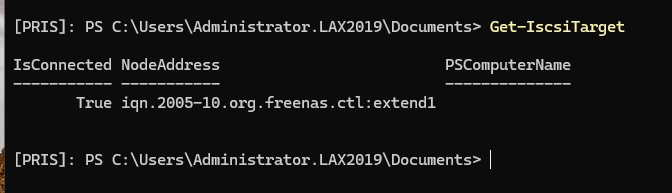
Capture the NodeAddress in a variable with:
$TargetIQN = "<node_address>"
Connect to the target:
Connect-IscsiTarget -NodeAddress $TargetIQN -IsPersistent $true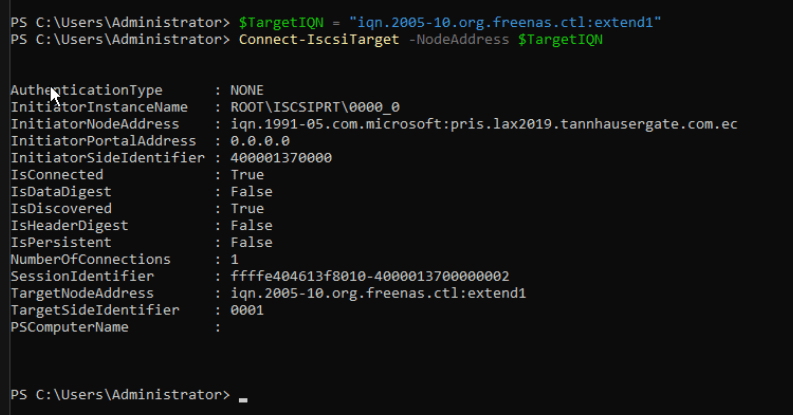
Repeat last two commands to add the second target (the 2Gb disk)
You should see now your iSCSI disk:
Get-Disk
Now, let’s initialize both disk and create partitions:
Initialize-Disk -Number 1Initialize-Disk -Number 2New-Partition -DiskNumber 1 -UseMaximumSize -AssignDriveLetterNew-Partition -DiskNumber 2 -UseMaximumSize -AssignDriveLetterGet-Partition -DiskNumber 1 | Format-Volume -FileSystem NTFS -NewFileSystemLabel "ClusterDisk1" -Confirm:$falseGet-Partition -DiskNumber 2 | Format-Volume -FileSystem NTFS -NewFileSystemLabel "ClusterDisk2" -Confirm:$falseThis will initialize the disks using the GPT partition table, create a new partition and format it using NTFS. We have to do this in one node only as both nodes share the same disks. Use Get-Partition to check them:
Get-Partition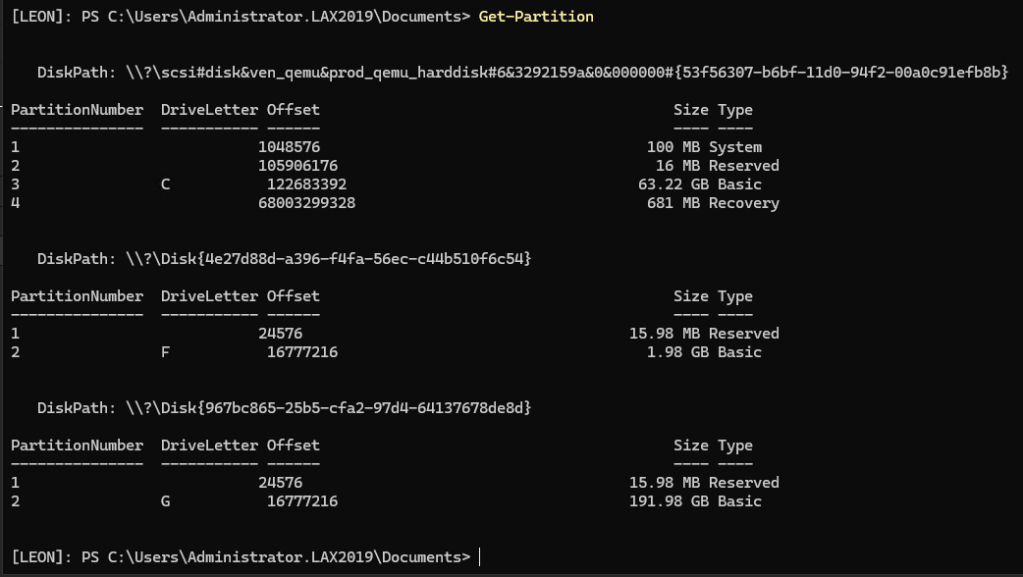
Finally, repeat the whole process in the other node. But, don’t initialize the disk because they are already initialized in the first node. Both nodes should see the same shared disks as online with their partitions.
Now, let’s install the cluster. Open Failover Cluster Manager on your bastion workstation. On the right menu, click Validate Configuration:
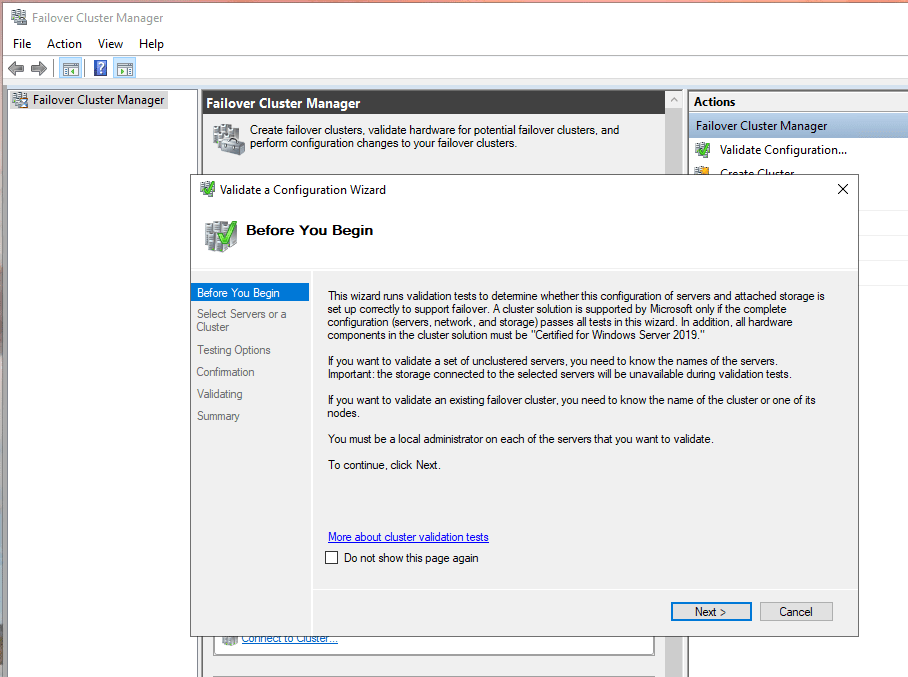
Click Next:
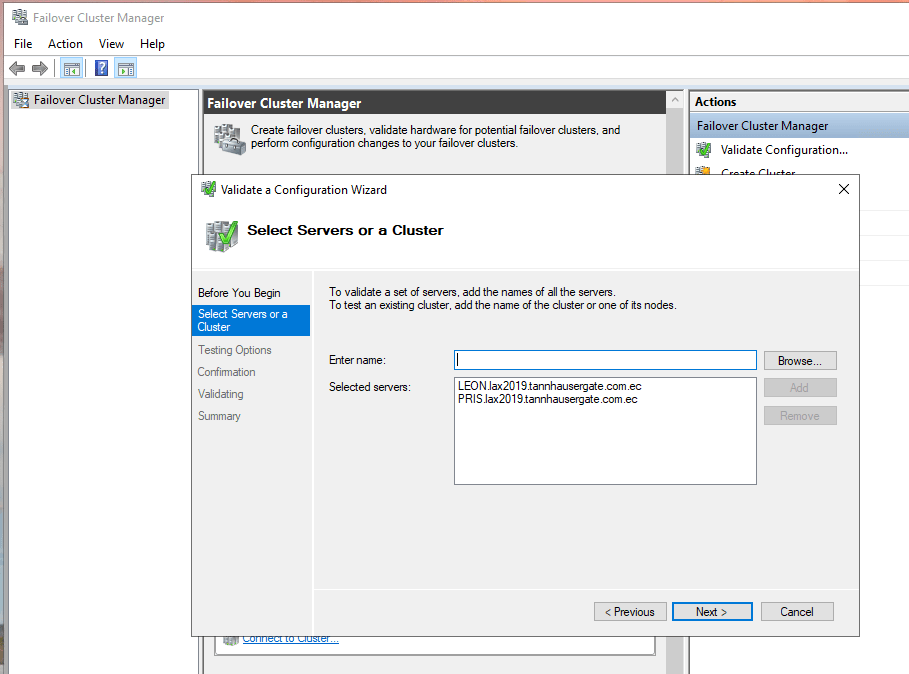
Add both nodes. Click Next:
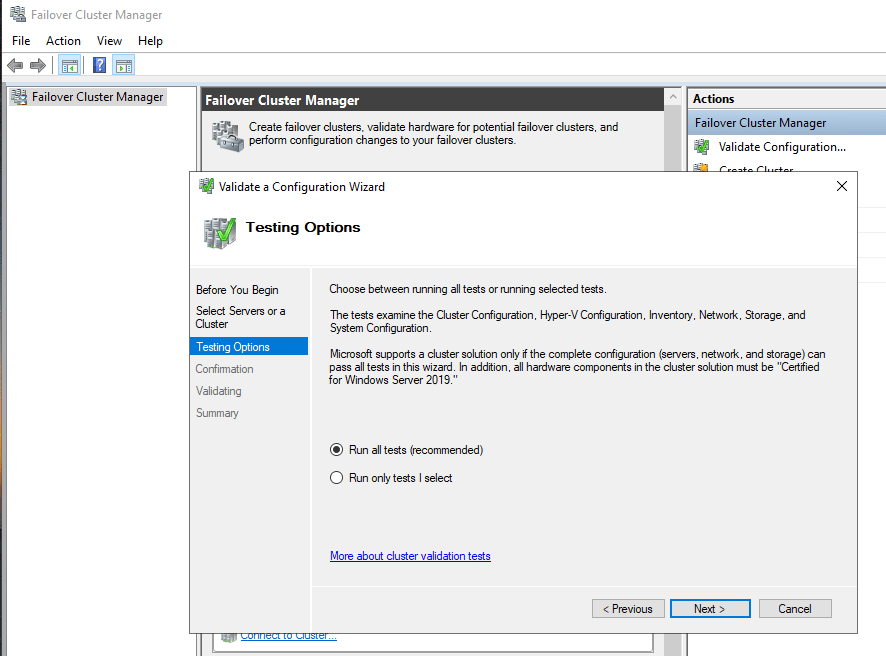
Leave Run all test selected. Click Next:
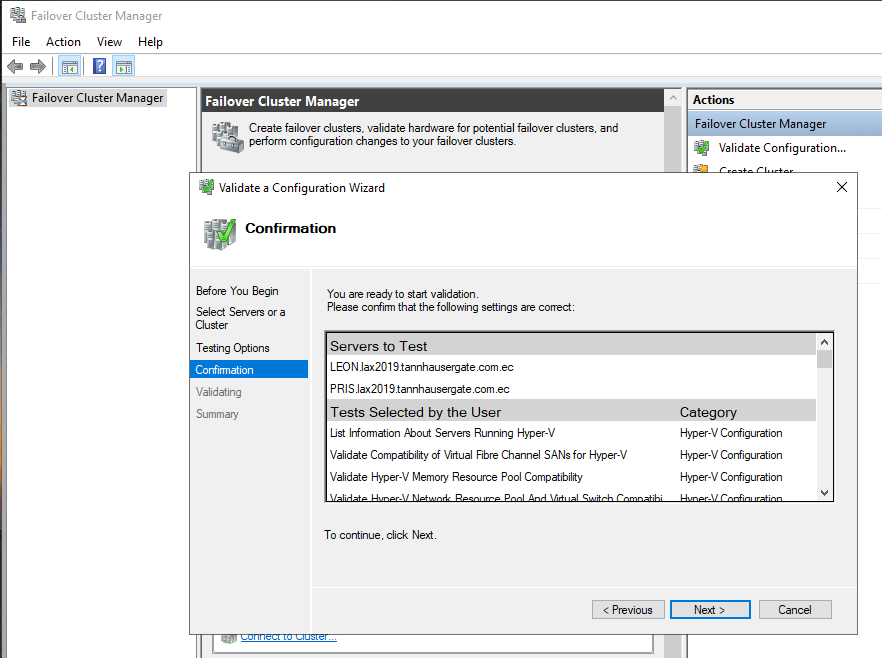
Click Next to confirm and validate. The wizard starts to validate both nodes to see if they have everything to create the new cluster.

If the wizard found only warnings we’re OK and we can create the cluster. Whatever the result is, you should review the report. This is especially important if you found errors. Resolve any issue before going ahead. Every time you make changes in the nodes, run the Validate Configuration Wizard again. This ensures everything remains OK.
Click View Report and be aware of the warnings. If the wizard found errors, you can’t create the cluster yet.
In our case the report is fine and we can continue. Click Finish and now in the right menu, click Create Cluster:
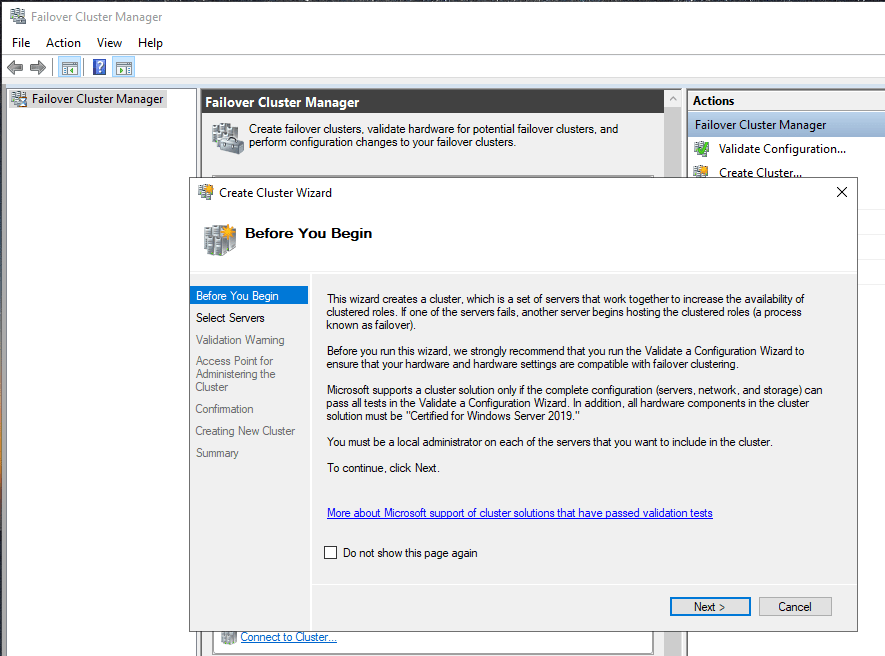
Click Next:
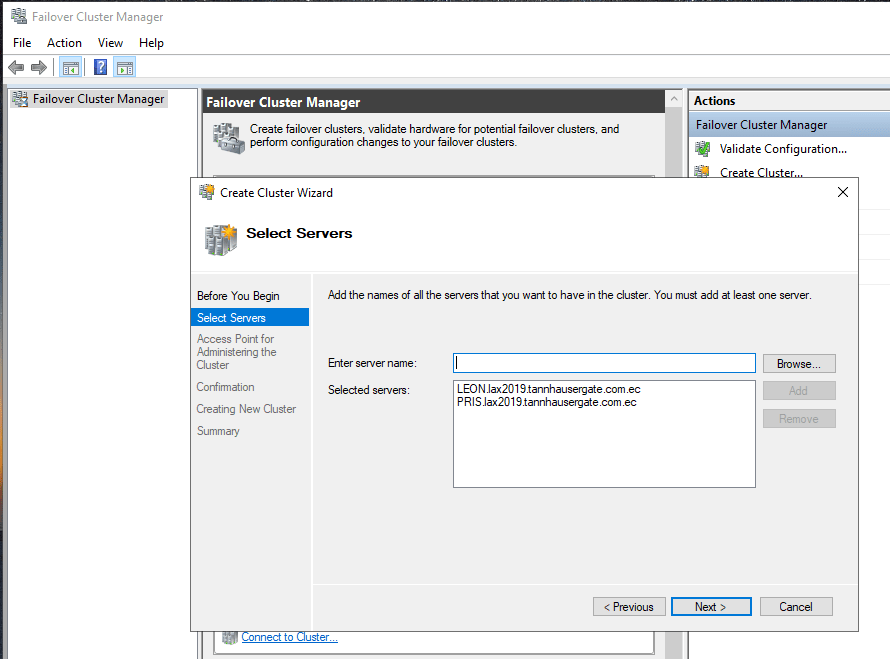
Again, add the nodes. Click Next:
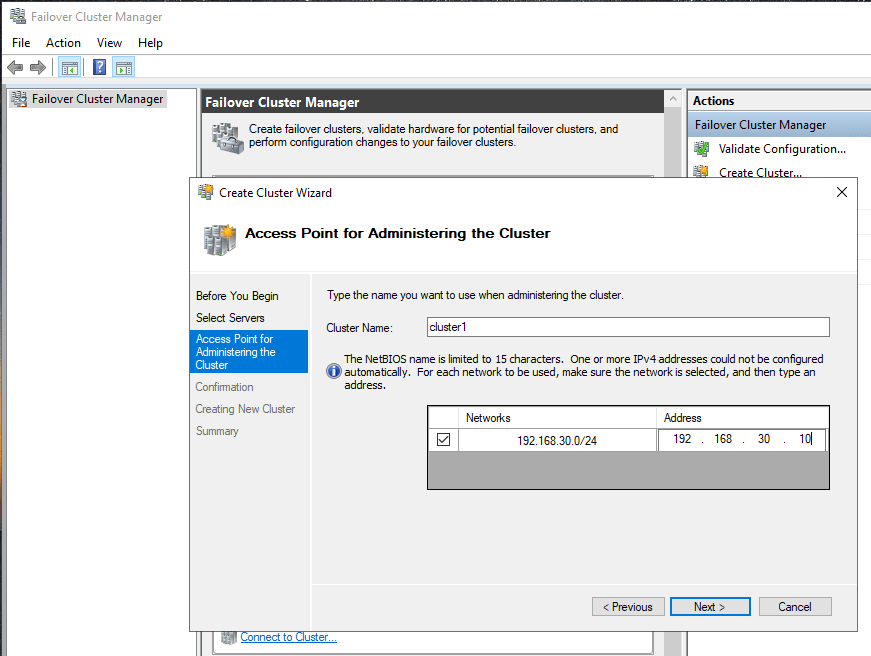
Give the cluster a name and a IP address. This name will be added as a computer object in Active Directory and DNS. Click Next:
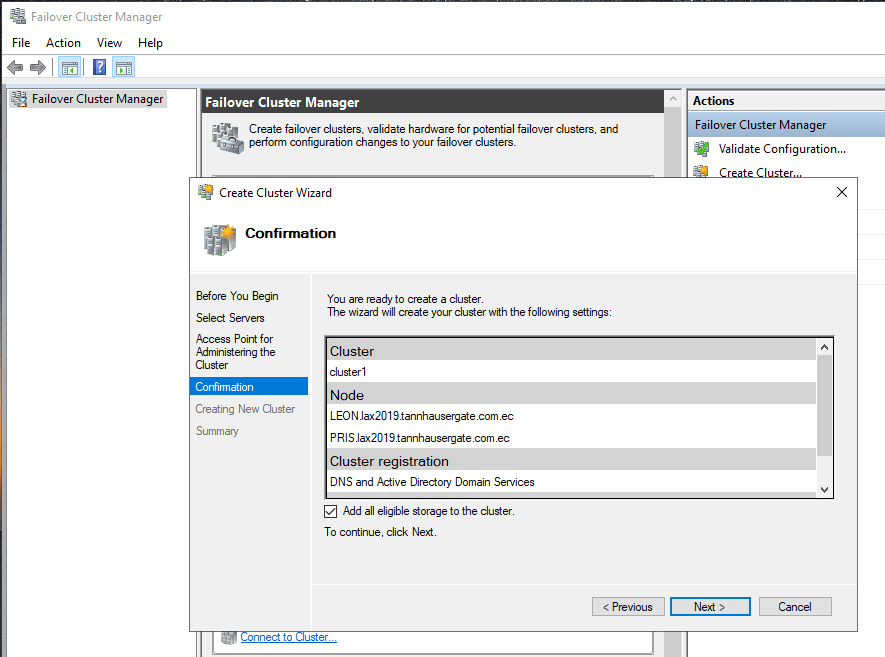
Leave the Add all eligible storage check box selected. This will automatically add our two shared disks to the cluster. It will select the smaller disk as a disk witness. In our case, it is the 2GiB disk. Click Next:
Note: As a good practice, run Validate Cluster configuration again to double check everything remains OK. The cluster shouldn’t have any errors and you should try to resolve all warnings one by one if its possible.
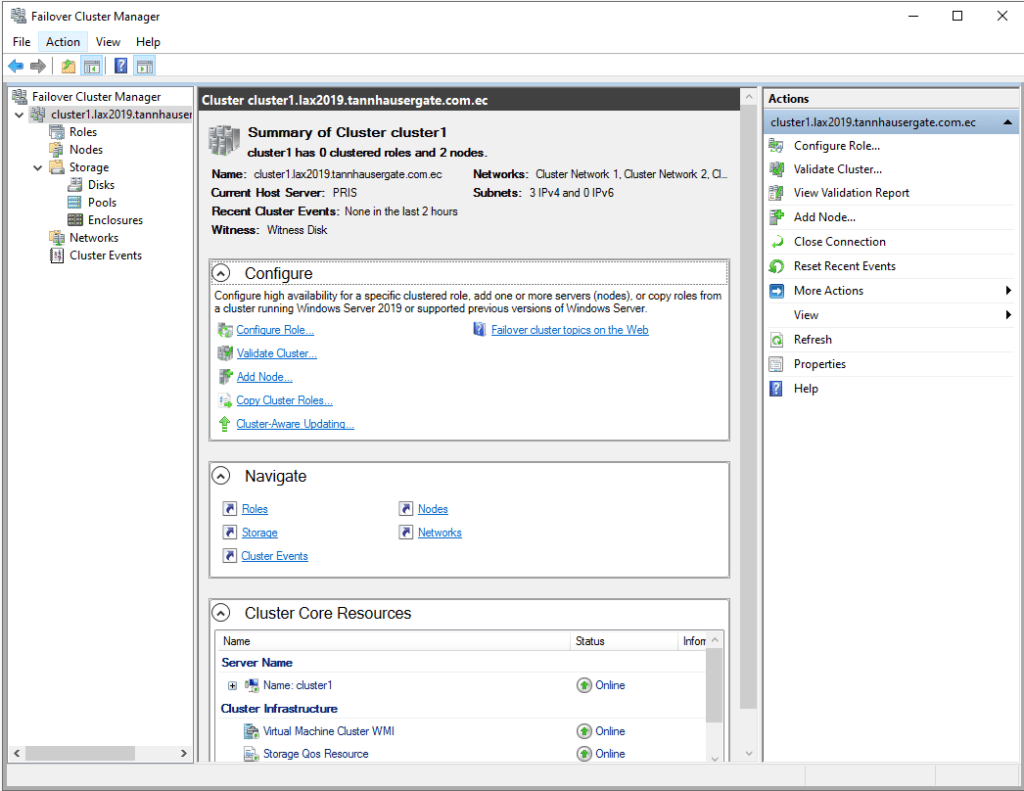
The cluster is ready, click Nodes, you’ll see both nodes Up. As a good practice, you should check disks and networks and label them properly. Click disk:
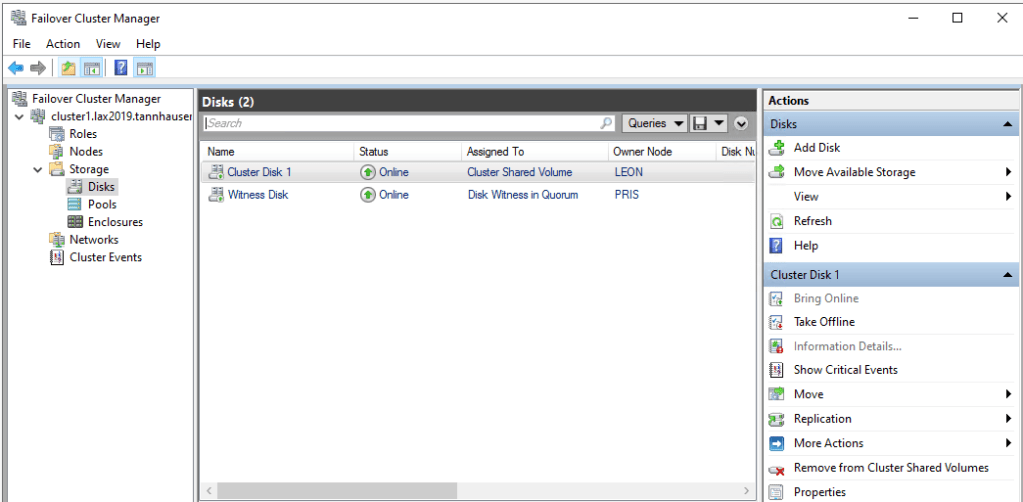
Right click each disk, click Properties and rename the disks suitably. Click Networks:

Right click each Network and click Properties. Rename the networks and select their purpose. Storage Network shouldn’t be used with any cluster activities.
Finally, go back to Hyper-V on each node and replace default location for VMs:
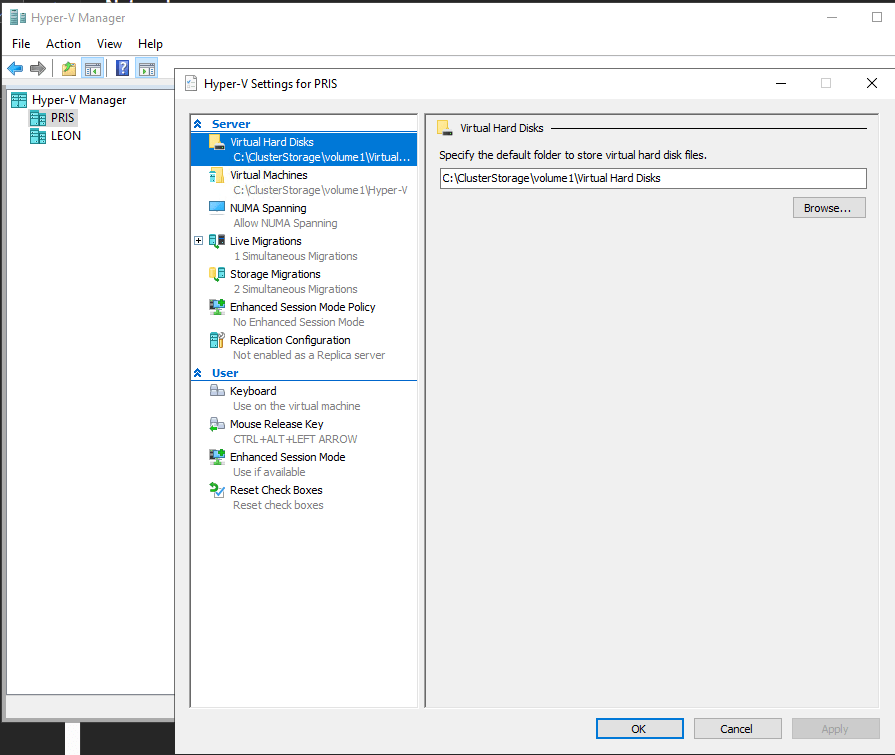
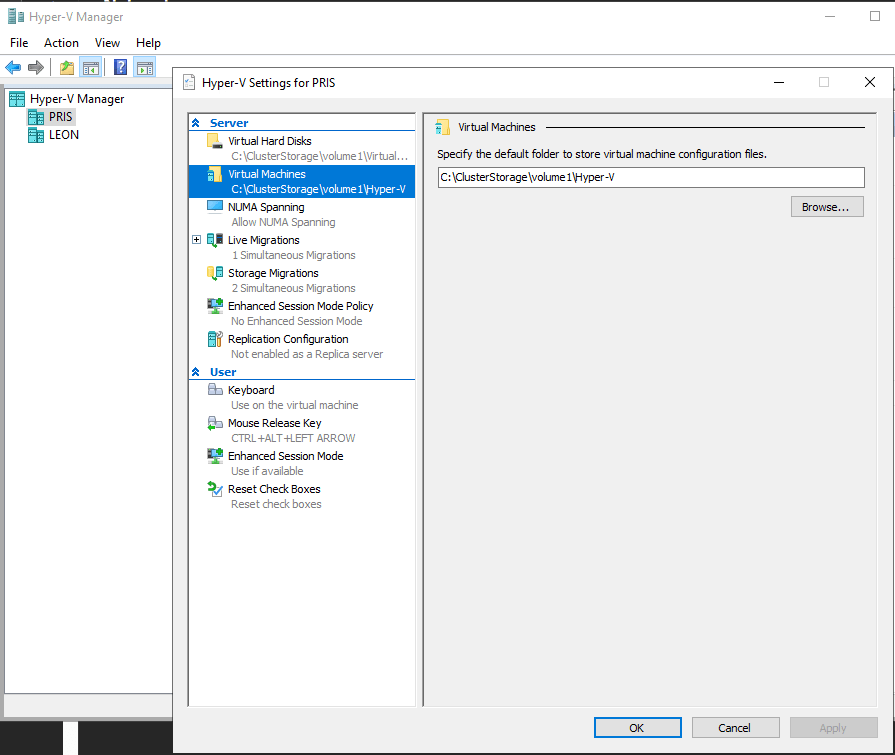
Make sure you select C:\ClusterStorage\<volumename>\ as the parent folder in both configurations. This path is the default path for shared storage on both nodes.
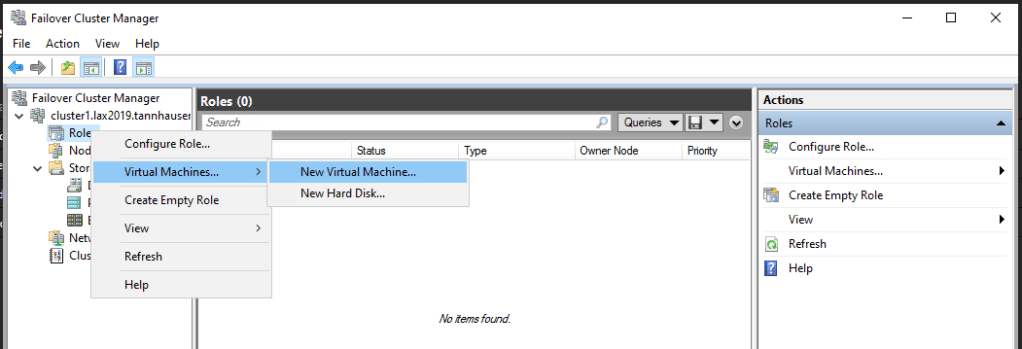
That’s it, the Hyper-V cluster is ready. We can start creating VMs from Failover Cluster Manager. These VMs will be in our shared storage an the cluster will manage redundancy and resiliency:
In the next post, we’ll set up an Storage Space Direct Hyper-converged Cluster without shared storage.
Don’t forget to leave your comments and suggestions.
Have Fun!

Leave a comment