
We want to check our lab environment with Zabbix. Zabbix is a powerful open source monitoring and alerting solution. It can track everything within a Windows or Linux Computer. It can also reach everything accessible with the SNMP protocol, like networking equipment. In this post, we’re going to install Zabbix in Docker containers. These containers will be hosted in our bastion, a Windows 10 (or 11) Workstation with WSL.
Note: Zabbix is a modular solution with several components, server, web interface, agent, proxy and gateway. All its components can be installed in a single Linux VM.
To check the installation of the bastion workstation:
First, let’s install WSL for Windows. Open Powershell an run:
wsl --installThis command installs all prerequisites and also install the default Ubuntu distribution.
Note: If you want to install other distribution, run:
wsl --install -d <Distribution Name>Replace <Distribution Name> with the name of the distribution you would like to install. To see a list of available Linux distributions available for download through the online store, enter:
wsl -l -oOnce Ubuntu is installed, enter your first user information. Finally, install latest updates with:
sudo apt update && sudo apt upgrade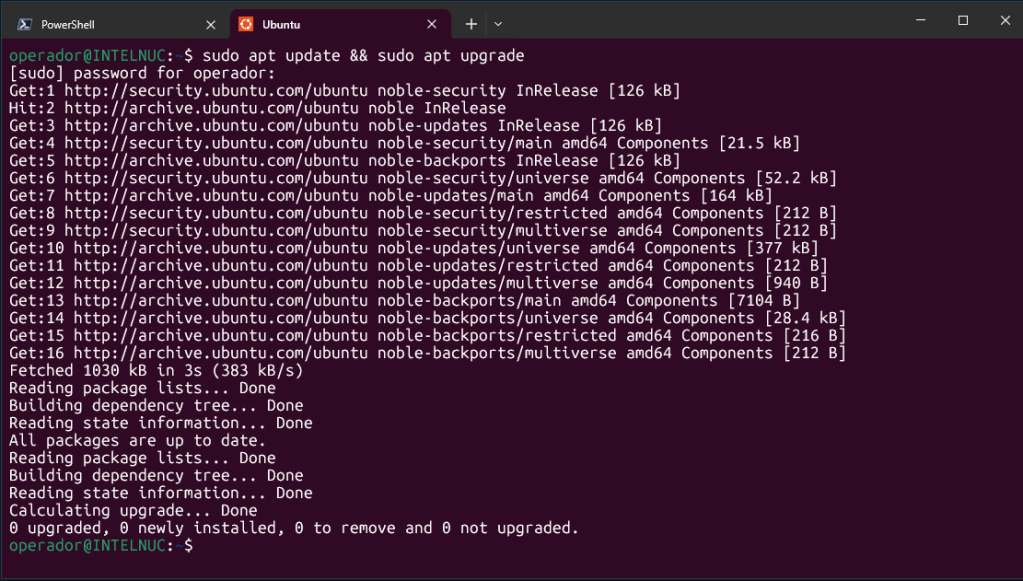
Now, let’s install Docker. You can download the latest version of Docker Desktop from Docker website:
Note: Docker Desktop can also be installed directly from Windows Store.
Install Docker Desktop on your workstation and restart your computer. Once it has been restarted, it automatically opens Docker Desktop. You have to login with a Docker free account. If you don’t have one, you can create it from there. Once inside, go to Settings in the upper menu, and click General:
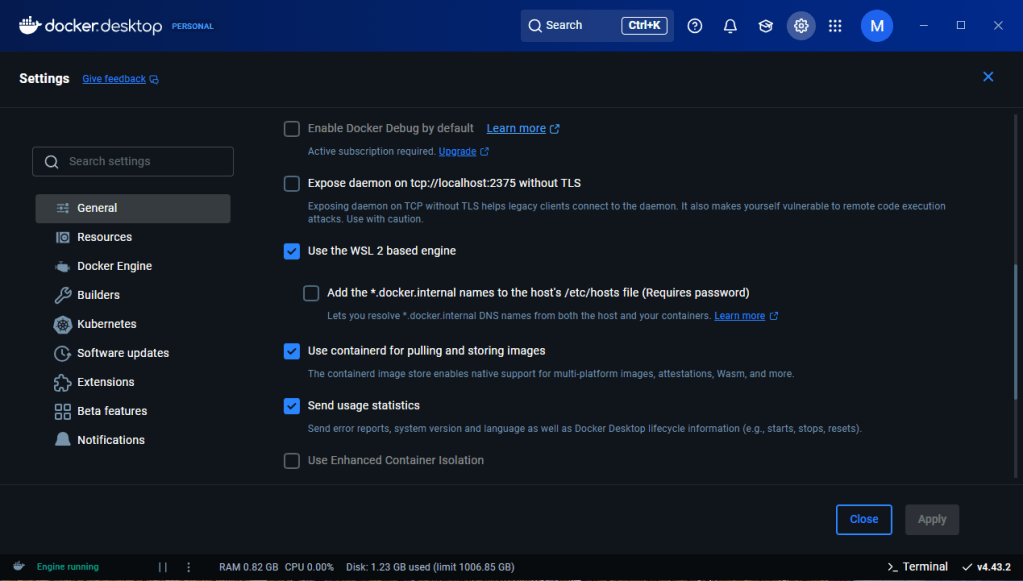
Make sure that “Use the WSL 2 based engine” is checked in Settings > General. Click Resources in the right menu:
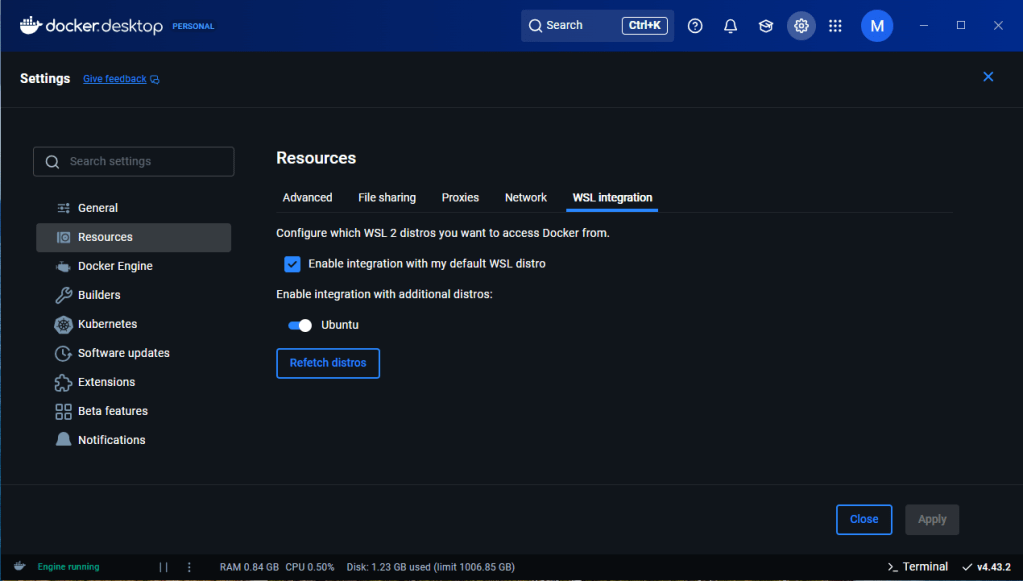
Click WSL Integration and make sure to turn on the Linux Distribution installed before. If you have several distributions installed, you can select from here on what distribution you want to allow Docker.
To confirm that Docker has been installed, open a WSL distribution (e.g. Ubuntu) and show the version and build number by entering:
docker --version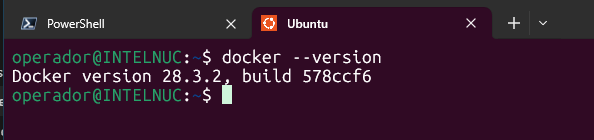
Now Docker is ready, let’s install our Zabbix containers. First we’ll create a network. Open your Linux Distribution and run:
docker network create --subnet <ip_subnet> --ip-range <ip_range> zabbix-netReplace ip_subnet and ip_range with the network you want to use internally. Check your network with:
docker network ls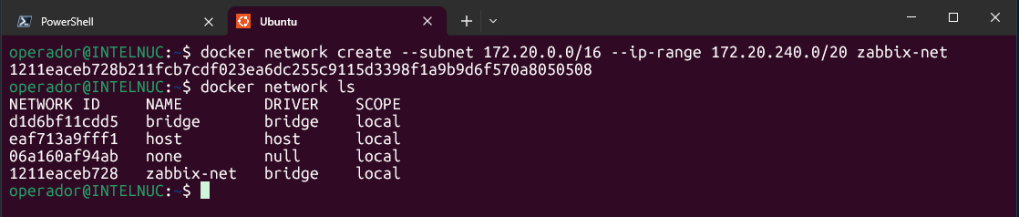
Next, let’s run the MySQL server instance:
docker run --name mysql-server -t \
      -e MYSQL_DATABASE="zabbix" \
      -e MYSQL_USER="zabbix" \
      -e MYSQL_PASSWORD="zabbix_pwd" \
      -e MYSQL_ROOT_PASSWORD="zabbix_pwd" \
      --network=zabbix-net \
      --restart unless-stopped \
      -d mysql:8.0-oracle \
      --character-set-server=utf8 --collation-server=utf8_bin \
      --default-authentication-plugin=mysql_native_password
Replace Zabbix User and Password if necessary. In this demo we are using MySQL:8.0-oracle.
Note: You can check the container’s log with:
docker logs <container_name>
Note: You can check different images in docker web page:
Next, let’s run Java Gateway instance:
docker run --name zabbix-java-gateway -t \
      --network=zabbix-net \
      --restart unless-stopped \
      -d zabbix/zabbix-java-gateway:ubuntu-7.4-latest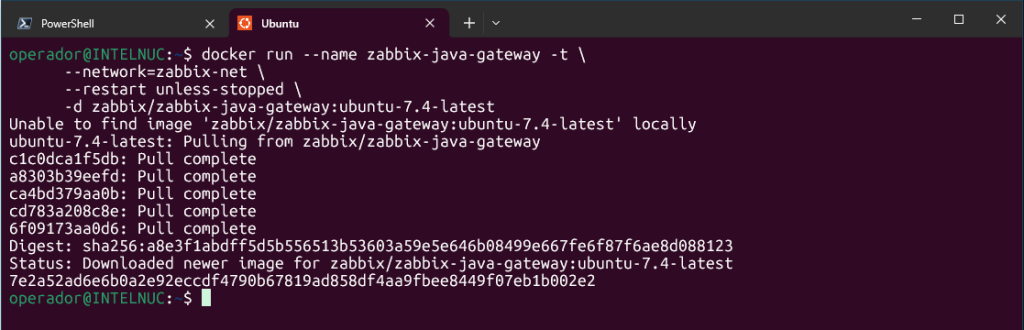
Next start Zabbix server instance and link the instance with created MySQL server instance:
docker run --name zabbix-server-mysql -t \
      -e DB_SERVER_HOST="mysql-server" \
      -e MYSQL_DATABASE="zabbix" \
      -e MYSQL_USER="zabbix" \
      -e MYSQL_PASSWORD="zabbix_pwd" \
      -e MYSQL_ROOT_PASSWORD="zabbix_pwd" \
      -e ZBX_JAVAGATEWAY="zabbix-java-gateway" \
      --network=zabbix-net \
      -p 10051:10051 \
      --restart unless-stopped \
      -d zabbix/zabbix-server-mysql:ubuntu-7.4-latest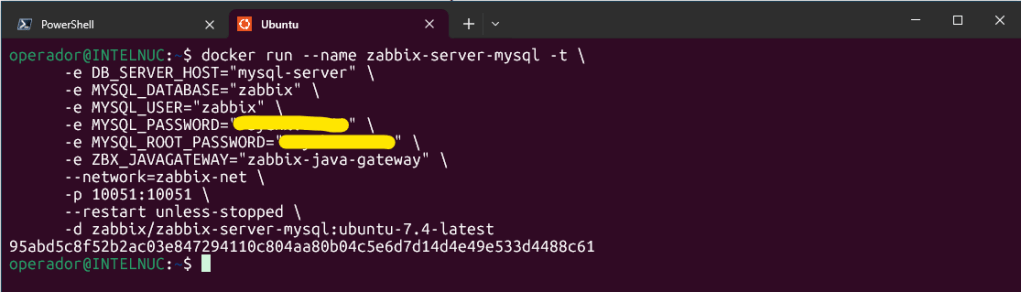
Replace passwords with mysql-server instance passwords.
Next, start Zabbix web interface and link the instance with created MySQL server and Zabbix server instances:
docker run --name zabbix-web-nginx-mysql -t \
      -e ZBX_SERVER_HOST="zabbix-server-mysql" \
      -e DB_SERVER_HOST="mysql-server" \
      -e MYSQL_DATABASE="zabbix" \
      -e MYSQL_USER="zabbix" \
      -e MYSQL_PASSWORD="zabbix_pwd" \
      -e MYSQL_ROOT_PASSWORD="zabbix_pwd" \
      --network=zabbix-net \
      -p 80:8080 \
      --restart unless-stopped \
      -d zabbix/zabbix-web-nginx-mysql:ubuntu-7.4-latest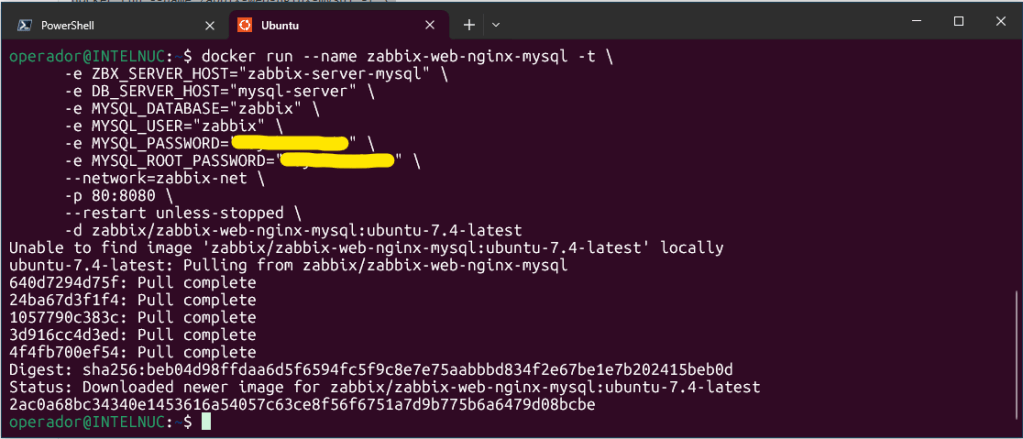
Replace passwords with mysql-server instance passwords.
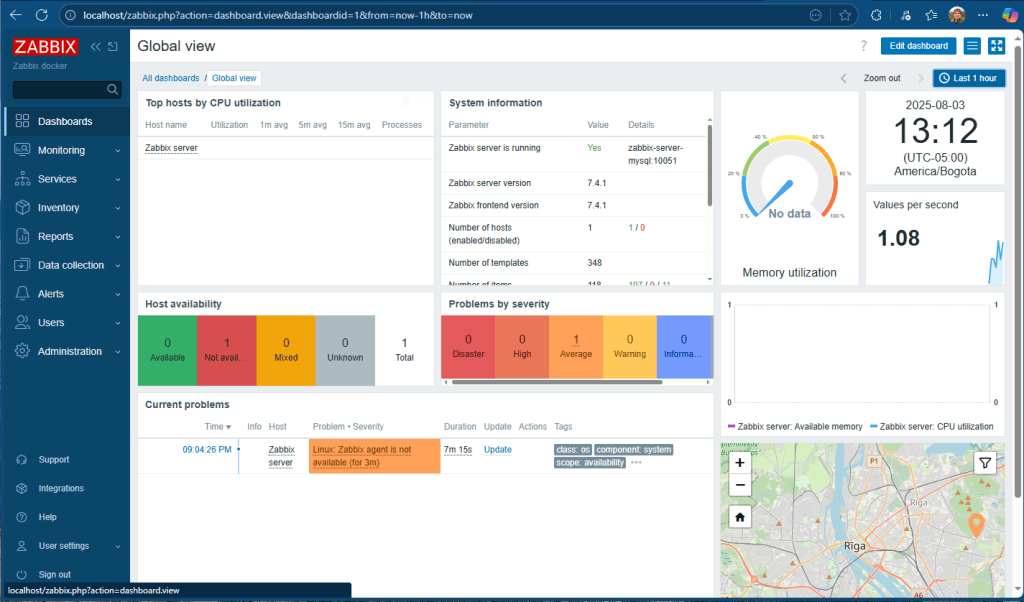
You should be able now to login to your Zabbix instance in your local computer with http://localhost. User: Admin, Password: zabbix
Finally, let’s run an agent instance to this zabbix implementation so it can check itself:
docker run --name zabbix-agent \
--network=zabbix-net \
--restart unless-stopped \
-e ZBX_SERVER_HOST=zabbix-server-mysql \
-e ZBX_HOSTNAME=zabbix-agent \
-p 10050:10050 \
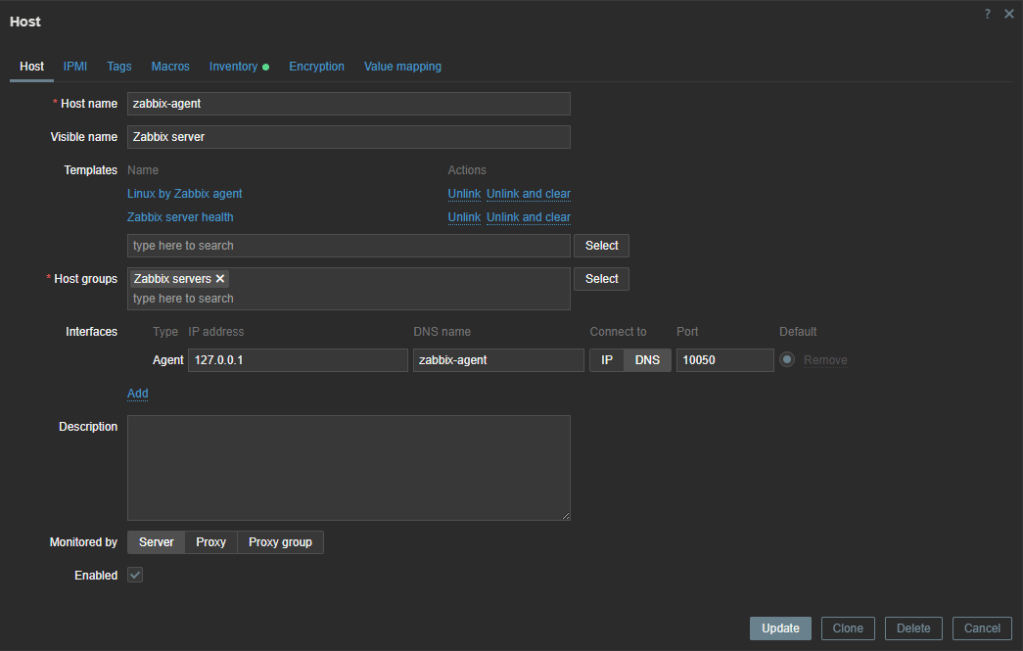
-d zabbix/zabbix-agent2:ubuntu-7.4-latestIn Zabbix Server, locate the host Zabbix Server object. Change the host name and DNS name values with the ZBX_HOSTNAME you used before. Change Visible name to Zabbix server. Click DNS in the field Connect to. Leave port 10050. Click Update.
That’s it. Your entire Zabbix implementation is running in your workstation on docker containers. You can start monitoring hosts in your network.
In the next post, we’ll configure this Zabbix to monitor our Proxmox Cluster and nodes:
Don’t forget to leave your comments and suggestions.
Have Fun!

Leave a reply to Step-by-Step Zabbix Setup on Proxmox Clusters – RacerX Steppenwolf Cancel reply