

In this post we are going to set up our Zabbix server to watch our Proxmox nodes and cluster.
Check the post for how to set up Zabbix in Docker containers in a Windows Workstation:
First we are going to install Zabbix Linux agent 7.0 in our Proxmox nodes.
Note: We are using Zabbix 7.0 LTS and Proxmox 8.4 based on Debian 12, if you need a reference for other Zabbix version or Linux distribution, you can refer to Zabbix documentation:
On each Proxmox Node install the agent:
wget https://repo.zabbix.com/zabbix/7.0/debian/pool/main/z/zabbix-release/zabbix-release_latest_7.0+debian12_all.deb

dpkg -i zabbix-release_latest_7.0+debian12_all.deb

apt update
apt install zabbix-agent2 zabbix-agent2-plugin-*systemctl restart zabbix-agent2
systemctl enable zabbix-agent2Now, lets set up the agent:
nano /etc/zabbix/zabbix_agent2.confChange these factors:
Server=<zabbix_ip_address>
ServerActive=<zabbix_ip_address>
Hostname=<hostname>
Restart Zabbix agent:
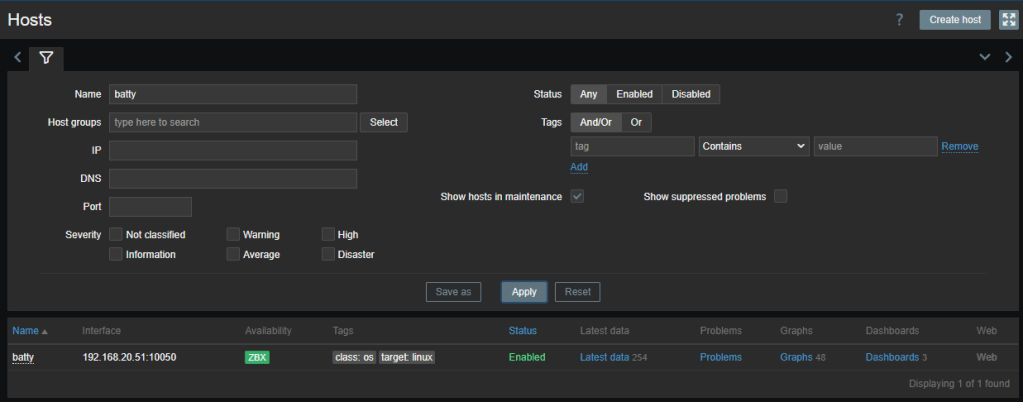
systemctl restart zabbix-agent2Now in Zabbix, go to Monitoring, Hosts and create a new Host. In hostname, type exactly the same name you configured in zabbix agent. Select some host groups. Add agent in Interfaces and type the IP of the Proxmox node, leave port 10050 as default. In templates, select Linux by Zabbix agent. Your configuration should look similar as follows:

You should now be receiving agent information. Zabbix button green. Click Latest data and you should see the information in real time.
Repeat for the other nodes.
The agent collects information about the OS, but it doesn’t collect information of the Cluster and its VMs. We need to create another Zabbix host object to do that.
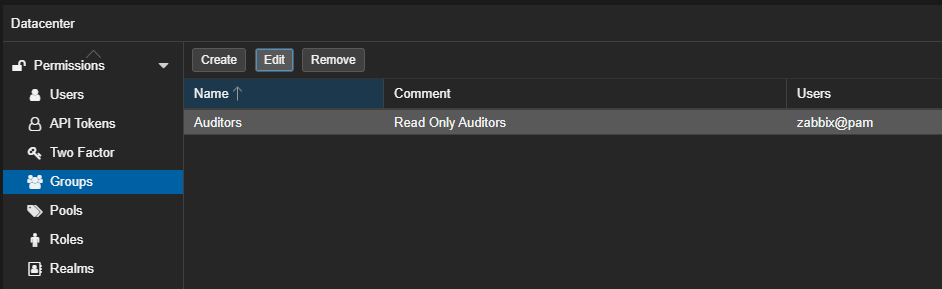
First we’ll create an API Token in Proxmox. Go to Datacenter, Permissions, Groups, click Create and create a group, for example: Auditors.
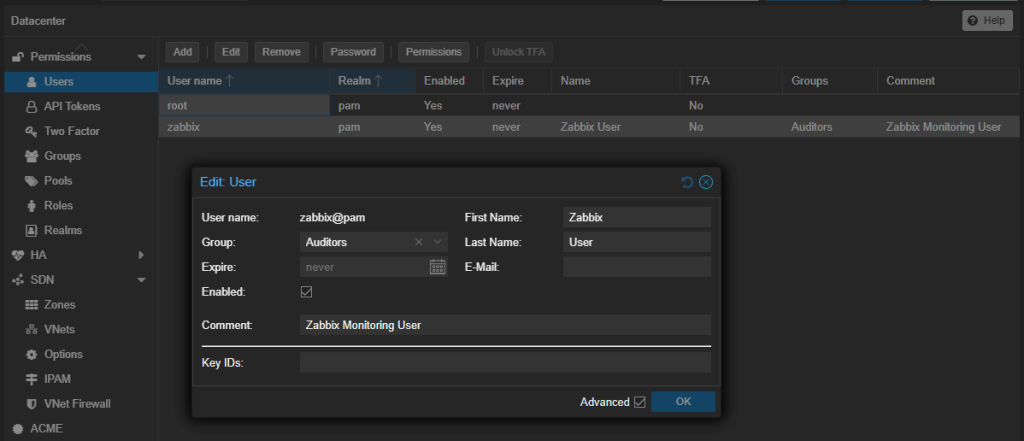
Now go to Users and create a new User, for example: zabbix. Make this user member of the earlier created group:
Now go to API Tokens and click Add. Select the earlier created user, type some Token ID you like and click OK:

Note: Take note of the Token ID and Secret, you’ll need that later. The secret won’t show again, so this is your chance.
Now go to Permissions and add the next permissions:
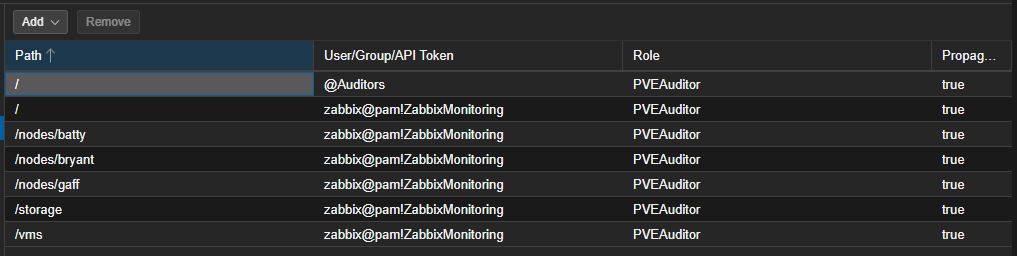
Make sure to add all your /nodes/<your_nodes>.
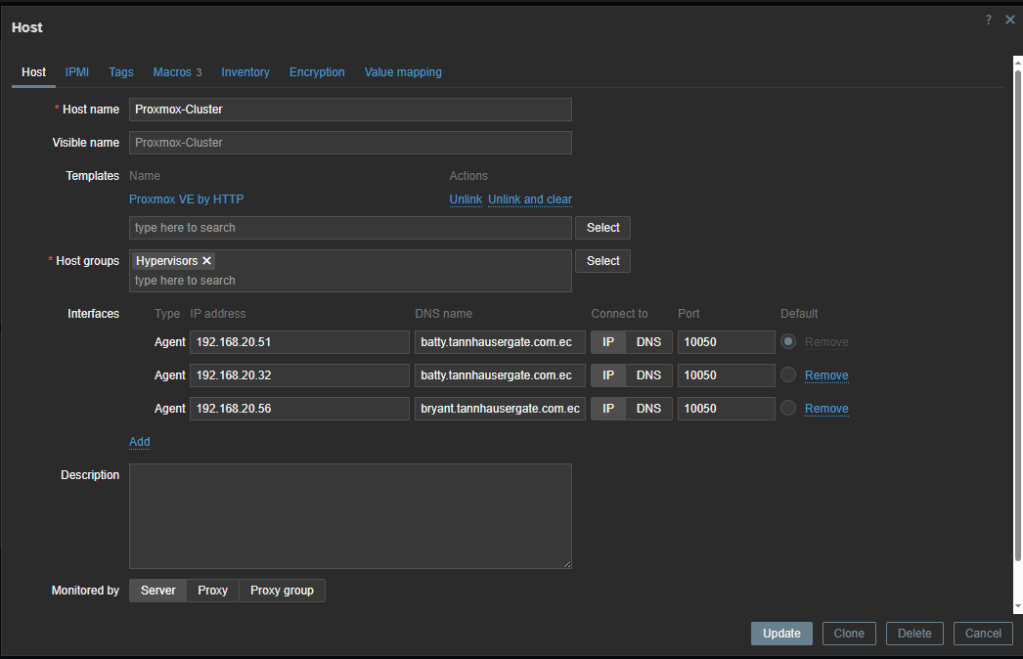
Now go to Zabbix and create a new Host. Give the Host a name, put it in some groups and add the nodes IPs as agents (optional). In Templates, add Proxmox VE by HTTP. Your configuration should look similar as the next:
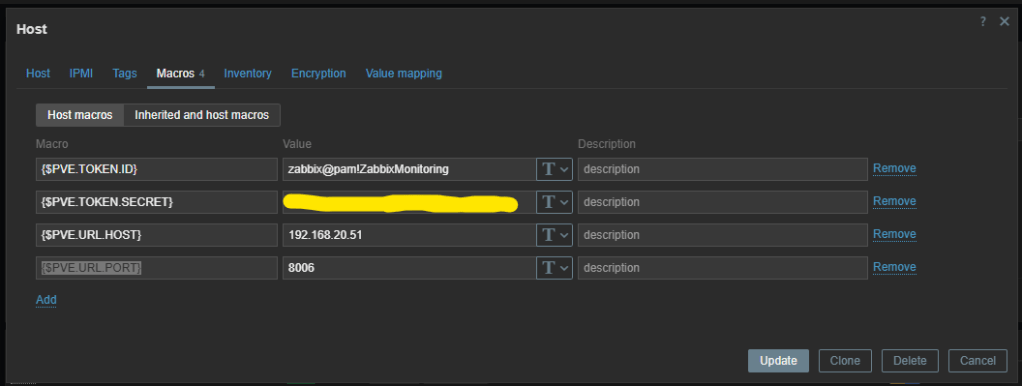
Click on Macros tab and the next macros:
{$PVE.TOKEN.ID} <your token id>
{$PVE.TOKEN.SECRET} <your secret>
{$PVE.URL.HOST} <ip address of one of the nodes>
{$PVE.URL.PORT} <optional>
Your configuration should look like this:
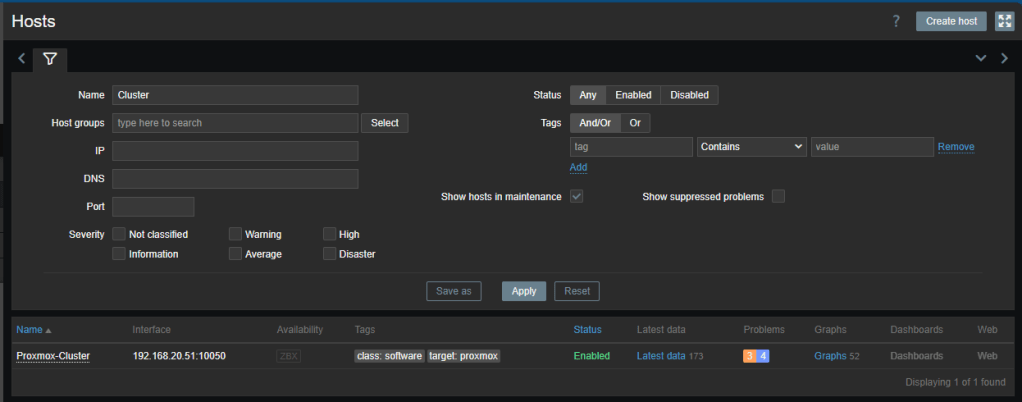
Click Add or Update. Wait a couple of minutes and you should start receiving Cluster information, like status of VMs. Click Latest data and you should see information:
That’s it. Now your monitoring your Proxmox nodes and cluster.
Don’t forget to leave your comments and suggestions.
Have Fun!

Leave a comment