


In every corporate network, there are multiple internal web portals and applications that are not intended to be exposed to the public internet. These applications are typically accessed directly through their IP addresses or, in more mature environments, by using the hostname of the server where they are running. When multiple applications share the same host, it is also common to access them by specifying different TCP ports.
This approach introduces several operational challenges. Among them are the use of non-standard naming conventions, the reliance on self-signed certificates that generate browser security warnings, and the limited flexibility required to migrate applications between servers. These limitations become even more evident in distributed environments where applications are deployed across multiple web front-end servers.
Access to internal applications should follow the same principles and standards applied to externally published services. Users should be able to reach applications through a consistent and intuitive URL structure that reflects the application’s identity and the organization’s internal domain. Additionally, there should be no need to specify custom ports as part of the connection process. In distributed deployments, users should remain unaware of backend infrastructure changes and should not be required to switch IP addresses during failover or failback events.
In this post, we will deploy an NGINX reverse proxy as a centralized access layer for internal web applications. Acting as an intermediary between internal clients and backend services, the reverse proxy will provide a unified entry point for all applications. It will also manage internal TLS certificates, ensuring encrypted communications across the environment.
Furthermore, for applications hosted on multiple backend servers, NGINX will provide native load-balancing capabilities, distributing traffic across available nodes while improving availability and resilience, all without requiring additional software components or agents on the application servers.
Let’s get started.
Obtain Internal Certificate
First of all we’re going to need SSL certificates. We start with the idea that applications will be referenced by its internal domian, which is not exposed outside, so we don’t have public certificates for our internal domain. In this lab we’re going to generate an private CA in our internal firewall OPNsense and a wildcard certificate. In many environments, this certificate should be more than enough, though you could generate individual certificates for every application.
Note: You could use any internal CA.
Note: You could use your public domain certificate if internal and external applications are referenced by the same name with split DNS.
Let’s generate the CA in OPNsense. Go to System, Trusts, Authorities and click plus sing to create a new CA:
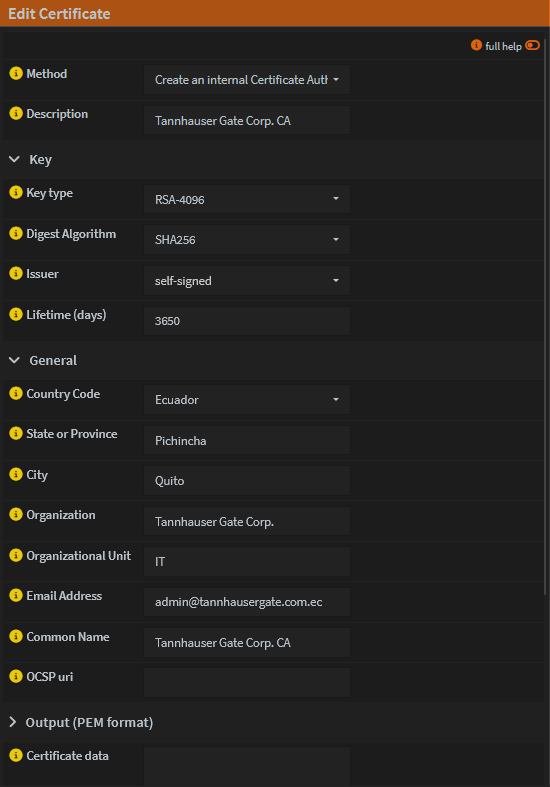
Fill the information regarding your organization. Lifetime 10 years or more. Click OK to create the CA.
Note: Internal CA public certificate should be installed in all client workstations and browsers.
Now let’s create the wildcard certificate. Go to System, Trust, Certificates and click plus sign to create a new certificate:
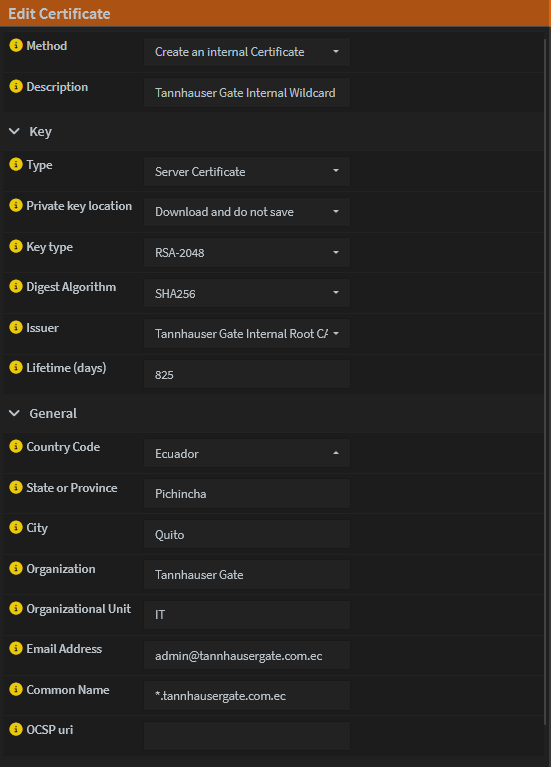
Make sure to select: Server Certificate, your CA as issuer, lifetime 2 or 3 years. Common name and alternative names: *.yourinternaldomain.com.
Note: For security purpose, don’t save the private key in the firewall. Save it in your workstation and keep it in a safe place (Like Vaultwarden).
Now the certificate is ready. You can download it next to the private key. We’ll use them in NGINX.
Install NGINX
Let’s move to our NGINX server. This can be any Linux distribution. I use Ubuntu 24 and it shouln’t be used as any other role.
sudo apt updatesudo apt install nginx -y
Check NGINX
systemctl status nginx
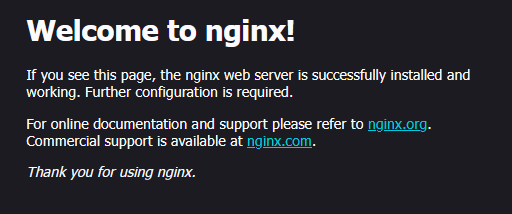
Browse your server IP, you should see NGINX Welcome Page:
Let’s create a folder for our wildcard certificate:
sudo mkdir -p /etc/nginx/certs
Now move the CA certificate, Wildcard certificate and Wildcard private key to this folder.
sudo cp wildcard.lab.midominio.com.crt /etc/nginx/cert/sudo cp wildcard.lab.midominio.com.key /etc/nginx/cert/sudo cp HomeLab-Root-CA.crt /etc/nginx/cert/
Now change owner and permisions:
sudo chown root:root /etc/nginx/certs/sudo chmod 600 /etc/nginx/certs/*.keysudo chmod 644 /etc/nginx/certs/*.crt
Some clients expect full chain certificate, so its recommended to create it here now:
cat wildcard.lab.midominio.com.crt HomeLab-Root-CA.crt | sudo tee /etc/nginx/certs/fullchain.crt
You should have something like this:

Now let’s publish our first application:
sudo nano /etc/nginx/sites-available/application1.lab.midominio.com
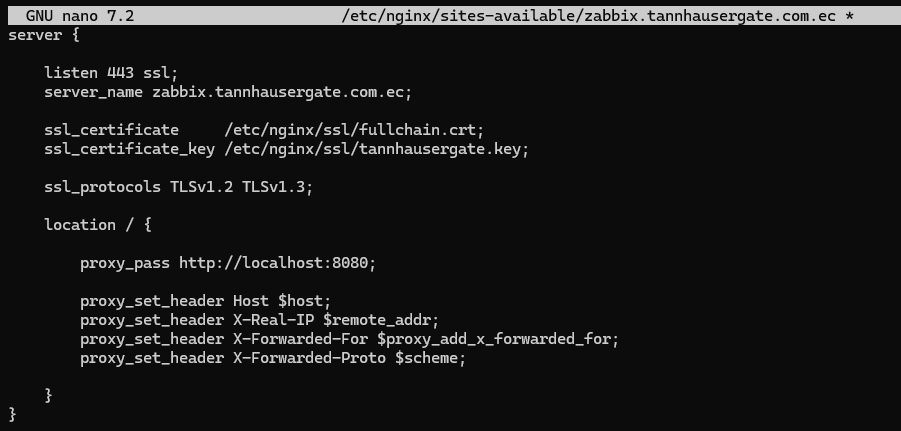
Edit the file with an initial configuration:
server { listen 443 ssl; server_name application1.lab.midominio.com; ssl_certificate /etc/nginx/ssl/fullchain.crt; ssl_certificate_key /etc/nginx/ssl/wildcard.lab.midominio.com.key; ssl_protocols TLSv1.2 TLSv1.3; location / { proxy_pass http://10.10.20.100:3000; proxy_set_header Host $host; proxy_set_header X-Real-IP $remote_addr; proxy_set_header X-Forwarded-For $proxy_add_x_forwarded_for; proxy_set_header X-Forwarded-Proto $scheme; }}
Replace the application name, certificate and key name and proxy_pass destination as to your case.
Let’s enable the site:
sudo ln -s /etc/nginx/sites-available/application1.lab.midominio.com /etc/nginx/sites-enabled/
Validate
sudo nginx -t
Validation should be ok, otherwise check sintax of the file.
Now reload
sudo systemctl restart nginx
Now, in order your site to be available to clients, internal DNS should resolve application name to the application to the IP address of NGINX. Go to your internal DNS and create a CNAME or A record.
After all this steps, clients should be able to open the application without errors. Clients see https in the url and our internal certificate is working although destination site uses only http.
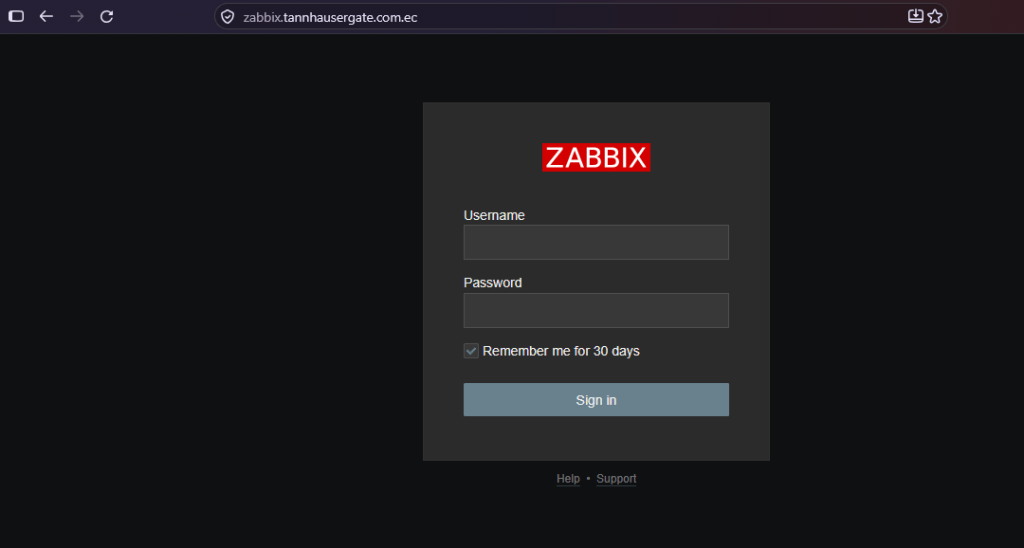
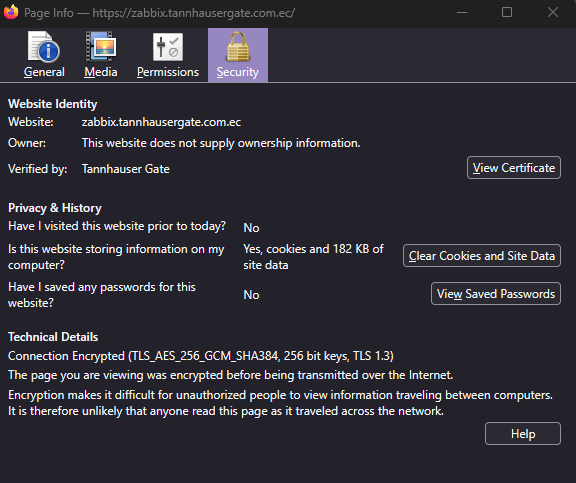
Now let’s configure another application, but this time it’s a distributed clustered application hosted on two nodes. Any of the nodes can present the web application to the clients:
Let’s copy our first application configuration to the second application:
sudo cp /etc/nginx/sites-available/application1.lab.midominio.com /etc/nginx/sites-available/application2.lab.midominio.com
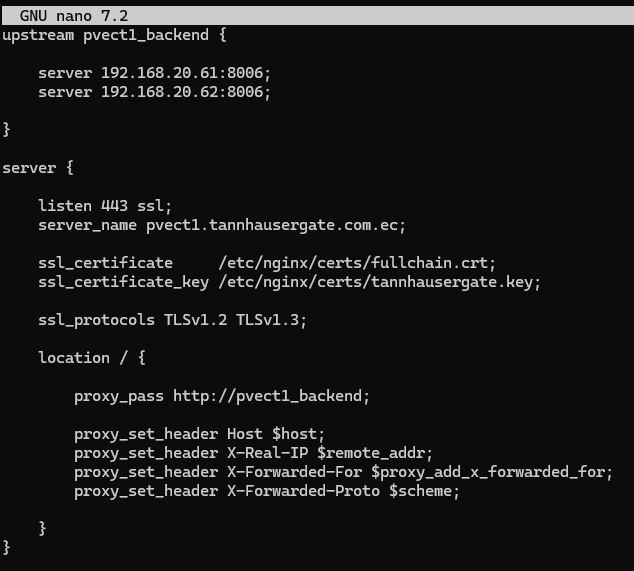
Edit the second application configuration file. Add an upstream section at the begining with all your backend servers:
upstream application2_backend { server 10.10.20.100:3000; server 10.10.20.101:3000; server 10.10.20.102:3000;}
Then:
location / { proxy_pass http://application2_backend;}
You should have something like this:
Enable the site:
sudo ln -s /etc/nginx/sites-available/application2.lab.midominio.com /etc/nginx/sites-enabled/
Validate and reload:
sudo nginx -tsudo systemctl restart nginx
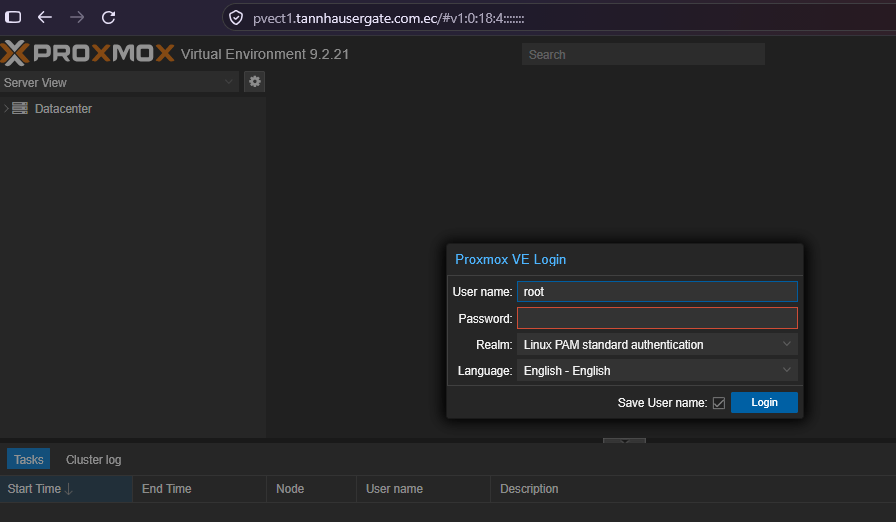
That’s it, your second application should work now with https, no ports and high availability. If you turn off one node, the other node should present the application after a few seconds.
Websocket Applications
Some modern web applications rely on WebSockets for real-time communication between the browser and backend services. While standard HTTP requests may work correctly through a reverse proxy, WebSocket connections require additional NGINX configuration, including HTTP/1.1 support and the appropriate Upgrade and Connection headers. During testing, TrueNAS SCALE loaded successfully through the reverse proxy, but the user interface remained stuck on the “Connecting to TrueNAS…” screen until WebSocket proxying was properly configured for the /api/current endpoint.
This is an example of the configuration file for websocket application like TrueNAS:
server { listen 443 ssl; server_name truenas.tannhausergate.com.ec; ssl_certificate /etc/nginx/certs/fullchain.crt; ssl_certificate_key /etc/nginx/certs/tannhausergate.key; location /api/current { proxy_pass https://192.168.100.64/api/current; proxy_ssl_verify off; proxy_http_version 1.1; proxy_set_header Upgrade $http_upgrade; proxy_set_header Connection "Upgrade"; proxy_set_header Host $host; proxy_set_header X-Forwarded-Proto https; proxy_read_timeout 86400; } location / { proxy_pass https://192.168.100.64; proxy_ssl_verify off; proxy_http_version 1.1; proxy_set_header Host $host; proxy_set_header X-Forwarded-Proto https; proxy_set_header Upgrade $http_upgrade; proxy_set_header Connection "Upgrade"; proxy_buffering off; }}
Conclusion
A well-designed internal application delivery platform should provide the same level of usability, security, and resilience expected from internet-facing services. By deploying NGINX as an internal reverse proxy, we established a centralized entry point for web applications, implemented TLS encryption using an internally trusted wildcard certificate, and simplified access through consistent DNS naming conventions. This approach not only improves the user experience by eliminating the need for IP addresses and custom ports, but also increases operational flexibility by abstracting backend infrastructure from end users. As the environment grows, NGINX can seamlessly scale to provide load balancing, high availability, and centralized traffic management, making it a valuable component of any modern enterprise or home lab architecture.
Don’t forget to leave your comments. See you in the next post.


Leave a comment